Ford Fiesta: Parking Brake and Actuation / Parking Brake Control. Removal and Installation
Ford Fiesta 2014 - 2019 Service Manual / Brake System / Parking Brake and Actuation / Parking Brake Control. Removal and Installation
Removal
NOTE: Removal steps in this procedure may contain installation details.
-
Remove the floor console.
Refer to: Floor Console (501-12 Instrument Panel and Console, Removal and Installation).
-
Remove the driver seat.
Refer to: Front Seat (501-10 Seating, Removal and Installation).
-
Remove the parking brake cable adjustment lock nut.
 |
-
Loosen the parking brake cable adjustment nut.
 |
-
With the vehicle in NEUTRAL, position it on a hoist.
Refer to: Jacking and Lifting - Overview (100-02 Jacking and Lifting, Description and Operation).
-
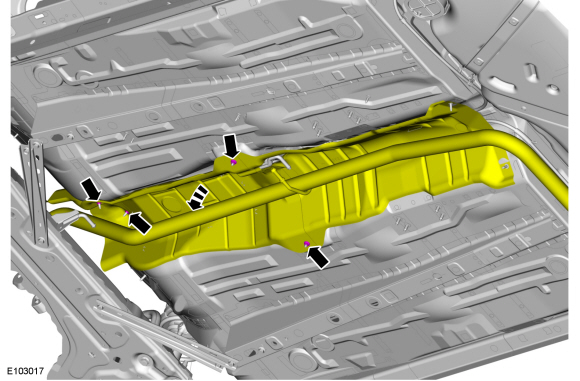
Remove the nuts and the crossbrace.
Torque: 30 lb.ft (40 Nm)
 |
-
Detach the exhaust isolators and lower the exhaust.
 |
-
Remove the nuts and exhaust heat shield.
 |
-
Remove the nuts and position the exhaust heat shield forward.
 |
-
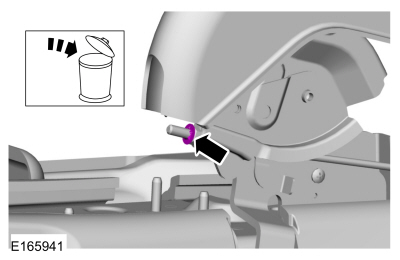
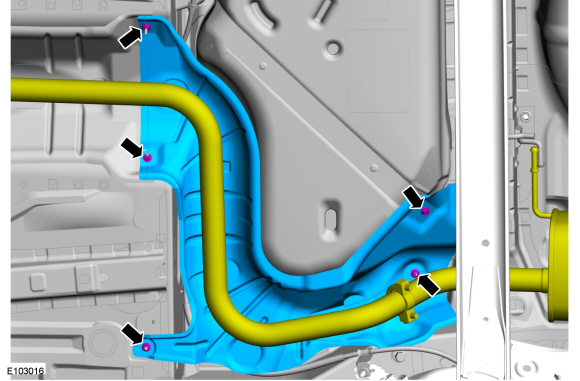
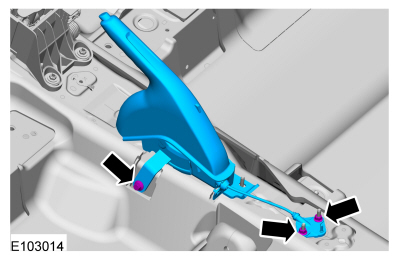
Remove the plug from the equalizer, push inward on the
tabs and detach the LH and RH rear cables from the bracket.
 |
-
-
Align the end of the front cable with the hole in the equalizer.
-
Rotate both rear cables upward.
-
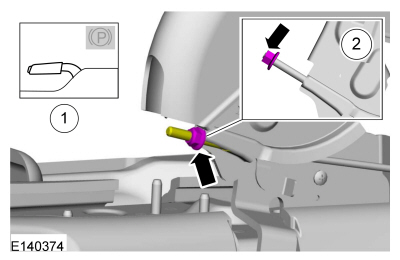
Disconnect the front cable from the equalizer.
-
Align the end of the front cable with the hole in the equalizer.
 |
-
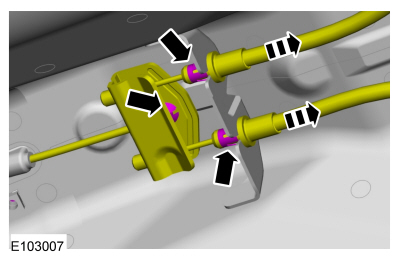
Remove the nuts, the bracket and disconnect the parking brake switch electrical connector.
Torque: 22 lb.ft (30 Nm)
 |
-
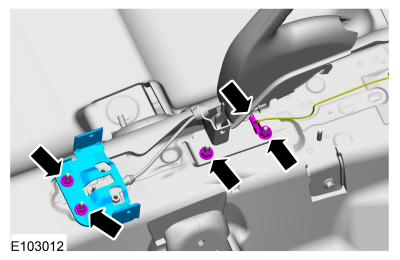
Remove the bolt, nuts and the parking brake control and front cable assembly.
Torque: 22 lb.ft (30 Nm)
 |
Installation
-
To install, reverse the removal procedure.
-
Before installing the parking brake cable adjustment nut
retainer and floor console, adjust the parking brake cables.
Refer to: Parking Brake Cable Adjustment (206-05 Parking Brake and Actuation, General Procedures).
Refer to: Parking Brake Cable Adjustment - 1.6L EcoBoost (132kW/180PS) – Sigma (206-05 Parking Brake and Actuation, General Procedures).
 Parking Brake Cable Adjustment - 1.6L EcoBoost (132kW/180PS) – Sigma. General Procedures
Special Tool(s) /
General Equipment
Feeler Gauge
Adjustment
Remove the floor console.
Refer to: Floor Console (501-12 Instrument Panel and Console, Removal and Installation)...
 Parking Brake Cable. Removal and Installation
Special Tool(s) /
General Equipment
206-D002
(D81L-1103-A)
Gauge, Brake Adjustment
Flat Headed Screw Driver
Removal
NOTE:
Removal steps in this procedure may contain installation details...
Other information:
Ford Fiesta 2014 - 2019 Service Manual: Plastic Repairs. General Procedures
Materials Name Specification Plastic Bonding AdhesiveTA-9 - Repair NOTICE: Plastic repairs on vehicles equipped with Advanced Driver Assistance System (ADAS) must not exceed 12 mils (300 microns) of paint thickness after refinishing...
Ford Fiesta 2014 - 2019 Service Manual: Rear View Mirrors - Overview. Description and Operation
Overview - Exterior, Power The power mirrors allow the LH and RH exterior mirror glass position to be adjusted electronically by the driver. The exterior mirror glass position is controlled by the exterior mirror control switch. Selecting the LH or RH position of the exterior mirror selection switch determines which power mirror glass to control...
Categories
- Manuals Home
- Ford Fiesta Service Manual (2014 - 2019)
- Manual Transmission, Clutch, Transfer Case and Power Transfer Unit
- Valve Clearance Adjustment. General Procedures
- Climate Control System - General Information
- Clutch - 6-Speed Manual Transmission – B6
- Engine Component View. Description and Operation
Brake Backing Plate. Removal and Installation
Removal
NOTE: Removal steps in this procedure may contain installation details.
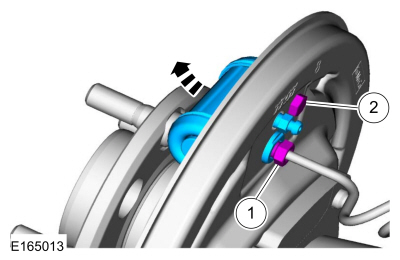
Remove the brake shoes.Refer to: Brake Shoes (206-02 Drum Brake, Removal and Installation).
Disconnect the brake tube fitting.
Torque: 159 lb.in (18 Nm) Remove the bolt and wheel cylinder.
Torque: 106 lb.in (12 Nm)
 Disconnect the brake shoe lever fitting and re
Copyright © 2025 www.fofiesta7.com