Ford Fiesta: Information and Entertainment System - General Information - Vehicles With: AM/FM/CD/SYNC / Information and Entertainment System. Diagnosis and Testing
DTC Charts
ACM
DTC Chart
|
DTC
|
Description
|
Action
|
|
B1A01:01
|
Speaker #1: General Electrical Failure
|
-
For a left front door speaker concern, GO to Pinpoint Test F
-
For a left front door tweeter speaker concern, GO to Pinpoint Test G
|
|
B1A01:11
|
Speaker #1: Circuit Short To Ground
|
-
For a left front door speaker concern, GO to Pinpoint Test F
-
For a left front door tweeter speaker concern, GO to Pinpoint Test G
|
|
B1A01:12
|
Speaker #1: Circuit Short To Battery
|
-
For a left front door speaker concern, GO to Pinpoint Test F
-
For a left front door tweeter speaker concern, GO to Pinpoint Test G
|
|
B1A01:13
|
Speaker #1: Circuit Open
|
GO to Pinpoint Test F
|
|
B1A02:01
|
Speaker #2: General Electrical Failure
|
-
For a right front door speaker concern, GO to Pinpoint Test H
-
For a right front door tweeter speaker concern, GO to Pinpoint Test I
|
|
B1A02:11
|
Speaker #2: Circuit Short To Ground
|
-
For a right front door speaker concern, GO to Pinpoint Test H
-
For a right front door tweeter speaker concern, GO to Pinpoint Test I
|
|
B1A02:12
|
Speaker #2: Circuit Short To Battery
|
-
For a right front door speaker concern, GO to Pinpoint Test H
-
For a right front door tweeter speaker concern, GO to Pinpoint Test I
|
|
B1A02:13
|
Speaker #2: Circuit Open
|
GO to Pinpoint Test H
|
|
B1A03:01
|
Speaker #3: General Electrical Failure
|
GO to Pinpoint Test J
|
|
B1A03:11
|
Speaker #3: Circuit Short To Ground
|
GO to Pinpoint Test J
|
|
B1A03:12
|
Speaker #3: Circuit Short To Battery
|
GO to Pinpoint Test J
|
|
B1A03:13
|
Speaker #3: Circuit Open
|
GO to Pinpoint Test J
|
|
B1A04:01
|
Speaker #4: General Electrical Failure
|
GO to Pinpoint Test K
|
|
B1A04:11
|
Speaker #4: Circuit Short To Ground
|
GO to Pinpoint Test K
|
|
B1A04:12
|
Speaker #4: Circuit Short To Battery
|
GO to Pinpoint Test K
|
|
B1A04:13
|
Speaker #4: Circuit Open
|
GO to Pinpoint Test K
|
|
B1A56:21
|
Antenna: Signal Amplitude < Minimum
|
If DTC B1A56:21 sets after running the bezel diagnostic tests, DISREGARD this DTC
. This test is used for end of line or repair bay testing at the Ford
plant. Each plant has its own assigned frequency and signal strength
requirements. The running and passing of this test depends on local
radio stations. If no local station is broadcasting on the required
frequency, the test fails.
|
|
B1D19:49
|
Compact Disc Unit: Internal Electronic Failure
|
CLEAR the DTC . WAIT at least 10 seconds. REPEAT the self-test. If the DTC is retrieved again, INSTALL a new ACM .
REFER
to: Audio Front Control Module (ACM) (415-00A Information and
Entertainment System - General Information - Vehicles With:
AM/FM/CD/SYNC, Removal and Installation).
|
|
B1D19:4B
|
Compact Disc Unit: Over Temperature
|
The ACM was over temperature. This may occur during extended use. Audio
operation can resume after the ACM cools. CLEAR the DTC . This is
normal operation.
|
|
U0155:00
|
Lost Communication With Instrument Panel Cluster (IPC) Control Module: No Sub Type Information
|
GO to Pinpoint Test Z
|
|
U0253:00
|
Lost Communication With Accessory Protocol Interface Module: No Sub Type Information
|
GO to Pinpoint Test AB
|
|
U0257:00
|
Lost Communication With Front Control/Display Interface Module: No Sub Type Information
|
GO to Pinpoint Test AC
|
|
U201A:51
|
Control Module Main Calibration Data: Not Programmed
|
-
This DTC sets due to incomplete or incorrect PMI procedures. CHECK the
vehicle service history for recent service actions related to the ACM .
-
If there have been recent service actions with the ACM , CARRY OUT the PMI procedure as directed by the diagnostic scan tool.
-
If there have been no recent service actions, INSTALL a new ACM to correct the failure to retain configuration data.
REFER
to: Audio Front Control Module (ACM) (415-00A Information and
Entertainment System - General Information - Vehicles With:
AM/FM/CD/SYNC, Removal and Installation).
|
|
U2100:00
|
Initial Configuration Not Complete: No Sub Type Information
|
-
This DTC sets due to incomplete or incorrect PMI procedures. CHECK the
vehicle service history for recent service actions related to the ACM .
-
If there have been recent service actions with the ACM , CARRY OUT the PMI procedure as directed by the diagnostic scan tool.
-
If there have been no recent service actions, INSTALL a new ACM to correct the failure to retain configuration data.
REFER
to: Audio Front Control Module (ACM) (415-00A Information and
Entertainment System - General Information - Vehicles With:
AM/FM/CD/SYNC, Removal and Installation).
|
|
U2101:00
|
Control Module Configuration Incompatible: No Sub Type Information
|
-
This DTC sets due to incomplete or incorrect PMI procedures. CHECK the
vehicle service history for recent service actions related to the ACM .
-
If there have been recent service actions with the ACM , CARRY OUT the PMI procedure as directed by the diagnostic scan tool.
-
If there have been no recent service actions, INSTALL a new ACM to correct the failure to retain configuration data.
REFER
to: Audio Front Control Module (ACM) (415-00A Information and
Entertainment System - General Information - Vehicles With:
AM/FM/CD/SYNC, Removal and Installation).
|
|
U3000:41
|
Control Module: General Checksum Failure
|
CLEAR the DTC . WAIT at least 10 seconds. REPEAT the self-test. If the DTC is retrieved again, INSTALL a new ACM .
REFER
to: Audio Front Control Module (ACM) (415-00A Information and
Entertainment System - General Information - Vehicles With:
AM/FM/CD/SYNC, Removal and Installation).
|
|
U3000:42
|
Control Module: General Memory Failure
|
CLEAR the DTC . WAIT at least 10 seconds. REPEAT the self-test. If the DTC is retrieved again, INSTALL a new ACM .
REFER
to: Audio Front Control Module (ACM) (415-00A Information and
Entertainment System - General Information - Vehicles With:
AM/FM/CD/SYNC, Removal and Installation).
|
|
U3000:96
|
Control Module: Component Internal Failure
|
CLEAR the DTC . WAIT at least 10 seconds. REPEAT the self-test. If the DTC is retrieved again, INSTALL a new ACM .
REFER
to: Audio Front Control Module (ACM) (415-00A Information and
Entertainment System - General Information - Vehicles With:
AM/FM/CD/SYNC, Removal and Installation).
|
|
U3003:16
|
Battery Voltage: Circuit Voltage Below Threshold
|
GO to Pinpoint Test AD
|
|
U3003:17
|
Battery Voltage: Circuit Voltage Above Threshold
|
GO to Pinpoint Test AE
|
APIM
DTC Chart
|
DTC
|
Description
|
Action
|
|
B1252:04
|
USB Port: System Internal Failure
|
GO to Pinpoint Test R
|
|
B1252:11
|
USB Port: Circuit Short To Ground
|
GO to Pinpoint Test R
|
|
B1D79:01
|
Microphone Input: General Electrical Failure
|
GO to Pinpoint Test P
|
|
B1D79:11
|
Microphone Input: Circuit Short To Ground
|
GO to Pinpoint Test P
|
|
B1D79:12
|
Microphone Input: Circuit Short To Battery
|
GO to Pinpoint Test P
|
|
B1D79:13
|
Microphone Input: Circuit Open
|
GO to Pinpoint Test P
|
|
U0140:00
|
Lost Communication With Body Control Module: No Sub Type Information
|
GO to Pinpoint Test Y
|
|
U0155:00
|
Lost Communication With Instrument Panel Cluster (IPC) Control Module: No Sub Type Information
|
GO to Pinpoint Test Z
|
|
U0257:00
|
Lost Communication With Front Controls / Display Interface Module: No Sub Type Information
|
GO to Pinpoint Test AC
|
|
U0423:00
|
Invalid Data Received From Instrument Panel Cluster Control Module: No Sub Type Information
|
NOTE:
If no Diagnostic Trouble Codes (DTCs) are present in the IPC , DIAGNOSE the observable symptom.
DIAGNOSE any Diagnostic Trouble Codes (DTCs) present in the IPC .
REFER
to: Instrumentation, Message Center and Warning Chimes (413-01
Instrumentation, Message Center and Warning Chimes, Diagnosis and
Testing).
|
|
U2100:00
|
Initial Configuration Not Complete: No Sub Type Information
|
This DTC sets due to an incorrect or incomplete APIM configuration.
Using a diagnostic scan tool, CARRY OUT the APIM programming procedure.
REFER
to: SYNC Module [APIM] Programming (415-00A Information and
Entertainment System - General Information - Vehicles With:
AM/FM/CD/SYNC, General Procedures).
|
|
U2101:00
|
Control Module Configuration Incompatible: No Sub Type Information
|
This DTC sets due to an incorrect or incomplete APIM configuration.
Using a diagnostic scan tool, CARRY OUT the APIM programming procedure.
REFER
to: SYNC Module [APIM] Programming (415-00A Information and
Entertainment System - General Information - Vehicles With:
AM/FM/CD/SYNC, General Procedures).
|
|
U3000:04
|
Control Module: System Internal Failure
|
CLEAR the Diagnostic Trouble Codes
(DTCs). WAIT at least 10 seconds and then REPEAT the self-test. If the DTC is retrieved again,
 COMPLETE THE FDRS GUIDED ROUTINE COMPLETE THE FDRS GUIDED ROUTINE |
- NOTE: This procedure must be completed using FDRS. Do not clear DTCs until the FDRS procedure has completed.
 To complete the diagnosis, navigate to the FDRS Guided Routine tab and carry out the procedure SYNC. To complete the diagnosis, navigate to the FDRS Guided Routine tab and carry out the procedure SYNC.

|
|
|
U3000:41
|
Control Module: General Checksum Failure
|
CLEAR the Diagnostic Trouble Codes
(DTCs). WAIT at least 10 seconds and then REPEAT the self-test. If the DTC is retrieved again,
| COMPLETE THE FDRS GUIDED ROUTINE |
- NOTE: This procedure must be completed using FDRS. Do not clear DTCs until the FDRS procedure has completed.
To complete the diagnosis, navigate to the FDRS Guided Routine tab and carry out the procedure SYNC.
|
|
|
U3000:42
|
Control Module: General Memory Failure
|
CLEAR the Diagnostic Trouble Codes
(DTCs). WAIT at least 10 seconds and then REPEAT the self-test. If the DTC is retrieved again,
| COMPLETE THE FDRS GUIDED ROUTINE |
- NOTE: This procedure must be completed using FDRS. Do not clear DTCs until the FDRS procedure has completed.
To complete the diagnosis, navigate to the FDRS Guided Routine tab and carry out the procedure SYNC.
|
|
|
U3000:88
|
Control Module: Bus Off
|
NOTE:
The module was unable to communicate
on the network at a point in time. The fault is not currently present
since the module had to communicate with the diagnostic scan tool to
report this DTC .
INSPECT for damaged or corroded wiring at the APIM . Refer to Wiring
Diagrams Cell 14 for schematic and connector information. CLEAR the DTC .
WAIT at least 10 seconds and then REPEAT the self-test. If the DTC is
retrieved again,
| COMPLETE THE FDRS GUIDED ROUTINE |
- NOTE: This procedure must be completed using FDRS. Do not clear DTCs until the FDRS procedure has completed.
To complete the diagnosis, navigate to the FDRS Guided Routine tab and carry out the procedure SYNC.
|
|
|
U3003:16
|
Battery Voltage: Circuit Voltage Below Threshold
|
GO to Pinpoint Test AD
|
|
U3003:17
|
Battery Voltage: Circuit Voltage Above Threshold
|
GO to Pinpoint Test AE
|
FCDIM
DTC Chart
|
DTC
|
Description
|
Action
|
|
B10BD:11
|
Multifunctional Switch: Circuit Short to Ground
|
GO to Pinpoint Test T
|
|
B10BD:13
|
Multifunctional Switch: Circuit Open
|
GO to Pinpoint Test T
|
|
B10BD:23
|
Multifunctional Switch: Signal Stuck Low
|
GO to Pinpoint Test T
|
|
U0001:88
|
High Speed CAN Communication Bus: Bus Off
|
NOTE:
The module was unable to communicate
on the network at a point in time. The fault is not currently present
since the module had to communicate with the diagnostic scan tool to
report this DTC .
INSPECT for damaged or corroded wiring at the FCDIM . Refer to Wiring
Diagrams Cell 14 for schematic and connector information. CLEAR the DTC .
WAIT at least 10 seconds and then REPEAT the self-test. If the DTC is
retrieved again, INSTALL a new FCDIM .
REFER to: Front
Control/Display Interface Module (FCDIM) (415-00A Information and
Entertainment System - General Information - Vehicles With:
AM/FM/CD/SYNC, Removal and Installation).
|
|
U0140:00
|
Lost Communication With Body Control Module: No Sub Type Information
|
GO to Pinpoint Test Y
|
|
U0155:00
|
Lost Communication With Instrument Panel Cluster (IPC) Control Module: No Sub Type Information
|
GO to Pinpoint Test Z
|
|
U0193:00
|
Lost Communication With "Digital Audio Control Module A:" No Sub Type Information
|
GO to Pinpoint Test AA
|
|
U0253:00
|
Lost Communication With Accessory Protocol Interface Module
|
GO to Pinpoint Test AB
|
|
U0423:68
|
Invalid Data Received From Instrument Panel Cluster Control Module: Event Information
|
NOTE:
If no Diagnostic Trouble Codes (DTCs) are present in the IPC , DIAGNOSE the observable symptom.
DIAGNOSE any Diagnostic Trouble Codes (DTCs) present in the IPC .
REFER
to: Instrumentation, Message Center and Warning Chimes (413-01
Instrumentation, Message Center and Warning Chimes, Diagnosis and
Testing).
|
|
U1A00:00
|
Private Communication Network: No Sub Type Information
|
GO to Pinpoint Test U
|
|
U2100:00
|
Initial Configuration Not Complete: No Sub Type Information
|
This DTC sets due to an incorrect or incomplete FCDIM configuration.
Using a diagnostic scan tool, CARRY OUT the FCDIM programming procedure
using as-built data.
|
|
U2101:00
|
Control Module Configuration Incompatible: No Sub Type Information
|
This DTC sets due to an incorrect or incomplete FCDIM configuration.
Using a diagnostic scan tool, CARRY OUT the FCDIM programming procedure
using as-built data.
|
|
U3000:00
|
Control Module: No Sub Type Information
|
CLEAR the DTC . WAIT at least 10 seconds. REPEAT the self-test. If the DTC is retrieved again, INSTALL a new FCDIM .
REFER
to: Front Control/Display Interface Module (FCDIM) (415-00A Information
and Entertainment System - General Information - Vehicles With:
AM/FM/CD/SYNC, Removal and Installation).
|
|
U3006:16
|
Control Module Input Power "A:" Circuit Voltage Below Threshold
|
GO to Pinpoint Test AF
|
|
U3006:17
|
Control Module Input Power "A:" Circuit Voltage Above Threshold
|
GO to Pinpoint Test AG
|
GPSM
DTC Chart
|
DTC
|
Description
|
Action
|
|
U0100:00
|
Lost Communication with ECM/PCM "A": No Sub Type Information
|
GO to Pinpoint Test X
|
|
U0140:00
|
Lost Communication With Body Control Module: No Sub Type Information
|
GO to Pinpoint Test Y
|
|
U0155:00
|
Lost Communication With Instrument Panel Cluster (IPC) Control Module: No Sub Type Information
|
GO to Pinpoint Test Z
|
|
U0401:00
|
Invalid Data Received from ECM/PCM A: No Sub Type Information
|
NOTE:
If no Diagnostic Trouble Codes (DTCs) are present in the PCM , DIAGNOSE the observable symptom.
DIAGNOSE any Diagnostic Trouble Codes (DTCs) present in the PCM . REFER
to Diagnosis and Testing in the appropriate 303-14 section.
|
|
U0422:00
|
Invalid Data Received from Body Control Module: No Sub Type Information
|
NOTE:
If no Diagnostic Trouble Codes (DTCs) are present in the BCM , DIAGNOSE the observable symptom.
DIAGNOSE any Diagnostic Trouble Codes (DTCs) present in the BCM .
REFER to: Body Control Module (BCM) (419-10 Multifunction Electronic Modules, Diagnosis and Testing).
|
|
U0423:00
|
Invalid Data Received from Instrument Panel Cluster Control Module: No Sub Type Information
|
NOTE:
If no Diagnostic Trouble Codes (DTCs) are present in the IPC , DIAGNOSE the observable symptom.
DIAGNOSE any Diagnostic Trouble Codes (DTCs) present in the IPC .
REFER
to: Instrumentation, Message Center and Warning Chimes (413-01
Instrumentation, Message Center and Warning Chimes, Diagnosis and
Testing).
|
|
U2100:00
|
Initial Configuration Not Complete: No Sub Type Information
|
This DTC sets due to an incorrect or incomplete GPSM configuration.
Using a diagnostic scan tool, CARRY OUT the GPSM programming procedure.
|
|
U2101:00
|
Control Module Configuration Incompatible: No Sub Type Information
|
This DTC sets due to an incorrect or incomplete GPSM configuration.
Using a diagnostic scan tool, CARRY OUT the GPSM programming procedure.
|
|
U3000:09
|
Control Module: Component Failure
|
CLEAR the DTC . WAIT at least 10 seconds. REPEAT the self-test. If the DTC is retrieved again, INSTALL a new FCDIM .
REFER
to: Global Positioning System Module (GPSM) (415-00A Information and
Entertainment System - General Information - Vehicles With:
AM/FM/CD/SYNC, Removal and Installation).
|
|
U3000:41
|
Control Module: General Checksum Failure
|
CLEAR the DTC . WAIT at least 10 seconds. REPEAT the self-test. If the DTC is retrieved again, INSTALL a new FCDIM .
REFER
to: Global Positioning System Module (GPSM) (415-00A Information and
Entertainment System - General Information - Vehicles With:
AM/FM/CD/SYNC, Removal and Installation).
|
|
U3000:42
|
Control Module: General Memory Failure
|
CLEAR the DTC . WAIT at least 10 seconds. REPEAT the self-test. If the DTC is retrieved again, INSTALL a new FCDIM .
REFER
to: Global Positioning System Module (GPSM) (415-00A Information and
Entertainment System - General Information - Vehicles With:
AM/FM/CD/SYNC, Removal and Installation).
|
|
U3003:16
|
Battery Voltage: Circuit Voltage Below Threshold
|
GO to Pinpoint Test AD
|
|
U3003:17
|
Battery Voltage: Circuit Voltage Above Threshold
|
GO to Pinpoint Test AE
|
Symptom Charts
Symptom Chart: General Audio System
|
Condition
|
Possible Sources
|
Actions
|
|
A module does not respond to the diagnostic scan tool
|
Refer to the Pinpoint Test
|
REFER to: Communications Network (418-00 Module Communications Network, Diagnosis and Testing).
|
|
The audio steering wheel switches are inoperative
|
Refer to the Pinpoint Test
|
GO to Pinpoint Test T
|
|
The CD player is inoperative or does not operate correctly
|
|
-
INSPECT the CD for scratches, fingerprints, a loose paper label,
incorrect format, or damage. INSERT a known good CD and TEST the system.
-
If the system operates correctly, the concern was caused by a damaged CD .
-
If the system does not operate correctly, INSTALL a new ACM .
REFER
to: Audio Front Control Module (ACM) (415-00A Information and
Entertainment System - General Information - Vehicles With:
AM/FM/CD/SYNC, Removal and Installation).
|
|
The speed compensated volume does not operate correctly
|
Refer to the Pinpoint Test
|
GO to Pinpoint Test B
|
|
The compass is inoperative or does not operate correctly
|
Refer to the Pinpoint Test
|
GO to Pinpoint Test W
|
|
The audio system does not operate correctly from the FCIM
|
Refer to the Pinpoint Test
|
GO to Pinpoint Test U
|
|
The FCIM illumination is inoperative or does not dim
|
Refer to the Pinpoint Test
|
REFER to: Instrument Panel and Interior Switches Illumination
(413-00 Instrument Panel and Interior Switches Illumination, Diagnosis
and Testing).
|
|
The FCDIM is inoperative or does not operate correctly
|
Refer to the Pinpoint Test
|
GO to Pinpoint Test V
|
|
The FCDIM illumination is inoperative or does not dim
|
Refer to the Pinpoint Test
|
REFER to: Instrument Panel and Interior Switches Illumination
(413-00 Instrument Panel and Interior Switches Illumination, Diagnosis
and Testing).
|
Symptom Chart: Sound Quality
|
Condition
|
Possible Sources
|
Actions
|
|
Poor AM / FM reception
|
Refer to the Pinpoint Test
|
GO to Pinpoint Test A
|
|
Continuous seek or scan in AM / FM mode
|
Refer to the Pinpoint Test
|
GO to Pinpoint Test A
|
|
A loud popping sound is heard when cycling the ignition
|
Refer to the Pinpoint Test
|
GO to Pinpoint Test C
|
|
Poor sound quality or distorted sound from one or more speakers (not all speakers)
|
Refer to the Pinpoint Test
|
GO to Pinpoint Test D
|
|
No sound from all speakers
|
Refer to the Pinpoint Test
|
GO to Pinpoint Test E
|
|
The left front door speaker is inoperative
|
Refer to the Pinpoint Test
|
GO to Pinpoint Test F
|
|
The left front door tweeter speaker is inoperative
|
Refer to the Pinpoint Test
|
GO to Pinpoint Test G
|
|
The right front door speaker is inoperative
|
Refer to the Pinpoint Test
|
GO to Pinpoint Test H
|
|
The right front door tweeter speaker is inoperative
|
Refer to the Pinpoint Test
|
GO to Pinpoint Test I
|
|
The right rear door speaker is inoperative
|
Refer to the Pinpoint Test
|
GO to Pinpoint Test J
|
|
The left rear door speaker is inoperative
|
Refer to the Pinpoint Test
|
GO to Pinpoint Test K
|
Symptom Chart: SYNC System
|
Condition
|
Possible Sources
|
Actions
|
|
The SYNC system is inoperative (no response is received from phone, voice, and media inputs)
|
Refer to the Pinpoint Test
|
GO to Pinpoint Test M
|
|
All SYNC Services features are inoperative or inaccurate (traffic, directions, and information)
|
Refer to the Pinpoint Test
|
GO to Pinpoint Test N
|
|
The SYNC system voice or tone prompts,
Text-To-Speech (TTS) feature, or ringtones are inoperative or do not
operate correctly
|
Refer to the Pinpoint Test
|
GO to Pinpoint Test O
|
|
During a phone call, no incoming audio is heard in the vehicle
|
Refer to the Pinpoint Test
|
GO to Pinpoint Test O
|
|
Voice recognition is inoperative or does not operate correctly
|
Refer to the Pinpoint Test
|
GO to Pinpoint Test P
|
|
During a phone call, poor quality or no outgoing audio is heard on the outside device
|
Refer to the Pinpoint Test
|
GO to Pinpoint Test P
|
|
No sound from all SYNC audio sources (Bluetooth, USB or audio input jack, if equipped)
|
Refer to the Pinpoint Test
|
GO to Pinpoint Test L
|
|
The SYNC steering wheel switches are inoperative
|
Refer to the Pinpoint Test
|
GO to Pinpoint Test T
|
|
The audio input jack is inoperative
|
Refer to the Pinpoint Test
|
GO to Pinpoint Test Q
|
|
The USB port is inoperative or does not operate correctly
|
Refer to the Pinpoint Test
|
GO to Pinpoint Test R
|
|
Unable to pair Bluetooth device
|
Refer to the Pinpoint Test
|
GO to Pinpoint Test S
|
|
An individual Bluetooth device feature
is inoperative (text messaging, media playback or controls, phone book
download, call history, or call waiting)
|
Device compatibility
|
NOTE:
If an individual Bluetooth device
is able to pair with the SYNC system, there are no concerns with the APIM .
INSTRUCT the vehicle owner to review the
device compatibility list. REFER to the appropriate Ford authorized
website to view a list of compatible devices and features. Not all phone
features are available through the SYNC system. This is normal
operation.
|
|
SYNC AppLink is inoperative or does not operate correctly
|
Refer to the Pinpoint Test
|
-
REVIEW the mobile device
platform, application, and application version compatibility list. REFER
to the appropriate Lincoln authorized website to view a list of
compatible devices and features. It is normal operation for incompatible
mobile device platforms, applications, and application versions to be
unavailable through SYNC AppLink.
-
If the mobile device
platform, application, and application version are compatible, and the
device is connected through Bluetooth only, GO to Pinpoint Test S
-
If the mobile device
platform, application, and application version are compatible, and the
device is connected through Bluetooth and the USB port, GO to Pinpoint Test R
|
|
911 Assist/Emergency Assistance or Vehicle Health Report (VHR) is inoperative
|
-
Unregistered SYNC owner account
-
RCM misconfiguration
-
IPC misconfiguration
|
-
Verify the vehicle owner has a SYNC Owner Account.
-
This error message appears due to incomplete or incorrect PMI
procedures. CHECK the vehicle service history for recent service actions
related to the IPC or RCM .
-
If there have been recent service actions with the IPC or RCM , CARRY
OUT the PMI procedure as directed by the diagnostic scan tool.
-
If there have been no recent service actions, the APIM has failed to retain configuration data.
| COMPLETE THE FDRS GUIDED ROUTINE |
- NOTE: This procedure must be completed using FDRS. Do not clear DTCs until the FDRS procedure has completed.
To complete the diagnosis, navigate to the FDRS Guided Routine tab and carry out the procedure SYNC.
|
|
Pinpoint Tests
Poor AM / FM Reception Or Continuous Seek/Scan
Refer to Wiring Diagrams Cell 130 for schematic and connector information.
Refer to Wiring Diagrams Cell 12 for schematic and connector information.
Normal Operation and Fault Conditions
REFER to: Information and Entertainment System - System Operation
and Component Description (415-00A Information and Entertainment System -
General Information - Vehicles With: AM/FM/CD/SYNC, Description and
Operation).
The RDS
function allows the vehicle operator to choose which genre (category)
of music to listen to. When the SCAN button is pressed, the ACM only
stops at channels falling within the selected category. If no channel in
the selected category is found, the ACM
continues to scan without stopping. This can appear to be a reception
issue, but it is actually due to the audio system settings.
Possible Sources
-
No channel found in the selected category
-
Charging system
-
Wiring, terminals, or connectors
-
Ignition system
-
Noise suppression equipment
-
AM / FM antenna coaxial cable
-
AM / FM antenna
-
Mounting surface corrosion
-
ACM
PINPOINT TEST A: POOR AM (AMPLITUDE MODULATION)
/ FM (FREQUENCY MODULATION)
RECEPTION OR CONTINUOUS SEEK/SCAN
| A1 CHECK THE AUDIO SYSTEM RECEPTION WITH THE ENGINE RUNNING |
-
Operate the audio system in AM / FM mode.
-
Check the reception with the engine running, and with the engine off.
Is poor reception only present with the engine running?
|
| A2 CHECK THE GENERATOR |
-
NOTICE:
Do not allow the generator B+ cable terminal to
make contact with a conductive surface. Failure to follow this
instruction may result in personal injury or damage to the vehicle.
Disconnect: Generator B+ Cable C102B.
-
Operate the audio system in AM / FM mode.
Is the reception OK?
| Yes |
INSTALL a new generator. REFER to the appropriate procedure in section 414-02.
|
|
| A3 CHECK THE IGNITION CIRCUITS |
-
Connect: Generator B+ Cable C102B.
-
Visually inspect the engine compartment and make
sure all ignition coils are correctly and securely connected, and there
are no visible cracks in the coil housings.
-
Inspect all the wiring harnesses and connectors for damaged insulation and loose or broken conditions.
Are the ignition components OK?
| Yes |
USE a jumper cable to temporarily ground various
parts of the vehicle (example: engine, fenders, quarter panels, body
sheet metal) to the frame. When the noise is eliminated, PROVIDE a
permanent ground where necessary.
|
| No |
REPAIR the ignition system as necessary.
|
|
| A4 CHECK THE ANTENNA ENABLE CIRCUIT FOR CORRECT VOLTAGE |
-
Disconnect: Antenna C9021.
-
Operate the audio system in AM / FM mode.
-
Measure:
Click to display connectors
|
Positive Lead
|
Measurement / Action
|
Negative Lead
|
|
C9021-1
|

|
Ground
|
Is the voltage greater than 11 volts?
|
| A5 CHECK THE ANTENNA ENABLE CIRCUIT FOR A SHORT TO GROUND |
-
Measure:
Click to display connectors
|
Positive Lead
|
Measurement / Action
|
Negative Lead
|
|
C9021-1
|

|
Ground
|
Is the resistance greater than 10,000 ohms?
|
| A6 CHECK THE ANTENNA ENABLE CIRCUIT FOR AN OPEN |
-
Measure:
Click to display connectors
|
Positive Lead
|
Measurement / Action
|
Negative Lead
|
|
C9021-1
|
|
C240A-2
|
Is the resistance less than 3 ohms?
|
| A7 CHECK THE FRONT AUDIO UNIT ANTENNA COAXIAL CABLE CORE AND SHIELD FOR A SHORT TO VOLTAGE |
-
Disconnect: Audio unit antenna coaxial cable at the ACM .
-
Disconnect: Audio unit antenna inline coaxial cable connection behind the RH lower cowl trim panel.
-
Measure:
|
Positive Lead
|
Measurement / Action
|
Negative Lead
|
|
Audio unit antenna coaxial cable core at the ACM
|
|
Ground
|
|
Audio unit antenna coaxial cable shield at the ACM
|
|
Ground
|
Is any voltage present?
| Yes |
REPAIR or INSTALL a new front audio unit antenna coaxial cable.
REFER
to: Audio Unit Antenna Cable (415-00A Information and Entertainment
System - General Information - Vehicles With: AM/FM/CD/SYNC, Removal and
Installation).
|
|
| A8 CHECK THE FRONT AUDIO UNIT ANTENNA COAXIAL CABLE CORE FOR A SHORT TO GROUND |
-
Measure:
|
Positive Lead
|
Measurement / Action
|
Negative Lead
|
|
Audio unit antenna coaxial cable core at the ACM
|
|
Ground
|
Is the resistance greater than 10,000 ohms?
| No |
REPAIR or INSTALL a new front AM / FM audio unit antenna coaxial cable.
REFER
to: Audio Unit Antenna Cable (415-00A Information and Entertainment
System - General Information - Vehicles With: AM/FM/CD/SYNC, Removal and
Installation).
|
|
| A9 CHECK THE FRONTAUDIO UNIT ANTENNA COAXIAL CABLE CORE AND SHIELD FOR AN OPEN |
-
Measure:
|
Positive Lead
|
Measurement / Action
|
Negative Lead
|
|
Audio unit antenna coaxial cable core at the ACM
|
|
Front audio unit antenna coaxial cable core at the inline connection
|
|
Audio unit antenna coaxial cable shield at the ACM
|
|
Front audio unit antenna coaxial cable shield at the inline connection
|
Are the resistances less than 1 ohm?
| No |
REPAIR or INSTALL a new front audio unit antenna coaxial cable.
REFER
to: Audio Unit Antenna Cable (415-00A Information and Entertainment
System - General Information - Vehicles With: AM/FM/CD/SYNC, Removal and
Installation).
|
|
| A10 CHECK THE FRONTAUDIO UNIT ANTENNA COAXIAL CABLE CORE AND SHIELD FOR A SHORT TOGETHER |
-
Measure:
|
Positive Lead
|
Measurement / Action
|
Negative Lead
|
|
Audio unit antenna coaxial cable core at the ACM
|
|
Audio unit antenna coaxial cable shield at the ACM
|
Is the resistance greater than 10,000 ohms?
| No |
REPAIR or INSTALL a new front audio unit antenna coaxial cable.
REFER
to: Audio Unit Antenna Cable (415-00A Information and Entertainment
System - General Information - Vehicles With: AM/FM/CD/SYNC, Removal and
Installation).
|
|
| A11 CHECK THE REAR AUDIO UNIT ANTENNA COAXIAL CABLE CORE AND SHIELD FOR A SHORT TO VOLTAGE |
-
Connect: Audio unit antenna inline coaxial cable connection behind the RH lower cowl trim panel.
-
Disconnect: Audio unit antenna coaxial cable at the antenna unit.
-
Measure:
|
Positive Lead
|
Measurement / Action
|
Negative Lead
|
|
Audio unit antenna coaxial cable core at the ACM
|
|
Ground
|
|
Audio unit antenna coaxial cable shield at the ACM
|
|
Ground
|
Is any voltage present?
| Yes |
REPAIR or INSTALL a new rear audio unit antenna coaxial cable.
REFER
to: Audio Unit Antenna Cable (415-00A Information and Entertainment
System - General Information - Vehicles With: AM/FM/CD/SYNC, Removal and
Installation).
|
|
| A12 CHECK THE REAR AUDIO UNIT NTENNA COAXIAL CABLE CORE FOR A SHORT TO GROUND |
-
Measure:
|
Positive Lead
|
Measurement / Action
|
Negative Lead
|
|
Audio unit antenna coaxial cable core at the ACM
|
|
Ground
|
Is the resistance greater than 10,000 ohms?
| No |
REPAIR or INSTALL a new rear audio unit antenna coaxial cable.
REFER
to: Audio Unit Antenna Cable (415-00A Information and Entertainment
System - General Information - Vehicles With: AM/FM/CD/SYNC, Removal and
Installation).
|
|
| A13 CHECK THE REAR AUDIO UNIT ANTENNA COAXIAL CABLE CORE AND SHIELD FOR AN OPEN |
-
Measure:
|
Positive Lead
|
Measurement / Action
|
Negative Lead
|
|
Audio unit antenna coaxial cable core at the ACM
|
|
Audio unit antenna coaxial cable core at the antenna unit (harness side)
|
|
Audio unit antenna coaxial cable shield at the ACM
|
|
Audio unit antenna coaxial cable shield at the antenna unit (harness side)
|
Are the resistances less than 1 ohm?
| No |
REPAIR or INSTALL a new rear audio unit antenna coaxial cable.
REFER
to: Audio Unit Antenna Cable (415-00A Information and Entertainment
System - General Information - Vehicles With: AM/FM/CD/SYNC, Removal and
Installation).
|
|
| A14 CHECK THE REAR AUDIO UNIT ANTENNA COAXIAL CABLE CORE AND SHIELD FOR A SHORT TOGETHER |
-
Measure:
|
Positive Lead
|
Measurement / Action
|
Negative Lead
|
|
Audio unit antenna coaxial cable core at the ACM
|
|
Audio unit antenna coaxial cable shield at the ACM
|
Is the resistance greater than 10,000 ohms?
| No |
REPAIR or INSTALL a new rear audio unit antenna coaxial cable.
REFER
to: Audio Unit Antenna Cable (415-00A Information and Entertainment
System - General Information - Vehicles With: AM/FM/CD/SYNC, Removal and
Installation).
|
|
| A15 CHECK THE AUDIO UNIT ANTENNA UNIT CORE AND SHIELD FOR A SHORT TO VOLTAGE |
-
Connect: Audio unit antenna coaxial cable at the antenna unit.
-
Measure:
|
Positive Lead
|
Measurement / Action
|
Negative Lead
|
|
Audio unit antenna coaxial cable core at the ACM
|
|
Ground
|
|
Audio unit antenna coaxial cable shield at the ACM
|
|
Ground
|
Is any voltage present?
| Yes |
INSTALL a new antenna.
REFER to: Audio Unit Antenna (415-00A
Information and Entertainment System - General Information - Vehicles
With: AM/FM/CD/SYNC, Removal and Installation).
|
|
| A16 CHECK THE AUDIO UNIT ANTENNA UNIT CORE FOR A SHORT TO GROUND |
-
Measure:
|
Positive Lead
|
Measurement / Action
|
Negative Lead
|
|
Audio unit antenna coaxial cable core at the ACM
|
|
Ground
|
Is the resistance greater than 10,000 ohms?
| No |
INSTALL a new antenna.
REFER to: Audio Unit Antenna (415-00A
Information and Entertainment System - General Information - Vehicles
With: AM/FM/CD/SYNC, Removal and Installation).
|
|
| A17 CHECK THE ANTENNA UNIT CORE AND SHIELD FOR A SHORT TOGETHER |
-
Measure:
|
Positive Lead
|
Measurement / Action
|
Negative Lead
|
|
Audio unit antenna coaxial cable core at the ACM
|
|
Audio unit antenna coaxial cable shield at the ACM
|
Is the resistance greater than 10,000 ohms?
| No |
INSTALL a new antenna.
REFER to: Audio Unit Antenna (415-00A
Information and Entertainment System - General Information - Vehicles
With: AM/FM/CD/SYNC, Removal and Installation).
|
|
| A18 CHECK THE ANTENNA UNIT SHIELD FOR CONTINUITY TO GROUND |
-
Measure:
|
Positive Lead
|
Measurement / Action
|
Negative Lead
|
|
Audio unit antenna coaxial cable shield at the ACM
|
|
Ground
|
Is the resistance less than 1 ohm?
|
| A19 CHECK THE ANTENNA UNIT SHIELD FOR CONTINUITY TO ANTENNA UNIT BASE |
-
Remove the audio unit antenna.
REFER to: Audio Unit Antenna
(415-00A Information and Entertainment System - General Information -
Vehicles With: AM/FM/CD/SYNC, Removal and Installation).
-
Measure:
|
Positive Lead
|
Measurement / Action
|
Negative Lead
|
|
Audio unit antenna unit shield at the antenna unit (component side)
|
|
Audio unit antenna base (unpainted surface)
|
Is the resistance less than 1 ohm?
| Yes |
INSPECT and REPAIR any corrosion on the antenna unit
base and/or vehicle mounting surface. REINSTALL the antenna and make
sure the proper torque value is achieved.
REFER to: Audio Unit
Antenna (415-00A Information and Entertainment System - General
Information - Vehicles With: AM/FM/CD/SYNC, Removal and Installation).
|
| No |
INSTALL a new audio unit antenna.
REFER to: Audio Unit Antenna
(415-00A Information and Entertainment System - General Information -
Vehicles With: AM/FM/CD/SYNC, Removal and Installation).
|
|
| A20 CHECK FOR CORRECT ACM (AUDIO FRONT CONTROL MODULE)
OPERATION |
-
Disconnect and inspect all the ACM connectors.
-
Repair:
-
corrosion (install new connectors or terminals - clean module pins)
-
damaged or bent pins - install new terminals pins
-
pushed-out pins - install new pins as necessary
-
Reconnect the ACM connectors. Make sure they seat and latch correctly.
-
Operate the system and determine if the concern is still present.
Is the concern still present?
| Yes |
CHECK OASIS for any applicable Technical Service Bulletins (TSBs). If a
TSB exists for this concern, DISCONTINUE this test and FOLLOW TSB
instructions. If no Technical Service Bulletins (TSBs) address this
concern, INSTALL a new ACM .
REFER to: Audio Front Control Module
(ACM) (415-00A Information and Entertainment System - General
Information - Vehicles With: AM/FM/CD/SYNC, Removal and Installation).
|
| No |
The system is operating correctly at this time. The
concern may have been caused by module connections. ADDRESS the root
cause of any connector or pin issues.
|
|
The Speed Compensated Volume Does Not Operate Correctly
Normal Operation and Fault Conditions
REFER to: Information and Entertainment System - System Operation
and Component Description (415-00A Information and Entertainment System -
General Information - Vehicles With: AM/FM/CD/SYNC, Description and
Operation).
Possible Sources
-
Speed compensated volume setting
-
ACM
PINPOINT TEST B: THE SPEED COMPENSATED VOLUME DOES NOT OPERATE CORRECTLY
| B1 CHECK THE SPEEDOMETER OPERATION |
-
Drive the vehicle and observe the speedometer.
Does the speedometer operate correctly?
| No |
REFER to: Instrumentation, Message Center and Warning Chimes
(413-01 Instrumentation, Message Center and Warning Chimes, Diagnosis
and Testing).
|
|
| B2 CHECK THE SPEED COMPENSATED VOLUME SETTING |
-
Turn the speed compensated volume off. Refer to the Owner's Literature.
-
Operate the audio system in AM / FM mode.
-
Drive the vehicle at various speeds and observe the speaker volume.
-
Set the speed compensated volume to maximum compensation. Refer to the Owner's Literature.
-
Operate the audio system in AM / FM mode.
-
Drive the vehicle at various speeds and observe the speaker volume.
Does the volume remain constant with the speed
compensated volume turned off, and increase and decrease with vehicle
speed with the speed compensated volume set to maximum?
| Yes |
The system is operating correctly at this time.
INSTRUCT the vehicle owner in the correct usage of the speed compensated
volume feature.
|
|
| B3 CHECK FOR DTC (DIAGNOSTIC TROUBLE CODE)
U0155:00 |
-
Using a diagnostic scan tool, retrieve all Continuous Memory Diagnostic Trouble Codes (CMDTCs).
Is DTC U0155:00 retrieved in any audio system module?
| Yes |
GO to Pinpoint Test Z
|
|
| B4 CHECK FOR CORRECT ACM (AUDIO FRONT CONTROL MODULE)
OPERATION |
-
Disconnect and inspect all the ACM connectors.
-
Repair:
-
corrosion (clean module pins or install new connectors or terminals)
-
damaged or bent pins (install new terminals or pins)
-
pushed-out pins (install new pins as necessary)
-
Reconnect the ACM connectors. Make sure they seat and latch correctly.
-
Operate the system and determine if the concern is still present.
Is the concern still present?
| Yes |
CHECK OASIS for any applicable Technical Service Bulletins (TSBs). If a
TSB exists for this concern, discontinue this test and follow TSB
instructions. If no Technical Service Bulletins (TSBs) address this
concern, INSTALL a new ACM .
REFER to: Audio Front Control Module
(ACM) (415-00A Information and Entertainment System - General
Information - Vehicles With: AM/FM/CD/SYNC, Removal and Installation).
|
| No |
The system is operating correctly at this time. The
concern may have been caused by module connections. ADDRESS the root
cause of any connector or pin issues.
|
|
A Loud Popping Sound Is Heard When Cycling The Ignition
Refer to Wiring Diagrams Cell 130 for schematic and connector information.
Refer to Wiring Diagrams Cell 20 for schematic and connector information.
Normal Operation and Fault Conditions
The PCM provides voltage to the ACM on the start signal circuit when
the ignition is in the START position. When the voltage is received by
the ACM
, the audio signal output is muted to prevent voltage spikes from
producing popping noises through the speakers. An open on the circuit
between splice S212 and the ACM could cause voltage spikes to produce
popping noises through the speakers.
Possible Sources
-
Wiring, terminals, or connectors
-
ACM
PINPOINT TEST C: A LOUD POPPING SOUND IS HEARD WHEN CYCLING THE IGNITION
Poor Sound Quality Or Distorted Sound From One Or More Speakers (Not All Speakers)
Normal Operation and Fault Conditions
The ACM sends audio signals to the speakers in the form of AC voltage, resulting in clear audio output.
Possible Sources
-
Loose component fasteners
-
Loose door handle, lock, and other trim panel components and fasteners
-
Loose items in storage areas
-
Loose speaker grilles
-
Loose wire harnesses or wire harness fasteners
-
Speaker(s)
-
Water shield bonding and placement
Visual Inspection and Diagnostic Pre-checks
Inspect the suspect area for any possible rattle conditions such as:
-
Any storage compartments including cup holders (if equipped)
-
Door map pockets for contents that can rattle (if equipped)
-
Door pull cup attachments (if equipped)
-
Door switch bezels (if equipped)
-
Package tray (if equipped)
-
Speaker grilles
-
Trim panels and fasteners
PINPOINT TEST D: POOR SOUND QUALITY OR DISTORTED SOUND FROM ONE OR MORE SPEAKERS (NOT ALL SPEAKERS)
| D1 ISOLATE THE ZONE |
-
Operate the audio system using digital media (CD , MP3, etc.).
-
Using the audio system fade and balance feature,
adjust the audio sound to each of the four zones (left front, right
front, left rear and right rear) of the vehicle to isolate the poor
sound quality.
-
Locate and apply pressure to the trim panel(s) around the poor sound quality area in question.
Does applying pressure to a trim panel reduce or eliminate the audible noise?
| Yes |
REPAIR or REPLACE the trim panel as needed.
|
|
| D2 REMOVE AND INSPECT BEHIND/UNDERNEATH THE SUSPECT TRIM PANEL(S) |
-
Remove the trim panel to access the suspect speaker.
-
Operate the audio system using digital media (CD , MP3, etc.).
-
Validate where the poor sound quality area is located.
-
Check:
-
Trim panel for loose components around the speaker area such as the speaker grille.
-
Trim panel joining components for missing or broken pieces.
-
Lock and handle mechanical parts for correct attachment.
-
Wire harnesses for correct routing.
-
Wire harness fasteners for correct attachment.
-
Water shield for correct placement (speaker air path not blocked).
-
Water shield for correct bonding to sheet metal.
-
Storage areas for loose items.
-
All child safety belt anchors (if equipped).
-
All safety belt retractors.
-
All speaker bracket fasteners and other fasteners are secured and tightened to specified torque.
Was the source of the noise located?
| Yes |
REPAIR or REPLACE any loose or broken component or fastener as needed.
|
|
| D3 CHECK THE SUSPECT SPEAKER FOR WATER INTRUSION |
Are any watermarks present on the speaker?
| Yes |
VERIFY the water shield is in the correct location,
REPAIR or REPLACE any trim, door, or speaker seal as required.
DRY the speaker in question and TEST the system for normal operation.
|
|
| D4 ISOLATE SPEAKER TO VERIFY NOISE |
-
Remove the suspect speaker from its location and leave the speaker connected to the harness.
-
Hold the speaker away from any trim panel(s) and make sure the speaker is isolated from contact.
-
Operate the audio system using digital media (CD , MP3, etc.).
Is the noise still present in the suspect speaker?
| Yes |
INSTALL a new speaker for the one in question.
|
| No |
LOCATE the source of the noise and REPAIR as needed.
|
|
No Sound From All Speakers
Refer to Wiring Diagrams Cell 130 for schematic and connector information.
Normal Operation and Fault Conditions
REFER to: Information and Entertainment System - System Operation
and Component Description (415-00A Information and Entertainment System -
General Information - Vehicles With: AM/FM/CD/SYNC, Description and
Operation).
A
short to ground or short to voltage in the circuitry to one of the
speakers may cause multiple speakers to lose sound due to the built-in
overload protection feature of the ACM . In this case, a speaker fault DTC sets.
The PCM provides voltage to the ACM on the start signal circuit when
the ignition is in the START position. When the voltage is received by
the ACM
, the audio signal output is muted to prevent voltage spikes from
producing popping noises through the speakers. A short to voltage on
this circuit causes the ACM output to be muted continuously.
Possible Source
-
Wiring, terminals, or connectors
-
ACM
PINPOINT TEST E: NO SOUND FROM ALL SPEAKERS
| E1 VERIFY THE ACM (AUDIO FRONT CONTROL MODULE)
PASSES THE NETWORK TEST |
-
Using a diagnostic scan tool, carry out the network test.
Does the ACM pass the network test?
| No |
REFER to: Communications Network (418-00 Module Communications Network, Diagnosis and Testing).
|
|
| E2 CHECK FOR SPEAKER DIAGNOSTIC TROUBLE CODES (DTCS) |
-
Using a diagnostic scan tool, carry out the ACM self-test.
Are any speaker fault Diagnostic Trouble Codes (DTCs) present?
| Yes |
REFER to the ACM
DTC Chart in this section.
|
|
| E3 CHECK THE START SENSE CIRCUIT FOR A SHORT TO VOLTAGE |
-
Remove: BJB Starter Inhibit Relay.
-
Disconnect:
-
PCM
C1381B For vehicles with the 1.0L Fox GTDI (90kW/120PS).
-
PCM
C175E for vehicles with the 1.6L Duratec-16V Ti-VCT (88kW/120PS) - Sigma.
-
PCM
C1915B for vehicles with the 1.6L EcoBoost (132kW/180PS) - Sigma.
-
IPC
C220A for vehicles with push button start.
-
Measure:
Click to display connectors
|
Positive Lead
|
Measurement / Action
|
Negative Lead
|
|
C240A-3
|
|
Ground
|
Is any voltage present?
|
| E4 CHECK FOR CORRECT ACM (AUDIO FRONT CONTROL MODULE)
OPERATION |
-
Disconnect and inspect all the ACM connectors.
-
Repair:
-
corrosion (clean module pins or install new connectors or terminals)
-
damaged or bent pins (install new terminals or pins)
-
pushed-out pins (install new pins as necessary)
-
Reconnect the ACM connectors. Make sure they seat and latch correctly.
-
Operate the system and determine if the concern is still present.
Is the concern still present?
| Yes |
CHECK OASIS for any applicable Technical Service Bulletins (TSBs). If a
TSB exists for this concern, discontinue this test and follow TSB
instructions. If no Technical Service Bulletins (TSBs) address this
concern, INSTALL a new ACM .
REFER to: Audio Front Control Module
(ACM) (415-00A Information and Entertainment System - General
Information - Vehicles With: AM/FM/CD/SYNC, Removal and Installation).
|
| No |
The system is operating correctly at this time. The
concern may have been caused by module connections. ADDRESS the root
cause of any connector or pin issues.
|
|
The Left Front Door Speaker Is Inoperative
Refer to Wiring Diagrams Cell 130 for schematic and connector information.
Normal Operation and Fault Conditions
REFER to: Information and Entertainment System - System Operation
and Component Description (415-00A Information and Entertainment System -
General Information - Vehicles With: AM/FM/CD/SYNC, Description and
Operation).
The left front door speaker and left front door tweeter speaker share the same audio signal.
ACM
DTC Fault Trigger Conditions
|
DTC
|
Description
|
Fault Trigger Conditions
|
|
B1A01:01
|
Speaker #1: General Electrical Failure
|
Set by the ACM when a failure is detected on the left front door or left front door tweeter speaker circuits.
|
|
B1A01:11
|
Speaker #1: Circuit Short To Ground
|
Set by the ACM when a short to ground is detected on the left front
door or left front door tweeter speaker circuits. When DTC B1A01:11 is
set, the speaker output is disabled.
|
|
B1A01:12
|
Speaker #1: Circuit Short To Battery
|
Set by the ACM when a short to voltage is detected on the left front
door or left front door tweeter speaker circuits. When DTC B1A01:12 is
set, the speaker output is disabled.
|
|
B1A01:13
|
Speaker #1: Circuit Open
|
Set by the ACM when an open is detected on the left front door speaker circuits.
|
Possible Sources
-
Speaker
-
Wiring, terminals, or connectors
-
ACM
PINPOINT TEST F: THE LEFT FRONT DOOR SPEAKER IS INOPERATIVE
| F1 CHECK THE AUDIO SIGNAL TO THE LEFT FRONT DOOR SPEAKER |
-
Disconnect: Left Front Door Speaker C536.
-
Operate the audio system in AM / FM mode.
-
Measure:
Click to display connectors
|
Positive Lead
|
Measurement / Action
|
Negative Lead
|
|
C536-1
|

|
C536-4
|
Is a fluctuating AC voltage present?
| Yes |
INSTALL a new left front door speaker.
REFER to: Front Door Speaker
(415-00A Information and Entertainment System - General Information -
Vehicles With: AM/FM/CD/SYNC, Removal and Installation).
|
|
| F2 CHECK THE AUDIO CIRCUITS TO THE LEFT FRONT DOOR SPEAKER FOR A SHORT TO VOLTAGE |
-
Measure:
Click to display connectors
|
Positive Lead
|
Measurement / Action
|
Negative Lead
|
|
C536-1
|
|
Ground
|
|
C536-4
|
|
Ground
|
Is any voltage present?
| Yes |
REPAIR the circuit in question.
|
|
| F3 CHECK THE AUDIO CIRCUITS TO THE LEFT FRONT DOOR SPEAKER FOR A SHORT TO GROUND |
-
Measure:
Click to display connectors
|
Positive Lead
|
Measurement / Action
|
Negative Lead
|
|
C536-1
|
|
Ground
|
|
C536-4
|
|
Ground
|
Are the resistances greater than 10,000 ohms?
| No |
REPAIR the circuit in question.
|
|
| F4 CHECK THE AUDIO CIRCUITS TO THE LEFT FRONT DOOR SPEAKER FOR AN OPEN |
-
Measure:
Click to display connectors
|
Positive Lead
|
Measurement / Action
|
Negative Lead
|
|
C536-1
|
|
C240A-22
|
|
C536-4
|
|
C240A-10
|
Are the resistances less than 3 ohms?
| No |
REPAIR the circuit in question.
|
|
| F5 CHECK THE AUDIO CIRCUITS TO THE LEFT FRONT DOOR SPEAKER FOR A SHORT TOGETHER |
-
Measure:
Click to display connectors
|
Positive Lead
|
Measurement / Action
|
Negative Lead
|
|
C536-1
|
|
C536-4
|
Is the resistance greater than 10,000 ohms?
| No |
REPAIR the circuit in question.
|
|
| F6 CHECK FOR CORRECT ACM (AUDIO FRONT CONTROL MODULE)
OPERATION |
-
Disconnect and inspect all the ACM connectors.
-
Repair:
-
corrosion (clean module pins or install new connectors or terminals)
-
damaged or bent pins (install new terminals or pins)
-
pushed-out pins (install new pins as necessary)
-
Reconnect the ACM connectors. Make sure they seat and latch correctly.
-
Operate the system and determine if the concern is still present.
Is the concern still present?
| Yes |
CHECK OASIS for any applicable Technical Service Bulletins (TSBs). If a
TSB exists for this concern, discontinue this test and follow TSB
instructions. If no Technical Service Bulletins (TSBs) address this
concern, INSTALL a new ACM .
REFER to: Audio Front Control Module
(ACM) (415-00A Information and Entertainment System - General
Information - Vehicles With: AM/FM/CD/SYNC, Removal and Installation).
|
| No |
The system is operating correctly at this time. The
concern may have been caused by module connections. ADDRESS the root
cause of any connector or pin issues.
|
|
The Left Front Door Tweeter Speaker Is Inoperative
Refer to Wiring Diagrams Cell 130 for schematic and connector information.
Normal Operation and Fault Conditions
REFER to: Information and Entertainment System - System Operation
and Component Description (415-00A Information and Entertainment System -
General Information - Vehicles With: AM/FM/CD/SYNC, Description and
Operation).
The left front door speaker and left front door tweeter speaker share the same audio signal.
DTC Fault Trigger Conditions
|
DTC
|
Description
|
Fault Trigger Conditions
|
|
B1A01:01
|
Speaker #1: General Electrical Failure
|
Set by the ACM when a failure is detected on the left front door or left front door tweeter speaker circuits.
|
|
B1A01:11
|
Speaker #1: Circuit Short To Ground
|
Set by the ACM when a short to ground is detected on the left front
door or left front door tweeter speaker circuits. When DTC B1A01:11 is
set, the speaker output is disabled.
|
|
B1A01:12
|
Speaker #1: Circuit Short To Battery
|
Set by the ACM when a short to voltage is detected on the left front
door or left front door tweeter speaker circuits. When DTC B1A01:12 is
set, the speaker output is disabled.
|
Possible Sources
-
Speaker
-
Wiring, terminals, or connectors
PINPOINT TEST G: THE LEFT FRONT DOOR TWEETER SPEAKER IS INOPERATIVE
| G1 CHECK THE LEFT FRONT DOOR SPEAKER |
-
Operate the audio system in AM / FM mode.
Does the left front door speaker operate correctly?
|
| G2 CHECK THE AUDIO SIGNAL TO THE LEFT FRONT DOOR TWEETER SPEAKER |
-
Disconnect: Left Front Door Tweeter Speaker C513.
-
Operate the audio system in AM / FM mode.
-
Measure:
Click to display connectors
|
Positive Lead
|
Measurement / Action
|
Negative Lead
|
|
C513-1
|
|
C513-3
|
Is a fluctuating AC voltage present?
| Yes |
INSTALL a new left front door tweeter speaker.
REFER to: Front Door
Tweeter Speaker (415-00A Information and Entertainment System - General
Information - Vehicles With: AM/FM/CD/SYNC, Removal and Installation).
|
|
| G3 CHECK THE AUDIO CIRCUITS TO THE LEFT FRONT DOOR TWEETER SPEAKER FOR A SHORT TO VOLTAGE |
-
Disconnect: Left Front Door Speaker C536.
-
Measure:
Click to display connectors
|
Positive Lead
|
Measurement / Action
|
Negative Lead
|
|
C513-1
|
|
Ground
|
|
C513-3
|
|
Ground
|
Is any voltage present?
| Yes |
REPAIR the circuit in question.
|
|
| G4 CHECK THE AUDIO CIRCUITS TO THE LEFT FRONT DOOR TWEETER SPEAKER FOR A SHORT TO GROUND |
-
Measure:
Click to display connectors
|
Positive Lead
|
Measurement / Action
|
Negative Lead
|
|
C513-1
|
|
Ground
|
|
C513-3
|
|
Ground
|
Are the resistances greater than 10,000 ohms?
| No |
REPAIR the circuit in question.
|
|
| G5 CHECK THE AUDIO CIRCUITS TO THE LEFT FRONT DOOR TWEETER SPEAKER FOR AN OPEN |
-
Measure:
Click to display connectors
|
Positive Lead
|
Measurement / Action
|
Negative Lead
|
|
C513-1
|
|
C536-2
|
|
C513-3
|
|
C536-3
|
Are the resistances less than 3 ohms?
| No |
REPAIR the circuit in question.
|
|
| G6 CHECK THE AUDIO CIRCUITS TO THE LEFT FRONT DOOR TWEETER SPEAKER FOR A SHORT TOGETHER |
-
Measure:
Click to display connectors
|
Positive Lead
|
Measurement / Action
|
Negative Lead
|
|
C513-1
|
|
C513-3
|
Is the resistance greater than 10,000 ohms?
| Yes |
INSTALL a new left front door speaker.
REFER to: Front Door Speaker
(415-00A Information and Entertainment System - General Information -
Vehicles With: AM/FM/CD/SYNC, Removal and Installation).
|
| No |
REPAIR the circuit in question.
|
|
The Right Front Door Speaker Is Inoperative
Refer to Wiring Diagrams Cell 130 for schematic and connector information.
Normal Operation and Fault Conditions
REFER to: Information and Entertainment System - System Operation
and Component Description (415-00A Information and Entertainment System -
General Information - Vehicles With: AM/FM/CD/SYNC, Description and
Operation).
See ACM .
The right front door speaker and right front door tweeter speaker share the same audio signal.
DTC Fault Trigger Conditions
|
DTC
|
Description
|
Fault Trigger Conditions
|
|
B1A02:01
|
Speaker #2: General Electrical Failure
|
Set by the ACM when a failure is detected on the right front door or right front door tweeter speaker circuits.
|
|
B1A02:11
|
Speaker #2: Circuit Short To Ground
|
Set by the ACM when a short to ground is detected on the right front
door or right front door tweeter speaker circuits. When DTC B1A02:11 is
set, the speaker output is disabled.
|
|
B1A02:12
|
Speaker #2: Circuit Short To Battery
|
Set by the ACM when a short to voltage is detected on the right front
door or right front door tweeter speaker circuits. When DTC B1A02:12 is
set, the speaker output is disabled.
|
|
B1A02:13
|
Speaker #2: Circuit Open
|
Set by the ACM when an open is detected on the right front door speaker circuits.
|
Possible Sources
-
Speaker
-
Wiring, terminals, or connectors
-
ACM
PINPOINT TEST H: THE RIGHT FRONT DOOR SPEAKER IS INOPERATIVE
| H1 CHECK THE AUDIO SIGNAL TO THE RIGHT FRONT DOOR SPEAKER |
-
Disconnect: Right Front Door Speaker C628.
-
Operate the audio system in AM / FM mode.
-
Measure:
Click to display connectors
|
Positive Lead
|
Measurement / Action
|
Negative Lead
|
|
C628-1
|
|
C628-4
|
Is a fluctuating AC voltage present?
| Yes |
INSTALL a new right front door speaker.
REFER to: Front Door
Speaker (415-00A Information and Entertainment System - General
Information - Vehicles With: AM/FM/CD/SYNC, Removal and Installation).
|
|
| H2 CHECK THE AUDIO CIRCUITS TO THE RIGHT FRONT DOOR SPEAKER FOR A SHORT TO VOLTAGE |
-
Measure:
Click to display connectors
|
Positive Lead
|
Measurement / Action
|
Negative Lead
|
|
C628-1
|
|
Ground
|
|
C628-4
|
|
Ground
|
Is any voltage present?
| Yes |
REPAIR the circuit in question.
|
|
| H3 CHECK THE AUDIO CIRCUITS TO THE RIGHT FRONT DOOR SPEAKER FOR A SHORT TO GROUND |
-
Measure:
Click to display connectors
|
Positive Lead
|
Measurement / Action
|
Negative Lead
|
|
C628-1
|
|
Ground
|
|
C628-4
|
|
Ground
|
Are the resistances greater than 10,000 ohms?
| No |
REPAIR the circuit in question.
|
|
| H4 CHECK THE AUDIO CIRCUITS TO THE RIGHT FRONT DOOR SPEAKER FOR AN OPEN |
-
Measure:
Click to display connectors
|
Positive Lead
|
Measurement / Action
|
Negative Lead
|
|
C628-1
|
|
C240A-23
|
|
C628-4
|
|
C240A-11
|
Are the resistances less than 3 ohms?
| No |
REPAIR the circuit in question.
|
|
| H5 CHECK THE AUDIO CIRCUITS TO THE RIGHT FRONT DOOR SPEAKER FOR A SHORT TOGETHER |
-
Measure:
Click to display connectors
|
Positive Lead
|
Measurement / Action
|
Negative Lead
|
|
C628-1
|
|
C628-4
|
Is the resistance greater than 10,000 ohms?
| No |
REPAIR the circuit in question.
|
|
| H6 CHECK FOR CORRECT ACM (AUDIO FRONT CONTROL MODULE)
OPERATION |
-
Disconnect and inspect all the ACM connectors.
-
Repair:
-
corrosion (clean module pins or install new connectors or terminals)
-
damaged or bent pins (install new terminals or pins)
-
pushed-out pins (install new pins as necessary)
-
Reconnect the ACM connectors. Make sure they seat and latch correctly.
-
Operate the system and determine if the concern is still present.
Is the concern still present?
| Yes |
CHECK OASIS for any applicable Technical Service Bulletins (TSBs). If a
TSB exists for this concern, discontinue this test and follow TSB
instructions. If no Technical Service Bulletins (TSBs) address this
concern, INSTALL a new ACM .
REFER to: Audio Front Control Module
(ACM) (415-00A Information and Entertainment System - General
Information - Vehicles With: AM/FM/CD/SYNC, Removal and Installation).
|
| No |
The system is operating correctly at this time. The
concern may have been caused by module connections. ADDRESS the root
cause of any connector or pin issues.
|
|
The Right Front Door Tweeter Speaker Is Inoperative
Refer to Wiring Diagrams Cell 130 for schematic and connector information.
Normal Operation and Fault Conditions
REFER to: Information and Entertainment System - System Operation
and Component Description (415-00A Information and Entertainment System -
General Information - Vehicles With: AM/FM/CD/SYNC, Description and
Operation).
The right front door speaker and right front door tweeter speaker share the same audio signal.
DTC Fault Trigger Conditions
|
DTC
|
Description
|
Fault Trigger Conditions
|
|
B1A02:01
|
Speaker #2: General Electrical Failure
|
Set by the ACM when a failure is detected on the right front door or right front door tweeter speaker circuits.
|
|
B1A02:11
|
Speaker #2: Circuit Short To Ground
|
Set by the ACM when a short to ground is detected on the right front
door or right front door tweeter speaker circuits. When DTC B1A02:11 is
set, the speaker output is disabled.
|
|
B1A02:12
|
Speaker #2: Circuit Short To Battery
|
Set by the ACM when a short to voltage is detected on the right front
door or right front door tweeter speaker circuits. When DTC B1A02:12 is
set, the speaker output is disabled.
|
Possible Sources
-
Speaker
-
Wiring, terminals, or connectors
PINPOINT TEST I: THE RIGHT FRONT DOOR TWEETER SPEAKER IS INOPERATIVE
| I1 CHECK THE RIGHT FRONT DOOR SPEAKER |
-
Operate the audio system in AM / FM mode.
Does the right front door speaker operate correctly?
|
| I2 CHECK THE AUDIO SIGNAL TO THE RIGHT FRONT DOOR TWEETER SPEAKER |
-
Disconnect: Right Front Door Tweeter Speaker C613.
-
Operate the audio system in AM / FM mode.
-
Measure:
Click to display connectors
|
Positive Lead
|
Measurement / Action
|
Negative Lead
|
|
C613-1
|
|
C613-3
|
Is a fluctuating AC voltage present?
| Yes |
INSTALL a new right front door tweeter speaker.
REFER to: Front
Door Tweeter Speaker (415-00A Information and Entertainment System -
General Information - Vehicles With: AM/FM/CD/SYNC, Removal and
Installation).
|
|
| I3 CHECK THE AUDIO CIRCUITS TO THE RIGHT FRONT DOOR TWEETER SPEAKER FOR A SHORT TO VOLTAGE |
-
Disconnect: Right Front Door Speaker C628.
-
Measure:
Click to display connectors
|
Positive Lead
|
Measurement / Action
|
Negative Lead
|
|
C613-1
|
|
Ground
|
|
C613-3
|
|
Ground
|
Is any voltage present?
| Yes |
REPAIR the circuit in question.
|
|
| I4 CHECK THE AUDIO CIRCUITS TO THE RIGHT FRONT DOOR TWEETER SPEAKER FOR A SHORT TO GROUND |
-
Measure:
Click to display connectors
|
Positive Lead
|
Measurement / Action
|
Negative Lead
|
|
C613-1
|
|
Ground
|
|
C613-3
|
|
Ground
|
Are the resistances greater than 10,000 ohms?
| No |
REPAIR the circuit in question.
|
|
| I5 CHECK THE AUDIO CIRCUITS TO THE RIGHT FRONT DOOR TWEETER SPEAKER FOR AN OPEN |
-
Measure:
Click to display connectors
|
Positive Lead
|
Measurement / Action
|
Negative Lead
|
|
C613-1
|
|
C628-2
|
|
C613-3
|
|
C628-3
|
Are the resistances less than 3 ohms?
| No |
REPAIR the circuit in question.
|
|
| I6 CHECK THE AUDIO CIRCUITS TO THE RIGHT FRONT DOOR TWEETER SPEAKER FOR A SHORT TOGETHER |
-
Measure:
Click to display connectors
|
Positive Lead
|
Measurement / Action
|
Negative Lead
|
|
C613-1
|
|
C613-3
|
Is the resistance greater than 10,000 ohms?
| Yes |
INSTALL a new right front door speaker.
REFER to: Front Door
Speaker (415-00A Information and Entertainment System - General
Information - Vehicles With: AM/FM/CD/SYNC, Removal and Installation).
|
| No |
REPAIR the circuit in question.
|
|
The Right Rear Door Speaker Is Inoperative
Refer to Wiring Diagrams Cell 130 for schematic and connector information.
Normal Operation and Fault Conditions
REFER to: Information and Entertainment System - System Operation
and Component Description (415-00A Information and Entertainment System -
General Information - Vehicles With: AM/FM/CD/SYNC, Description and
Operation).
DTC Fault Trigger Conditions
|
DTC
|
Description
|
Fault Trigger Conditions
|
|
B1A03:01
|
Speaker #3: General Electrical Failure
|
Set by the ACM when a failure is detected on the right rear door speaker circuits.
|
|
B1A03:11
|
Speaker #3: Circuit Short To Ground
|
Set by the ACM when a short to ground is detected on the right rear
door speaker circuits. When DTC B1A03:11 is set, the speaker output is
disabled.
|
|
B1A03:12
|
Speaker #3: Circuit Short To Battery
|
Set by the ACM when a short to voltage is detected on the right rear
door speaker circuits. When DTC B1A03:12 is set, the speaker output is
disabled.
|
|
B1A03:13
|
Speaker #3: Circuit Open
|
Set by the ACM when an open is detected on the right rear door speaker circuits.
|
Possible Sources
-
Speaker
-
Wiring, terminals, or connectors
-
ACM
PINPOINT TEST J: THE RIGHT REAR DOOR SPEAKER IS INOPERATIVE
| J1 CHECK THE AUDIO SIGNAL TO THE RIGHT REAR DOOR SPEAKER |
-
Disconnect: Right Rear Door Speaker C802.
-
Operate the audio system in AM / FM mode.
-
Measure:
Click to display connectors
|
Positive Lead
|
Measurement / Action
|
Negative Lead
|
|
C802-1
|
|
C802-4
|
Is a fluctuating AC voltage present?
| Yes |
INSTALL a new right rear door speaker.
REFER to: Rear Door Speaker
(415-00A Information and Entertainment System - General Information -
Vehicles With: AM/FM/CD/SYNC, Removal and Installation).
|
|
| J2 CHECK THE AUDIO CIRCUITS TO THE RIGHT REAR DOOR SPEAKER FOR ASHORT TO VOLTAGE |
-
Measure:
Click to display connectors
|
Positive Lead
|
Measurement / Action
|
Negative Lead
|
|
C802-1
|
|
Ground
|
|
C802-4
|
|
Ground
|
Is any voltage present?
| Yes |
REPAIR the circuit in question.
|
|
| J3 CHECK THE AUDIO CIRCUITS TO THE RIGHT REAR DOOR SPEAKER FOR ASHORT TO GROUND |
-
Measure:
Click to display connectors
|
Positive Lead
|
Measurement / Action
|
Negative Lead
|
|
C802-1
|
|
Ground
|
|
C802-4
|
|
Ground
|
Are the resistances greater than 10,000 ohms?
| No |
REPAIR the circuit in question.
|
|
| J4 CHECK THE AUDIO CIRCUITS TO THE RIGHT REAR DOOR SPEAKER FOR AN OPEN |
-
Measure:
Click to display connectors
|
Positive Lead
|
Measurement / Action
|
Negative Lead
|
|
C802-1
|
|
C240A-24
|
|
C802-4
|
|
C240A-12
|
Are the resistances less than 3 ohms?
| No |
REPAIR the circuit in question.
|
|
| J5 CHECK THE AUDIO CIRCUITS TO THE RIGHT REAR DOOR SPEAKER FOR ASHORT TOGETHER |
-
Measure:
Click to display connectors
|
Positive Lead
|
Measurement / Action
|
Negative Lead
|
|
C802-1
|
|
C802-4
|
Is the resistance greater than 10,000 ohms?
| No |
REPAIR the circuit in question.
|
|
| J6 CHECK FOR CORRECT ACM (AUDIO FRONT CONTROL MODULE)
OPERATION |
-
Disconnect and inspect all the ACM connectors.
-
Repair:
-
corrosion (clean module pins or install new connectors or terminals)
-
damaged or bent pins (install new terminals or pins)
-
pushed-out pins (install new pins as necessary)
-
Reconnect the ACM connectors. Make sure they seat and latch correctly.
-
Operate the system and determine if the concern is still present.
Is the concern still present?
| Yes |
CHECK OASIS for any applicable Technical Service Bulletins (TSBs). If a
TSB exists for this concern, discontinue this test and follow TSB
instructions. If no Technical Service Bulletins (TSBs) address this
concern, INSTALL a new ACM .
REFER to: Audio Front Control Module
(ACM) (415-00A Information and Entertainment System - General
Information - Vehicles With: AM/FM/CD/SYNC, Removal and Installation).
|
| No |
The system is operating correctly at this time. The
concern may have been caused by module connections. ADDRESS the root
cause of any connector or pin issues.
|
|
The Left Rear Door Speaker Is Inoperative
Refer to Wiring Diagrams Cell 130 for schematic and connector information.
Normal Operation and Fault Conditions
REFER to: Information and Entertainment System - System Operation
and Component Description (415-00A Information and Entertainment System -
General Information - Vehicles With: AM/FM/CD/SYNC, Description and
Operation).
DTC Fault Trigger Conditions
|
DTC
|
Description
|
Fault Trigger Conditions
|
|
B1A04:01
|
Speaker #4: General Electrical Failure
|
Set by the ACM when a failure is detected on the left rear door speaker circuits.
|
|
B1A04:11
|
Speaker #4: Circuit Short To Ground
|
Set by the ACM when a short to ground is detected on the left rear door
speaker circuits. When DTC B1A04:11 is set, the speaker output is
disabled.
|
|
B1A04:12
|
Speaker #4: Circuit Short To Battery
|
Set by the ACM when a short to voltage is detected on the left rear
door speaker circuits. When DTC B1A04:12 is set, the speaker output is
disabled.
|
|
B1A04:13
|
Speaker #4: Circuit Open
|
Set by the ACM when an open is detected on the left rear door speaker circuits.
|
Possible Sources
-
Speaker
-
Wiring, terminals, or connectors
-
ACM
PINPOINT TEST K: THE LEFT REAR DOOR SPEAKER IS INOPERATIVE
| K1 CHECK THE AUDIO SIGNAL TO THE LEFT REAR DOOR SPEAKER |
-
Disconnect: Left Rear Door Speaker C702.
-
Operate the audio system in AM / FM mode.
-
Measure:
Click to display connectors
|
Positive Lead
|
Measurement / Action
|
Negative Lead
|
|
C702-1
|
|
C702-4
|
Is a fluctuating AC voltage present?
| Yes |
INSTALL a new left rear door speaker.
REFER to: Rear Door Speaker
(415-00A Information and Entertainment System - General Information -
Vehicles With: AM/FM/CD/SYNC, Removal and Installation).
|
|
| K2 CHECK THE AUDIO CIRCUITS TO THE LEFT REAR DOOR SPEAKER FOR A SHORT TO VOLTAGE |
-
Measure:
Click to display connectors
|
Positive Lead
|
Measurement / Action
|
Negative Lead
|
|
C702-1
|
|
Ground
|
|
C702-4
|
|
Ground
|
Is any voltage present?
| Yes |
REPAIR the circuit in question.
|
|
| K3 CHECK THE AUDIO CIRCUITS TO THE LEFT REAR DOOR SPEAKER FOR A SHORT TO GROUND |
-
Measure:
Click to display connectors
|
Positive Lead
|
Measurement / Action
|
Negative Lead
|
|
C702-1
|
|
Ground
|
|
C702-4
|
|
Ground
|
Are the resistances greater than 10,000 ohms?
| No |
REPAIR the circuit in question.
|
|
| K4 CHECK THE AUDIO CIRCUITS TO THE LEFT REAR DOOR SPEAKER FOR AN OPEN |
-
Measure:
Click to display connectors
|
Positive Lead
|
Measurement / Action
|
Negative Lead
|
|
C702-1
|
|
C240A-21
|
|
C702-4
|
|
C240A-9
|
Are the resistances less than 3 ohms?
| No |
REPAIR the circuit in question.
|
|
| K5 CHECK THE AUDIO CIRCUITS TO THE LEFT REAR DOOR SPEAKER FOR A SHORT TOGETHER |
-
Measure:
Click to display connectors
|
Positive Lead
|
Measurement / Action
|
Negative Lead
|
|
C702-1
|
|
C702-4
|
Is the resistance greater than 10,000 ohms?
| No |
REPAIR the circuit in question.
|
|
| K6 CHECK FOR CORRECT ACM (AUDIO FRONT CONTROL MODULE)
OPERATION |
-
Disconnect and install all the ACM connectors.
-
Repair:
-
corrosion (clean module pins or install new connectors or terminals)
-
damaged or bent pins (install new terminals or pins)
-
pushed-out pins (install new pins as necessary)
-
Reconnect the ACM connectors. Make sure they seat and latch correctly.
-
Operate the system and determine if the concern is still present.
Is the concern still present?
| Yes |
CHECK OASIS for any applicable Technical Service Bulletins (TSBs). If a
TSB exists for this concern, discontinue this test and follow TSB
instructions. If no Technical Service Bulletins (TSBs) address this
concern, INSTALL a new ACM .
REFER to: Audio Front Control Module
(ACM) (415-00A Information and Entertainment System - General
Information - Vehicles With: AM/FM/CD/SYNC, Removal and Installation).
|
| No |
The system is operating correctly at this time. The
concern may have been caused by module connections. ADDRESS the root
cause of any connector or pin issues.
|
|
No Sound From All SYNC Audio Sources (Bluetooth, USB , Audio Input Jack)
Refer to Wiring Diagrams Cell 130 for schematic and connector information.
Normal Operation and Fault Conditions
REFER to: Information and Entertainment System - System Operation
and Component Description (415-00A Information and Entertainment System -
General Information - Vehicles With: AM/FM/CD/SYNC, Description and
Operation).
Possible Sources
-
Device
-
Wiring, terminals, or connectors
-
APIM
-
ACM
PINPOINT TEST L: NO SOUND FROM ALL SYNC AUDIO SOURCES (BLUETOOTH, USB (UNIVERSAL SERIAL BUS)
, AUDIO INPUT JACK)
| L1 VERIFY THE OPERATION OF THE SYNC® SYSTEM AUDIO SOURCES |
|
NOTE:
Carrying out a Master Reset returns all preference
settings to the factory defaults, erases the phone book and call
histories, and deletes any devices paired with the SYNC® system.
-
Connect: Multi-Media Interface Tester 105-00120.
-
Using the Multi-Media Interface Tester 105-00120,
test the audio output for the SYNC® audio sources (Bluetooth, USB , audio input jack).
Is there poor quality, distorted, or no sound from all SYNC® audio sources?
| No |
If there is a concern with one or more, but not all
SYNC audio sources, REFER to the Symptom Chart in this section.
If all SYNC audio sources operate correctly with the
Multi-Media Interface Tester 105-00120, CARRY OUT a SYNC system Master
Reset. REFER to the Owner's Literature. REVIEW the SYNC system operation
with the vehicle owner. If the device still does not operate correctly,
the fault is with the device.
|
|
| L2 CHECK THE AUDIO SIGNALS TO THE ACM (AUDIO FRONT CONTROL MODULE)
|
|
NOTICE:
This pinpoint test step directs testing circuits
using a back-probe method. Use the special back-probe tool POM6411. Do
not force test leads or other probes into connectors. Adequate care must
be exercised to avoid connector terminal damage, while making sure that
good electrical contact is made with the circuit or terminal. Failure
to follow these instructions may cause damage to wiring, terminals, or
connectors, and may cause subsequent electrical faults.
-
Operate the audio system using a SYNC audio source (Bluetooth, USB , audio input jack).
-
While back-probing ACM
C240B, measure the AC voltage.
Click to display connectors
|
Positive Lead
|
Measurement / Action
|
Negative Lead
|
|
C240B-13
|
|
C240B-23
|
|
C240B-25
|
|
C240B-26
|
Is a fluctuating AC voltage present?
|
| L3 CHECK THE AUDIO CIRCUITS TO THE ACM (AUDIO FRONT CONTROL MODULE)
FOR A SHORT TO VOLTAGE |
-
Measure:
Click to display connectors
|
Positive Lead
|
Measurement / Action
|
Negative Lead
|
|
C240B-12
|
|
Ground
|
|
C240B-13
|
|
Ground
|
|
C240B-25
|
|
Ground
|
|
C240B-26
|
|
Ground
|
Is any voltage present?
| Yes |
REPAIR the circuit in question.
|
|
| L4 CHECK THE AUDIO CIRCUITS TO THE ACM (AUDIO FRONT CONTROL MODULE)
FOR A SHORT TO GROUND |
-
Measure:
Click to display connectors
|
Positive Lead
|
Measurement / Action
|
Negative Lead
|
|
C240B-12
|
|
Ground
|
|
C240B-13
|
|
Ground
|
|
C240B-25
|
|
Ground
|
|
C240B-26
|
|
Ground
|
Are the resistances greater than 10,000 ohms?
| No |
REPAIR the circuit in question.
|
|
| L5 CHECK THE AUDIO CIRCUITS TO THE ACM (AUDIO FRONT CONTROL MODULE)
FOR AN OPEN |
-
Measure:
Click to display connectors
|
Positive Lead
|
Measurement / Action
|
Negative Lead
|
|
C240B-12
|
|
C2383-25
|
|
C240B-13
|
|
C2383-23
|
|
C240B-25
|
|
C2383-26
|
|
C240B-26
|
|
C2383-24
|
Are the resistances less than 3 ohms?
| No |
REPAIR the circuit in question.
|
|
| L6 CHECK FOR CORRECT APIM (SYNC MODULE)
OPERATION |
-
Disconnect and inspect the APIM connector.
-
Repair:
-
corrosion (clean module pins or install new connectors or terminals)
-
damaged or bent pins (install new terminals or pins)
-
pushed-out pins (install new pins as necessary)
-
Reconnect the APIM connector. Make sure it seats and latches correctly.
-
Wait at least 2 minutes for the APIM to re-initialize.
-
Operate the system and determine if the concern is still present.
Is the concern still present?
| Yes |
CHECK OASIS for any applicable Technical Service Bulletins (TSBs). If a
TSB exists for this concern, discontinue this test and follow TSB
instructions. If no Technical Service Bulletins (TSBs) address this
concern, CARRY OUT the APIM Hardware Test.
| COMPLETE THE FDRS GUIDED ROUTINE |
- NOTE: This procedure must be completed using FDRS. Do not clear DTCs until the FDRS procedure has completed.
To complete the diagnosis, navigate to the FDRS Guided Routine tab and carry out the procedure SYNC.
|
|
| No |
The system is operating correctly at this time. The
concern may have been caused by module connections. ADDRESS the root
cause of any connector or pin issues.
|
|
| L7 CHECK FOR CORRECT ACM (AUDIO FRONT CONTROL MODULE)
OPERATION |
-
Disconnect and inspect all the ACM connectors.
-
Repair:
-
corrosion (clean module pins or install new connectors or terminals)
-
damaged or bent pins (install new terminals or pins)
-
pushed-out pins (install new pins as necessary)
-
Reconnect the ACM connectors. Make sure they seat and latch correctly.
-
Operate the system and determine if the concern is still present.
Is the concern still present?
| Yes |
CHECK OASIS for any applicable Technical Service Bulletins (TSBs). If a
TSB exists for this concern, discontinue this test and follow TSB
instructions. If no Technical Service Bulletins (TSBs) address this
concern, INSTALL a new ACM .
REFER to: Audio Front Control Module
(ACM) (415-00A Information and Entertainment System - General
Information - Vehicles With: AM/FM/CD/SYNC, Removal and Installation).
|
| No |
The system is operating correctly at this time. The
concern may have been caused by module connections. ADDRESS the root
cause of any connector or pin issues.
|
|
The SYNC System Is Inoperative (No Response Is Received From Phone, Voice, And Media Inputs)
Refer to Wiring Diagrams Cell 130 for schematic and connector information.
Normal Operation and Fault Conditions
REFER to: Information and Entertainment System - System Operation
and Component Description (415-00A Information and Entertainment System -
General Information - Vehicles With: AM/FM/CD/SYNC, Description and
Operation).
Possible Sources
-
Portable audio device
-
APIM
PINPOINT TEST M: THE SYNC SYSTEM IS INOPERATIVE (NO RESPONSE IS RECEIVED FROM PHONE, VOICE, AND MEDIA INPUTS)
| M1 VERIFY THE APIM (SYNC MODULE)
PASSES THE NETWORK TEST |
-
Using a diagnostic scan tool, carry out the network test.
Does the APIM pass the network test?
| No |
REFER to: Communications Network (418-00 Module Communications Network, Diagnosis and Testing).
|
|
| M2 CHECK THE SYNC SYSTEM INPUTS FOR FUNCTIONALITY |
|
NOTE:
Carrying out a Master Reset returns all preference
settings to the factory defaults, erases the phone book and call
histories, and deletes any devices paired with the SYNC® system.
-
Connect: Multi-Media Interface Tester 105-00120.
-
Using the Multi-Media Interface Tester 105-00120,
test the audio output for the SYNC audio sources (Bluetooth, USB , audio
input jack) using the VOICE steering wheel switch to enter each mode.
Do all of the SYNC inputs function correctly?
| Yes |
The SYNC system is operating correctly at this time.
CARRY OUT a SYNC system Master Reset. REFER to the Owner Literature.
REVIEW the SYNC system operation with the vehicle owner. If the device
still does not operate correctly, the fault is with the device.
|
|
| M3 RESET THE APIM (SYNC MODULE)
AND RECHECK SYNC SYSTEM OPERATION |
|
NOTE:
Carrying out a Master Reset returns all preference
settings to the factory defaults, erases the phone book and call
histories, and deletes any devices paired with the SYNC® system.
-
Carry out an APIM power reset by disconnecting the battery for 1 minute, then reconnecting it.
-
Connect: Multi-Media Interface Tester 105-00120.
-
Using the Multi-Media Interface Tester 105-00120,
test the audio output for the SYNC audio sources (Bluetooth, USB , audio
input jack) using the VOICE steering wheel switch to enter each mode.
Do all of the SYNC inputs function correctly?
| Yes |
The SYNC system is operating correctly at this time.
CARRY OUT a SYNC system Master Reset. REFER to the Owner Literature.
REVIEW the SYNC system operation with the vehicle owner. If the device
still does not operate correctly, the fault is with the device.
|
| No |
If there is a concern with one or more, but not all
SYNC audio sources, REFER to the Symptom Chart in this section.
If there is a concern with the VOICE steering wheel switch, GO to Pinpoint Test T
If all inputs are inoperative,
| COMPLETE THE FDRS GUIDED ROUTINE |
- NOTE: This procedure must be completed using FDRS. Do not clear DTCs until the FDRS procedure has completed.
To complete the diagnosis, navigate to the FDRS Guided Routine tab and carry out the procedure SYNC.
|
|
|
All SYNC® Services Features Are Inoperative Or Inaccurate (Traffic, Directions, And Information)
Normal Operation and Fault Conditions
REFER to: Information and Entertainment System - System Operation
and Component Description (415-00A Information and Entertainment System -
General Information - Vehicles With: AM/FM/CD/SYNC, Description and
Operation).
Possible Sources
-
Unregistered SYNC Owner Account
-
Unregistered, inactive, or expired SYNC Services subscription
-
Unregistered mobile phone number
-
Mobile phone being used not selected as "Active"
-
SYNC Services server
-
Inadequate phone reception
-
Obstructions in the GPS antenna's line of sight
-
APIM
-
GPSM
PINPOINT TEST N: ALL SYNC SERVICES FEATURES ARE INOPERATIVE OR INACCURATE (TRAFFIC, DIRECTIONS, AND INFORMATION)
| N1 VERIFY THE PHONE CONNECTION TO SYNC SERVICES WHILE AWAY FROM THE VEHICLE |
|
NOTE:
Caller ID blocking must be disabled on the paired
mobile phone so the SYNC Services server can recognize the registered
and "Active" phone number.
-
Advise the vehicle owner to call SYNC Services from their mobile phone.Dial 800-304-6099.
-
Verify the phone call is placed and the phone connects to SYNC Services.
-
Observe whether the SYNC Services subscription
commercial plays, or if the system asks which Service is wanted.
Does the SYNC Services subscription commercial play?
|
| N2 VERIFY THE SYNC OWNER ACCOUNT AND SYNC SERVICES REGISTRATION AND SUBSCRIPTION |
-
Verify the vehicle owner has a SYNC Owner Account. Refer to the appropriate Ford authorized website.
-
Verify the vehicle owner has registered for SYNC Services and has an active subscription.
Does the vehicle owner have a SYNC Owner Account and an active SYNC Services subscription?
| No |
If the vehicle owner does not have a SYNC Owner
Account, INFORM the vehicle owner that an account must be created in
order to sign up for SYNC Services.
If the vehicle owner does not have an active SYNC
Services subscription, INFORM the vehicle owner that in order for SYNC
Services to function, the subscription needs to be activated.
|
|
| N3 VERIFY THE REGISTERED PHONE NUMBER AND STATUS |
|
NOTE:
Only one mobile phone number can be selected as
“Active” at a time, and only the "Active" mobile phone number has access
to SYNC Services.
-
Verify the mobile phone being used has the correct
mobile phone number registered with the SYNC Owner Account. Refer to the
appropriate Ford authorized website.
-
Verify the mobile phone being used is selected as "Active".
Is the vehicle owner using the registered and active mobile phone associated with the SYNC Services account?
| No |
INFORM the vehicle owner the correct mobile phone
number must be registered on the SYNC website and selected as "Active."
|
|
| N4 VERIFY THE PHONE CONNECTION TO SYNC SERVICES FROM INSIDE THE VEHICLE |
-
Make sure the registered and "Active" mobile phone
is paired with the SYNC system. For information on the pairing process,
refer to the Ownes Literature. If necessary, review the device
compatibility list. Refer to the appropriate Ford authorized website.
-
Make sure the mobile phone has adequate reception.
-
Make sure the vehicle is in an open location that is
free from obstacles such as tall buildings or large trees.
-
Connect to SYNC Services from the vehicle controls.
-
Verify the phone call is placed and the phone is connected to SYNC Services.
-
When prompted, select "Directions," and follow the
audible prompts to get directions to an address or Saved Point.
Does SYNC Services indicate the vehicle location is
being obtained, the route is being sent, and the route download from the
server to the vehicle was complete?
| Yes |
SYNC Services is operating correctly at this time.
|
| No |
If SYNC Services indicated the vehicle location was not able to be obtained, GO to N5
If SYNC Services indicated the vehicle location was
being obtained, but did not indicate the route was being sent, there is a
potential SYNC Services server issue. The problem does not reside in
the vehicle's audio system.
If SYNC Services indicated the vehicle location was
being obtained, the route was being sent, but did not indicate the route
download from the server to the vehicle was complete, GO to N8
If SYNC Services did not indicate the vehicle
location was being obtained, the route was being sent, and the route
download from the server to the vehicle was complete, there is a
potential SYNC® Services server issue. The problem does not reside in
the vehicle's audio system.
|
|
| N5 CHECK FOR APIM (SYNC MODULE)
DIAGNOSTIC TROUBLE CODES (DTCS) |
-
Using a diagnostic scan tool, carry out the APIM self-test.
Are any Diagnostic Trouble Codes (DTCs) recorded in the APIM ?
| Yes |
REFER to: Information and Entertainment System (415-00A Information
and Entertainment System - General Information - Vehicles With:
AM/FM/CD/SYNC, Diagnosis and Testing).
|
|
| N6 CHECK FOR GPSM (GLOBAL POSITIONING SYSTEM MODULE)
DIAGNOSTIC TROUBLE CODES (DTCS) |
-
Using a diagnostic scan tool, carry out the GPSM self-test.
Are any Diagnostic Trouble Codes (DTCs) recorded in the GPSM ?
| Yes |
REFER to: Information and Entertainment System (415-00A Information
and Entertainment System - General Information - Vehicles With:
AM/FM/CD/SYNC, Diagnosis and Testing).
|
|
| N7 CHECK FOR CORRECT APIM (SYNC MODULE)
OPERATION |
-
Disconnect and inspect the APIM connector.
-
Repair:
-
corrosion (clean module pins or install new connectors or terminals)
-
damaged or bent pins (install new terminals or pins)
-
pushed-out pins (install new pins as necessary)
-
Reconnect the APIM connector. Make sure it seats and latches correctly.
-
Operate the system and determine if the concern is still present.
Is the concern still present?
| Yes |
CHECK OASIS for any applicable Technical Service Bulletins (TSBs). If a
TSB exists for this concern, DISCONTINUE this test and FOLLOW TSB
instructions. If no Technical Service Bulletins (TSBs) address this
concern,
| COMPLETE THE FDRS GUIDED ROUTINE |
- NOTE: This procedure must be completed using FDRS. Do not clear DTCs until the FDRS procedure has completed.
To complete the diagnosis, navigate to the FDRS Guided Routine tab and carry out the procedure SYNC.
|
TEST the system for normal operation. If the concern is still present, GO to N8
|
| No |
The system is operating correctly at this time. The
concern may have been caused by module connections. ADDRESS the root
cause of any connector or pin issues.
|
|
| N8 CHECK FOR CORRECT GPSM (GLOBAL POSITIONING SYSTEM MODULE)
OPERATION |
|
NOTE:
Before operating the system to determine if the
concern is still present, make sure the vehicle is in an open location
that is free from obstacles such as tall buildings or large trees so an
adequate GPS signal can be obtained.
-
Disconnect and inspect the GPSM connector.
-
Repair:
-
corrosion (clean module pins or install new connectors or terminals)
-
damaged or bent pins (install new terminals or pins)
-
pushed-out pins (install new pins as necessary)
-
Reconnect the GPSM connector. Make sure it seats and latches correctly.
-
Operate the system and determine if the concern is still present.
Is the concern still present?
| Yes |
CHECK OASIS for any applicable Technical Service Bulletins (TSBs). If a
TSB exists for this concern, DISCONTINUE this test and FOLLOW TSB
instructions. If no Technical Service Bulletins (TSBs) address this
concern, INSTALL a new GPSM .
REFER to: Global Positioning System
Module (GPSM) (415-00A Information and Entertainment System - General
Information - Vehicles With: AM/FM/CD/SYNC, Removal and Installation).
|
| No |
The system is operating correctly at this time. The
concern may have been caused by module connections. ADDRESS the root
cause of any connector or pin issues.
|
|
The
SYNC System Voice Or Tone Prompts, Text-To-Speech (TTS) Feature, Or
Ringtones Are Inoperative Or Do Not Operate Correctly, Or During A Phone
Call, No Incoming Audio Is Heard In The Vehicle
Refer to Wiring Diagrams Cell 130 for schematic and connector information.
Normal Operation and Fault Conditions
REFER to: Information and Entertainment System - System Operation
and Component Description (415-00A Information and Entertainment System -
General Information - Vehicles With: AM/FM/CD/SYNC, Description and
Operation).
Possible Sources
-
SYNC settings
-
Wiring, terminals, or connectors
-
APIM
-
ACM
PINPOINT TEST O: THE SYNC SYSTEM VOICE OR TONE PROMPTS,
TEXT-TO-SPEECH (TTS) FEATURE, OR RINGTONES ARE INOPERATIVE OR DO NOT
OPERATE CORRECTLY, OR DURING A PHONE CALL, NO INCOMING AUDIO IS HEARD IN
THE VEHICLE
| O1 CHECK THE AUDIBLE PROMPT FUNCTIONALITY |
-
Operate the audio system in AM / FM mode.
-
Operate the VOICE steering wheel switch and listen for the SYNC audible prompt.
Does the SYNC system produce an audible prompt
correctly; indicating voice recognition mode has been entered?
| Yes |
The system is operating correctly at this time.
INSTRUCT the vehicle owner in the correct operation of the audible
prompt feature. REFER to "SYNC Voice Recognition Feature" in the Owner
Literature.
|
|
| O2 CHECK THE OPERATION OF THE STEERING WHEEL SWITCHES |
-
Operate the audio system in AM / FM mode.
-
Operate the VOLUME +/- and SEEK +/- steering wheel switches.
Do the VOLUME +/- and SEEK +/- steering wheel switches operate correctly?
|
| O3 CHECK FOR A VOLTAGE SIGNAL FROM THE APIM (SYNC MODULE)
|
|
NOTICE:
This pinpoint test step directs testing circuits
using a back-probe method. Use the special back-probe tool POM6411. Do
not force test leads or other probes into connectors. Adequate care must
be exercised to avoid connector terminal damage while making sure that
good electrical contact is made with the circuit or terminal. Failure to
follow these instructions may cause damage to wiring, terminals, or
connectors, and may cause subsequent electrical faults.
-
Operate the audio system in AM / FM mode.
-
While back-probing ACM
C240B, measure the AC voltage while repeatedly operating the VOICE steering wheel switch.
Click to display connectors
|
Positive Lead
|
Measurement / Action
|
Negative Lead
|
|
C240B-8
|
|
C240B-21
|
Is a fluctuating AC voltage present each time the VOICE steering wheel switch is operated?
|
| O4 CHECK THE AUDIBLE PROMPT CIRCUITS FOR A SHORT TO VOLTAGE |
-
Measure:
Click to display connectors
|
Positive Lead
|
Measurement / Action
|
Negative Lead
|
|
C240B-8
|
|
Ground
|
|
C240B-21
|
|
Ground
|
Is any voltage present?
| Yes |
REPAIR the circuit in question.
|
|
| O5 CHECK THE AUDIBLE PROMPT CIRCUITS FOR A SHORT TO GROUND |
-
Measure:
Click to display connectors
|
Positive Lead
|
Measurement / Action
|
Negative Lead
|
|
C240B-8
|
|
Ground
|
|
C240B-21
|
|
Ground
|
Are the resistances greater than 10,000 ohms?
| No |
REPAIR the circuit in question.
|
|
| O6 CHECK THE AUDIBLE PROMPT CIRCUITS FOR AN OPEN |
-
Measure:
Click to display connectors
|
Positive Lead
|
Measurement / Action
|
Negative Lead
|
|
C240B-8
|
|
C2383-3
|
|
C240B-21
|
|
C2383-4
|
Are the resistances less than 3 ohms?
| No |
REPAIR the circuit in question.
|
|
| O7 CHECK FOR CORRECT APIM (SYNC MODULE)
OPERATION |
-
Disconnect and inspect the APIM connector.
-
Repair:
-
corrosion (clean module pins or install new connectors or terminals)
-
damaged or bent pins (install new terminals or pins)
-
pushed-out pins (install new pins as necessary)
-
Reconnect the APIM connector. Make sure it seats and latches correctly.
-
Wait at least 2 minutes for the APIM to re-initialize.
-
Operate the system and determine if the concern is still present.
Is the concern still present?
| Yes |
CHECK OASIS for any applicable Technical Service Bulletins (TSBs). If a
TSB exists for this concern, discontinue this test and follow TSB
instructions. If no Technical Service Bulletins (TSBs) address this
concern,
| COMPLETE THE FDRS GUIDED ROUTINE |
- NOTE: This procedure must be completed using FDRS. Do not clear DTCs until the FDRS procedure has completed.
To complete the diagnosis, navigate to the FDRS Guided Routine tab and carry out the procedure SYNC.
|
|
| No |
The system is operating correctly at this time. The
concern may have been caused by module connections. ADDRESS the root
cause of any connector or pin issues.
|
|
| O8 CHECK FOR CORRECT ACM (AUDIO FRONT CONTROL MODULE)
OPERATION |
-
Disconnect and inspect all the ACM connectors.
-
Repair:
-
corrosion (clean module pins or install new connectors or terminals)
-
damaged or bent pins (install new terminals or pins)
-
pushed-out pins (install new pins as necessary)
-
Reconnect the ACM connectors. Make sure they seat and latch correctly.
-
Operate the system and determine if the concern is still present.
Is the concern still present?
| Yes |
CHECK OASIS for any applicable Technical Service Bulletins (TSBs). If a
TSB exists for this concern, discontinue this test and follow TSB
instructions. If no Technical Service Bulletins (TSBs) address this
concern, INSTALL a new ACM .
REFER to: Audio Front Control Module
(ACM) (415-00A Information and Entertainment System - General
Information - Vehicles With: AM/FM/CD/SYNC, Removal and Installation).
|
| No |
The system is operating correctly at this time. The
concern may have been caused by module connections. ADDRESS the root
cause of any connector or pin issues.
|
|
Voice
Recognition Is Inoperative Or Does Not Operate Correctly, Or During A
Phone Call, Poor Quality Or No Outgoing Audio Is Heard On The Outside
Device
Refer to Wiring Diagrams Cell 130 for schematic and connector information.
Normal Operation and Fault Conditions
REFER to: Information and Entertainment System - System Operation
and Component Description (415-00A Information and Entertainment System -
General Information - Vehicles With: AM/FM/CD/SYNC, Description and
Operation).
DTC Fault Trigger Conditions
|
DTC
|
Description
|
Fault Trigger Conditions
|
|
B1D79:01
|
Microphone Input: General Electrical Failure
|
Set by the APIM when a microphone is not detected during the on-demand self-test.
|
|
B1D79:11
|
Microphone Input: Circuit Short To Ground
|
Set by the APIM when a short to ground is detected on the microphone circuits.
|
|
B1D79:12
|
Microphone Input: Circuit Short To Battery
|
Set by the APIM when a short to battery voltage is detected on the microphone circuits.
|
|
B1D79:13
|
Microphone Input: Circuit Open
|
Set by the APIM when an open is detected on the microphone circuits.
|
Possible Sources
-
Insufficiently quiet vehicle
-
Inadequate phone reception
-
Wiring, terminals, or connectors
-
Microphone
-
APIM
PINPOINT TEST P: VOICE RECOGNITION IS INOPERATIVE OR DOES
NOT OPERATE CORRECTLY, OR DURING A PHONE CALL, POOR QUALITY OR NO
OUTGOING AUDIO IS HEARD ON THE OUTSIDE DEVICE
| P1 CHECK THE AUDIBLE PROMPT FUNCTIONALITY |
-
Operate the audio system in AM / FM mode.
-
Operate the VOICE steering wheel switch and listen for the SYNC audible prompt.
Does the SYNC® system produce an audible prompt
correctly; indicating voice recognition mode has been entered?
|
| P2 CHECK THE OPERATION OF THE STEERING WHEEL SWITCHES |
-
Operate the audio system in AM / FM mode.
-
Operate the VOLUME +/- and SEEK +/- steering wheel switches.
Do the VOLUME +/- and SEEK +/- steering wheel switches operate correctly?
| Yes |
GO to Pinpoint Test O
|
|
| P3 CHECK THE OPERATION OF THE "PHONE" VOICE COMMAND |
-
Pair a Bluetooth phone with the SYNC® system. For
information on the pairing process, refer to the Owner's Literature. If
necessary, review the device compatibility list. Refer to the
appropriate Ford authorized website.
-
Operate the VOICE steering wheel switch and listen for the SYNC audible prompt.
-
NOTE:
Make sure the interior of the vehicle is as
quiet as possible. Excessive noise may prevent the system from correctly
recognizing spoken commands.
Clearly speak the word "phone."
Does the SYNC system respond correctly to the "phone" voice command?
| Yes |
For a concern with the voice recognition being
inoperative or not operating correctly, the system is operating
correctly at this time. The concern may have been caused by an
insufficiently quiet vehicle. Delete the just-paired Bluetooth phone
from the SYNC system. For information on deleting a Bluetooth device
from the SYNC system, refer to the Owner Literature.
For a concern with poor quality or no outgoing audio
being heard on the outside device during a phone call, GO to P4
|
|
| P4 CHECK THE OUTGOING PHONE CALL QUALITY AND VOICE VOLUME |
-
Make sure the Bluetooth phone paired in step 3 has adequate reception.
-
NOTE:
Make sure the interior of the vehicle is as
quiet as possible. Excessive noise may prevent the call from having
clear call quality and acceptable voice volume.
Using the SYNC system, place a phone call. For
information on making calls from the SYNC system, refer to the Owner's
Literature.
-
Make sure the called party's phone has adequate reception.
-
Instruct the called party to determine if the call quality is clear and of acceptable volume.
-
Delete the Bluetooth phone paired in step 3 from the
SYNC system. For information on deleting a Bluetooth device from the
SYNC system, refer to the Owner Literature.
Is the outgoing call quality clear and of acceptable volume?
| Yes |
The system is operating correctly at this time. The
concern may have been caused by poor phone reception or an
insufficiently quiet vehicle.
|
|
| P5 CHECK THE MICROPHONE AND MICROPHONE CIRCUITS FOR CORRECT VOLTAGE DROP |
|
NOTICE:
This pinpoint test step directs testing circuits
using a back-probe method. Use the special back-probe tool POM6411. Do
not force test leads or other probes into connectors. Adequate care must
be exercised to avoid connector terminal damage, while making sure that
good electrical contact is made with the circuit or terminal. Failure
to follow these instructions may cause damage to wiring, terminals, or
connectors, and may cause subsequent electrical faults.
-
While back-probing Microphone C9221, measure and record the DC voltage.
Click to display connectors
|
Positive Lead
|
Measurement / Action
|
Negative Lead
|
|
C9221-2
|
|
C9221-3
|
Is the voltage between 2.7 and 6.2 volts?
| Yes |
If diagnosing an intermittent concern, GO to P6
If not diagnosing an intermittent concern, GO to P12
|
|
| P6 CHECK THE MICROPHONE CIRCUITS FOR INTERMITTENT CONCERNS |
|
NOTICE:
This pinpoint test step directs testing circuits
using a back-probe method. Use the special back-probe tool POM6411. Do
not force test leads or other probes into connectors. Adequate care must
be exercised to avoid connector terminal damage, while making sure that
good electrical contact is made with the circuit or terminal. Failure
to follow these instructions may cause damage to wiring, terminals, or
connectors, and may cause subsequent electrical faults.
-
While back-probing the microphone C9221, measure the DC voltage while
agitating the microphone harness back and forth and up and down (wiggle
testing).
Click to display connectors
|
Positive Lead
|
Measurement / Action
|
Negative Lead
|
|
C9221-2
|
|
C9221-3
|
-
Review the recorded results from step 5.
Does the voltage fluctuate more than 0.5 volts from the recorded result in step 5?
| Yes |
REPAIR the circuit(s), connector, or terminal(s) in
question. For corrosion, CLEAN pins or INSTALL a new connector or
terminals. For damaged or bent pins, INSTALL new terminals or pins.
|
|
| P7 CHECK THE MICROPHONE CIRCUITS TO THE APIM (SYNC MODULE)
FOR A SHORT TO VOLTAGE |
-
Disconnect: Microphone C9221.
-
Measure:
Click to display connectors
|
Positive Lead
|
Measurement / Action
|
Negative Lead
|
|
C9221-2
|
|
Ground
|
|
C9221-3
|
|
Ground
|
Is any voltage present?
| Yes |
REPAIR the circuit in question.
|
|
| P8 CHECK THE MICROPHONE CIRCUITS TO THE APIM (SYNC MODULE)
FOR A SHORT TO GROUND |
-
Measure:
Click to display connectors
|
Positive Lead
|
Measurement / Action
|
Negative Lead
|
|
C9221-2
|
|
Ground
|
|
C9221-3
|
|
Ground
|
Are the resistances greater than 10,000 ohms?
| No |
REPAIR the circuit in question.
|
|
| P9 CHECK THE MICROPHONE CIRCUITS TO THE APIM (SYNC MODULE)
FOR AN OPEN |
-
Measure:
Click to display connectors
|
Positive Lead
|
Measurement / Action
|
Negative Lead
|
|
C9221-2
|
|
C2383-5
|
|
C9221-3
|
|
C2383-6
|
Are the resistances less than 3 ohms?
| No |
REPAIR the circuit in question.
|
|
| P10 CHECK THE MICROPHONE CIRCUITS TO THE APIM (SYNC MODULE)
FOR A SHORT TOGETHER |
-
Measure:
Click to display connectors
|
Positive Lead
|
Measurement / Action
|
Negative Lead
|
|
C9221-2
|
|
C9221-3
|
Is the resistance greater than 10,000 ohms?
| No |
REPAIR the circuit in question.
|
|
| P11 ISOLATE THE MICROPHONE |
-
Install a new microphone.
REFER to: Microphone
(415-00B Information and Entertainment System - General Information -
Vehicles With: AM/FM/CD/SYNC/Touchscreen Display, Removal and
Installation).
-
If disconnected, connect: APIM
C2383.
-
Operate the audio system in AM / FM mode.
-
Operate the VOICE steering wheel switch and listen for the SYNC® audible prompt.
-
Speak a command to test the voice recognition for normal operation.
Is the voice recognition functioning correctly?
| Yes |
The system is operating correctly at this time. The concern was caused by an inoperative microphone.
|
|
| P12 CHECK FOR CORRECT APIM (SYNC MODULE)
OPERATION |
-
Disconnect and inspect the APIM connector.
-
Repair:
-
corrosion (clean module pins or install new connectors or terminals)
-
damaged or bent pins (install new terminals or pins)
-
pushed-out pins (install new pins as necessary)
-
Reconnect the APIM connector. Make sure they seat and latch correctly.
-
Wait at least 2 minutes for the APIM to re-initialize.
-
Operate the system and determine if the concern is still present.
Is the concern still present?
| Yes |
CHECK OASIS for any applicable Technical Service Bulletins (TSBs). If a
TSB exists for this concern, discontinue this test and follow TSB
instructions. If no Technical Service Bulletins (TSBs) address this
concern,
| COMPLETE THE FDRS GUIDED ROUTINE |
- NOTE: This procedure must be completed using FDRS. Do not clear DTCs until the FDRS procedure has completed.
To complete the diagnosis, navigate to the FDRS Guided Routine tab and carry out the procedure SYNC.
|
|
| No |
The system is operating correctly at this time. The
concern may have been caused by module connections. ADDRESS the root
cause of any connector or pin issues.
|
|
The Audio Input Jack Is Inoperative Or Does Not Operate Correctly
Refer to Wiring Diagrams Cell 130 for schematic and connector information.
Normal Operation and Fault Conditions
REFER to: Information and Entertainment System - System Operation
and Component Description (415-00A Information and Entertainment System -
General Information - Vehicles With: AM/FM/CD/SYNC, Description and
Operation).
Possible Sources
-
Portable audio device
-
Wiring, terminals, or connectors
-
Audio input jack
-
APIM
PINPOINT TEST Q: THE AUDIO INPUT JACK IS INOPERATIVE OR DOES NOT OPERATE CORRECTLY
| Q1 RESET THE APIM (SYNC MODULE)
AND RECHECK SYNC® SYSTEM OPERATION |
-
Remove any devices connected to the USB port and audio input jack.
-
Carry out an APIM power reset by disconnecting the battery for 1 minute, then reconnecting it.
-
Wait at least 2 minutes for the APIM to re-initialize.
-
Connect: Multi-Media Interface Tester 105-00120.
-
Using the Multi-Media Interface Tester 105-00120, attempt to play an audio file using the audio input jack.
Is the audio output OK for the audio input jack?
| Yes |
The system is operating correctly at this time. The concern was
corrected by carrying out the APIM power reset. If the device still does
not operate correctly, the fault is with the device.
|
|
| Q2 CHECK THE AUDIO INPUT JACK CIRCUITS FOR A SHORT TO VOLTAGE |
-
Disconnect: Audio Input Jack C3312.
-
Measure:
Click to display connectors
|
Positive Lead
|
Measurement / Action
|
Negative Lead
|
|
C3312-1
|
|
Ground
|
|
C3312-2
|
|
Ground
|
|
C3312-4
|
|
Ground
|
Is any voltage present?
| Yes |
REPAIR the circuit in question.
|
|
| Q3 CHECK THE AUDIO INPUT JACK CIRCUITS FOR A SHORT TO GROUND |
-
Measure:
Click to display connectors
|
Positive Lead
|
Measurement / Action
|
Negative Lead
|
|
C3312-1
|
|
Ground
|
|
C3312-2
|
|
Ground
|
|
C3312-4
|
|
Ground
|
Are the resistances greater than 10,000 ohms?
| No |
REPAIR the circuit. TEST the system for normal operation.
|
|
| Q4 CHECK THE AUDIO INPUT JACK CIRCUITS FOR AN OPEN |
-
Measure:
Click to display connectors
|
Positive Lead
|
Measurement / Action
|
Negative Lead
|
|
C3312-1
|
|
C2383-47
|
|
C3312-2
|
|
C2383-46
|
|
C3312-4
|
|
C2383-45
|
Are the resistances less than 3 ohms?
| No |
REPAIR the circuit in question. TEST the system for normal operation.
|
|
| Q5 ISOLATE THE AUDIO INPUT JACK |
-
Install a new audio input jack.
-
Connect: Multi-Media Interface Tester 105-00120.
-
Using the Multi-Media Interface Tester 105-00120, attempt to play an audio file using the audio input jack.
Is the audio output OK for the audio input jack?
| Yes |
The system is operating correctly at this time. The concern was caused by an inoperative audio input jack.
|
|
| Q6 CHECK FOR CORRECT APIM (SYNC MODULE)
OPERATION |
-
Disconnect and inspect the APIM connector.
-
Repair:
-
corrosion (clean module pins or install new connectors or terminals)
-
damaged or bent pins (install new terminals or pins)
-
pushed-out pins (install new pins as necessary)
-
Reconnect the APIM connector. Make sure it seats and latches correctly.
-
Operate the system and determine if the concern is still present.
Is the concern still present?
| Yes |
CHECK OASIS for any applicable Technical Service Bulletins (TSBs). If a
TSB exists for this concern, discontinue this test and follow TSB
instructions. If no Technical Service Bulletins (TSBs) address this
concern, CARRY OUT the APIM Hardware Test.
| COMPLETE THE FDRS GUIDED ROUTINE |
- NOTE: This procedure must be completed using FDRS. Do not clear DTCs until the FDRS procedure has completed.
To complete the diagnosis, navigate to the FDRS Guided Routine tab and carry out the procedure SYNC.
|
|
| No |
The system is operating correctly at this time. The
concern may have been caused by module connections. ADDRESS the root
cause of any connector or pin issues.
|
|
The USB Port Is Inoperative Or Does Not Operate Correctly
Refer to Wiring Diagrams Cell 130 for schematic and connector information.
Normal Operation and Fault Conditions
REFER to: Information and Entertainment System - System Operation
and Component Description (415-00A Information and Entertainment System -
General Information - Vehicles With: AM/FM/CD/SYNC, Description and
Operation).
The Multi-Media Interface Tester 105-00120 is powered by the USB port
DTC Fault Trigger Conditions
|
DTC
|
Description
|
Fault Trigger Conditions
|
|
B1252:04
|
USB Port: System Internal Failure
|
Set by the APIM when an over-temperature condition is detected on the
USB cable. This can be caused by a fault on the USB cable/ port, or USB
device.
|
|
B1252:11
|
USB Port: Circuit Short to Ground
|
Set by the APIM when a short to ground or over-current condition is
detected in the USB cable. This can be caused by a fault in the USB
cable/port, or USB device.
|
Possible Sources
-
USB device
-
USB cable/port
-
USB cable/port connection
-
APIM
PINPOINT TEST R: THE USB (UNIVERSAL SERIAL BUS)
PORT IS INOPERATIVE OR DOES NOT OPERATE CORRECTLY
| R1 CHECK THE USB (UNIVERSAL SERIAL BUS)
PORT FOR POWER OUTPUT |
-
Connect: Multi-Media Interface Tester 105-00120.
Does the Multi-Media Interface Tester 105-00120 power on from the USB port?
|
| R2 RESET THE APIM (SYNC MODULE)
AND RECHECK SYNC® SYSTEM OPERATION |
-
Remove any devices connected to the USB port and audio input jack.
-
Carry out an APIM power reset by disconnecting the battery for 1 minute, then reconnecting it.
-
Wait at least 2 minutes for the APIM to re-initialize.
-
Connect: Multi-Media Interface Tester 105-00120.
-
Using the Multi-Media Interface Tester 105-00120, attempt to play an audio file using the USB port.
Is the audio output OK for the USB port?
| Yes |
The system is operating correctly at this time. The concern was
corrected by carrying out the APIM power reset. If the device still does
not operate correctly, the fault is with the device.
|
|
| R3 CHECK THE APIM (SYNC MODULE)
FOR DTC (DIAGNOSTIC TROUBLE CODE)
B1252:04 OR DTC (DIAGNOSTIC TROUBLE CODE)
B1252:11 |
-
Using a diagnostic scan tool, clear the APIM Diagnostic Trouble Codes (DTCs).
-
Perform the APIM self-test.
Is DTC B1252:04 or DTC B1252:11 present?
|
| R4 INSPECT THE USB (UNIVERSAL SERIAL BUS)
CABLE AND APIM (SYNC MODULE)
|
-
Disconnect: USB cable at APIM .
-
Inspect the APIM connector port and both ends of the USB cable for damage. Remove any debris.
Is any damage present?
| Yes |
For the USB cable, INSTALL a new USB cable/port.
REFER to: SYNC
Module [APIM] to Universal Serial Bus (USB) Port Cable (415-00A
Information and Entertainment System - General Information - Vehicles
With: AM/FM/CD/SYNC, Removal and Installation).
For the APIM ,
| COMPLETE THE FDRS GUIDED ROUTINE |
- NOTE: This procedure must be completed using FDRS. Do not clear DTCs until the FDRS procedure has completed.
To complete the diagnosis, navigate to the FDRS Guided Routine tab and carry out the procedure SYNC.
|
|
|
| R5 CHECK THE USB (UNIVERSAL SERIAL BUS)
PORT FOR FUNCTIONALITY |
-
Connect: USB Cable At APIM .
-
Connect: Multi-Media Interface Tester 105-00120.
-
Using the Multi-Media Interface Tester 105-00120, attempt to play an audio file using the USB port.
Is the audio output OK for the USB port?
| Yes |
The system is operating correctly at this time. The concern was caused by the USB connector not being seated correctly.
|
|
| R6 ISOLATE THE USB (UNIVERSAL SERIAL BUS)
CABLE/PORT |
-
Install a new USB cable/port.
REFER to: SYNC Module [APIM] to
Universal Serial Bus (USB) Port Cable (415-00A Information and
Entertainment System - General Information - Vehicles With:
AM/FM/CD/SYNC, Removal and Installation).
-
Connect: Multi-Media Interface Tester 105-00120.
-
Using the Multi-Media Interface Tester 105-00120, attempt to play a file using the USB port.
Is the audio output OK for the USB port?
| Yes |
The system is operating correctly at this time. The concern was caused by an inoperative USB cable.
|
|
| R7 CHECK FOR CORRECT APIM (SYNC MODULE)
OPERATION |
-
Disconnect and inspect the APIM connector.
-
Repair:
-
corrosion (clean module pins or install new connectors or terminals)
-
damaged or bent pins (install new terminals or pins)
-
pushed-out pins (install new pins as necessary)
-
Reconnect the APIM connector. Make sure it seats and latches correctly.
-
Wait at least 2 minutes for the APIM to re-initialize.
-
Operate the system and determine if the concern is still present.
Is the concern still present?
| Yes |
CHECK OASIS for any applicable Technical Service Bulletins (TSBs). If a
TSB exists for this concern, discontinue this test and follow TSB
instructions. If no Technical Service Bulletins (TSBs) address this
concern,
| COMPLETE THE FDRS GUIDED ROUTINE |
- NOTE: This procedure must be completed using FDRS. Do not clear DTCs until the FDRS procedure has completed.
To complete the diagnosis, navigate to the FDRS Guided Routine tab and carry out the procedure SYNC.
|
|
| No |
The system is operating correctly at this time. The
concern may have been caused by module connections. ADDRESS the root
cause of any connector or pin issues.
|
|
Unable To Pair Bluetooth Device
Normal Operation and Fault Conditions
REFER to: Information and Entertainment System - System Operation
and Component Description (415-00A Information and Entertainment System -
General Information - Vehicles With: AM/FM/CD/SYNC, Description and
Operation).
Possible Sources
-
Incompatible Bluetooth device
-
APIM
PINPOINT TEST S: UNABLE TO PAIR BLUETOOTH DEVICE
| S1 CHECK THE BLUETOOTH CONNECTION |
|
NOTE:
Carrying out a Master Reset returns all preference
settings to the factory defaults, erases the phone book and call
histories, and deletes any devices paired with the SYNC® system.
-
Connect one of the following to a USB port:
-
MIT (105-00120 or Rotunda part # 105-00120-RCA)
-
MIT (420-373 or Rotunda part # 105-00120-GEN2) or later version
-
Verification tool equivalent to the MIT (only if the MIT
is not available)
-
Compatible Bluetooth Device (only if the MIT or equivalent verification tool are not available). Refer to the appropriate Ford authorized website.
-
With the MIT , equivalent verification tool, or compatible Bluetooth
device in Bluetooth mode, pair it with the APIM . If necessary, follow
the device instructions for Bluetooth pairing.
-
Using a diagnostic scan tool, view the APIM Parameter Identifications (PIDs).
-
Monitor the Bluetooth device paired PID (BT_PAIR) and the Bluetooth device connected PID (BT_CONN).
Do the Parameter Identifications (PIDs) both read "Yes"?
| Yes |
The SYNC system is operating correctly at this time.
CARRY OUT a SYNC system Master Reset. REFER to the Owner Literature.
REVIEW the pairing process with the vehicle owner. If the device still
does not pair, the fault is with the device.
|
|
| S2 CHECK FOR CORRECT APIM (SYNC MODULE)
OPERATION |
-
Disconnect and inspect the APIM connector.
-
Repair:
-
corrosion (clean module pins or install new connectors or terminals)
-
damaged or bent pins (install new terminals or pins)
-
pushed-out pins (install new pins as necessary)
-
Reconnect the APIM connector. Make sure it seats and latches correctly.
-
Wait at least 2 minutes for the APIM to re-initialize.
-
Operate the system and determine if the concern is still present.
Is the concern still present?
| Yes |
CHECK OASIS for any applicable Technical Service Bulletins (TSBs). If a
TSB exists for this concern, discontinue this test and follow TSB
instructions. If no Technical Service Bulletins (TSBs) address this
concern, CARRY OUT the APIM Hardware Test.
| COMPLETE THE FDRS GUIDED ROUTINE |
- NOTE: This procedure must be completed using FDRS. Do not clear DTCs until the FDRS procedure has completed.
To complete the diagnosis, navigate to the FDRS Guided Routine tab and carry out the procedure SYNC.
|
|
| No |
The system is operating correctly at this time. The
concern may have been caused by module connections. ADDRESS the root
cause of any connector or pin issues.
|
|
The Audio/SYNC Steering Wheel Switches Are Inoperative
Refer to Wiring Diagrams Cell 130 for schematic and connector information.
Normal Operation and Fault Conditions
REFER to: Information and Entertainment System - System Operation
and Component Description (415-00A Information and Entertainment System -
General Information - Vehicles With: AM/FM/CD/SYNC, Description and
Operation).
DTC Fault Trigger Conditions
|
DTC
|
Description
|
Fault Trigger Conditions
|
|
B10BD:11
|
Multifunctional Switch: Circuit Short to Ground
|
Set by the FCDIM when a short to ground is detected on the LH steering wheel switch circuits.
|
|
B10BD:13
|
Multifunctional Switch: Circuit Open
|
Set by the FCDIM when an open is detected on the LH steering wheel switch circuits.
|
|
B10BD:23
|
Multifunctional Switch: Signal Stuck Low
|
Set by the FCDIM when the LH steering wheel switch is stuck for more than 2 minutes during normal operation.
|
Possible Sources
-
Steering wheel switch
-
Wiring, terminals, or connectors
-
Clockspring
-
FCDIM
PINPOINT TEST T: THE AUDIO/SYNC STEERING WHEEL SWITCHES ARE INOPERATIVE
| T1 CHECK THE LH (LEFT-HAND)
STEERING WHEEL SWITCH PARAMETER IDENTIFICATIONS (PIDS) |
-
Using a diagnostic scan tool, view the FCDIM Parameter Identifications (PIDs).
-
Monitor the steering wheel switch Parameter Identifications (PIDs) while pressing each LH steering wheel switch.
-
Voice (SW_VOICE)
-
Seek+ (SW_SEEKPLUS)
-
Seek– (SW_SEEKMINUS)
-
Volume+ (SW_VOLUP)
-
Volume- (SW_VOLDOWN)
Do the PID values agree with the switch positions?
| No |
If one or more, but not all PID values are incorrect or always read one
particular switch position, INSTALL a new LH steering wheel switch.
REFER
to: Steering Wheel Multifunction Switch (211-05 Steering Wheel and
Column Electrical Components, Removal and Installation).
If all PID values are incorrect or always read one particular switch
position, GO to T2
|
|
| T2 CHECK FOR VOLTAGE FROM THE FCDIM (FRONT CONTROL/DISPLAY INTERFACE MODULE)
|
|
 WARNING:
Turn the ignition OFF and wait one minute to deplete
the backup power supply. Failure to follow this instruction may result
in serious personal injury or death in the event of an accidental
deployment.
WARNING:
Turn the ignition OFF and wait one minute to deplete
the backup power supply. Failure to follow this instruction may result
in serious personal injury or death in the event of an accidental
deployment.
-
Remove the driver airbag.
REFER to: Driver Airbag (501-20B Supplemental Restraint System, Removal and Installation).
-
Disconnect: Left Steering Wheel Switch C2998.
-
Measure:
Click to display connectors
|
Positive Lead
|
Measurement / Action
|
Negative Lead
|
|
C2998-2
|
|
C2998-4
|
Is approximately 5 volts present?
| Yes |
INSTALL a new left steering wheel switch.
REFER to: Steering Wheel
Multifunction Switch (211-05 Steering Wheel and Column Electrical
Components, Removal and Installation).
|
|
| T3 CHECK THE STEERING WHEEL HARNESS FOR A SHORT TO VOLTAGE |
-
Disconnect: Clockspring C218C.
-
Measure:
Click to display connectors
|
Positive Lead
|
Measurement / Action
|
Negative Lead
|
|
C2998-2
|
|
Ground
|
|
C2998-4
|
|
Ground
|
Is any voltage present?
| Yes |
INSTALL a new steering wheel.
REFER to: Steering Wheel (211-04 Steering Column, Removal and Installation).
|
|
| T4 CHECK THE STEERING WHEEL HARNESS FOR A SHORT TO GROUND |
-
Measure:
Click to display connectors
|
Positive Lead
|
Measurement / Action
|
Negative Lead
|
|
C2998-2
|
|
Ground
|
|
C2998-4
|
|
Ground
|
Are the resistances greater than 10,000 ohms?
| No |
INSTALL a new steering wheel.
REFER to: Steering Wheel (211-04 Steering Column, Removal and Installation).
|
|
| T5 CHECK THE STEERING WHEEL HARNESS FOR AN OPEN |
-
Measure:
Click to display connectors
|
Positive Lead
|
Measurement / Action
|
Negative Lead
|
|
C2998-2
|
|
C218C-11
|
|
C2998-4
|
|
C218C-10
|
Are the resistances less than 3 ohms?
| No |
INSTALL a new steering wheel.
REFER to: Steering Wheel (211-04 Steering Column, Removal and Installation).
|
|
| T6 CHECK THE STEERING WHEEL HARNESS FOR A SHORT TOGETHER |
-
Measure:
Click to display connectors
|
Positive Lead
|
Measurement / Action
|
Negative Lead
|
|
C2998-2
|
|
C2998-4
|
Is the resistance greater than 10,000 ohms?
| No |
INSTALL a new steering wheel.
REFER to: Steering Wheel (211-04 Steering Column, Removal and Installation).
|
|
| T7 CHECK THE CLOCKSPRING FOR A SHORT TO VOLTAGE |
-
Connect: Clockspring C218C.
-
Disconnect: Clockspring C218B.
-
Measure:
Click to display connectors
|
Positive Lead
|
Measurement / Action
|
Negative Lead
|
|
C2998-2
|
|
Ground
|
|
C2998-4
|
|
Ground
|
Is any voltage present?
| Yes |
REPAIR the circuit in question.
|
|
| T8 CHECK THE CLOCKSPRING FOR A SHORT TO GROUND |
-
Measure:
Click to display connectors
|
Positive Lead
|
Measurement / Action
|
Negative Lead
|
|
C2998-2
|
|
Ground
|
|
C2998-4
|
|
Ground
|
Are the resistances greater than 10,000 ohms?
| No |
INSTALL a new clockspring.
REFER to: Clockspring (501-20B Supplemental Restraint System, Removal and Installation).
|
|
| T9 CHECK THE CLOCKSPRING FOR AN OPEN |
-
Measure:
Click to display connectors
|
Positive Lead
|
Measurement / Action
|
Negative Lead
|
|
C2998-2
|
|
C218B-14 (Component Side)
|
|
C2998-4
|
|
C218B-12 (Component Side)
|
Are the resistances less than 3 ohms?
| No |
INSTALL a new clockspring.
REFER to: Clockspring (501-20B Supplemental Restraint System, Removal and Installation).
|
|
| T10 CHECK THE CLOCKSPRING FOR A SHORT TOGETHER |
-
Measure:
Click to display connectors
|
Positive Lead
|
Measurement / Action
|
Negative Lead
|
|
C2998-2
|
|
C2998-4
|
Is the resistance greater than 10,000 ohms?
| No |
INSTALL a new clockspring.
REFER to: Clockspring (501-20B Supplemental Restraint System, Removal and Installation).
|
|
| T11 CHECK THE CIRCUITRY TO THE CLOCKSPRING FOR A SHORT TO VOLTAGE |
-
Connect: Clockspring C218B.
-
Measure:
Click to display connectors
|
Positive Lead
|
Measurement / Action
|
Negative Lead
|
|
C2998-2
|
|
Ground
|
|
C2998-4
|
|
Ground
|
Is any voltage present?
| Yes |
REPAIR the circuit in question.
|
|
| T12 CHECK THE CIRCUITRY TO THE CLOCKSPRING FOR A SHORT TO GROUND |
-
Measure:
Click to display connectors
|
Positive Lead
|
Measurement / Action
|
Negative Lead
|
|
C2998-2
|
|
Ground
|
|
C2998-4
|
|
Ground
|
Are the resistances greater than 10,000 ohms?
| No |
REPAIR the circuit in question.
|
|
| T13 CHECK THE CIRCUITRY TO THE CLOCKSPRING FOR AN OPEN |
-
Measure:
Click to display connectors
|
Positive Lead
|
Measurement / Action
|
Negative Lead
|
|
C2998-2
|
|
C2123-7
|
|
C2998-4
|
|
C2123-10
|
Are the resistances less than 3 ohms?
| No |
REPAIR the circuit in question.
|
|
| T14 CHECK THE CIRCUITRY TO THE CLOCKSPRING FOR A SHORT TOGETHER |
-
Measure:
Click to display connectors
|
Positive Lead
|
Measurement / Action
|
Negative Lead
|
|
C2998-2
|
|
C2998-4
|
Is the resistance greater than 10,000 ohms?
| No |
REPAIR the circuit in question.
|
|
| T15 CHECK FOR CORRECT FCDIM (FRONT CONTROL/DISPLAY INTERFACE MODULE)
OPERATION |
-
Disconnect and inspect the FCDIM connector.
-
Repair:
-
corrosion (clean module pins or install new connectors or terminals)
-
damaged or bent pins (install new terminals or pins)
-
pushed-out pins (install new pins as necessary)
-
Reconnect the FCDIM connector. Make sure it seats and latches correctly.
-
Operate the system and determine if the concern is still present.
Is the concern still present?
| Yes |
CHECK OASIS for any applicable Technical Service Bulletins (TSBs). If a
TSB exists for this concern, discontinue this test and follow TSB
instructions. If no Technical Service Bulletins (TSBs) address this
concern, INSTALL a new FCDIM .
REFER to: Front Control/Display
Interface Module (FCDIM) (415-00A Information and Entertainment System -
General Information - Vehicles With: AM/FM/CD/SYNC, Removal and
Installation).
|
| No |
The system is operating correctly at this time. The
concern may have been caused by module connections. ADDRESS the root
cause of any connector or pin issues.
|
|
The Audio System Does Not Operate Correctly From The FCIM
Normal Operation and Fault Conditions
REFER to: Information and Entertainment System - System Operation
and Component Description (415-00A Information and Entertainment System -
General Information - Vehicles With: AM/FM/CD/SYNC, Description and
Operation).
DTC Fault Trigger Conditions
|
DTC
|
Description
|
Fault Trigger Conditions
|
|
U1A00:00
|
Private Communication Network: No Sub Type Information
|
Set by the FCDIM when a LIN message from the FCIM is missing for more
than 2 seconds with the ignition in RUN. This does not necessarily
indicate a fault in the LIN circuit, as a loss of power or ground to the
FCIM can also cause a lack of communication.
|
Possible Sources
-
Wiring, terminals, or connectors
-
FCIM
-
FCDIM
PINPOINT TEST U: THE AUDIO SYSTEM DOES NOT OPERATE CORRECTLY FROM THE FCIM (FRONT CONTROLS INTERFACE MODULE)
| U1 VERIFY THE ACM (AUDIO FRONT CONTROL MODULE)
AND FCDIM (FRONT CONTROL/DISPLAY INTERFACE MODULE)
PASS THE NETWORK TEST |
-
Using a diagnostic scan tool, carry out the network test.
Does the ACM and FCDIM pass the network test?
| No |
REFER to: Communications Network (418-00 Module Communications Network, Diagnosis and Testing).
|
|
| U2 CHECK FOR LOST COMMUNICATION DIAGNOSTIC TROUBLE CODES (DTCS) |
-
Using a diagnostic scan tool, clear all Continuous Memory Diagnostic Trouble Codes (CMDTCs).
-
Wait at least 10 seconds.
-
Using a diagnostic scan tool, carry out the self-test for the following modules:
Is DTC U0193:00 or U0257:00 present?
| Yes |
For DTC U0193:00, GO to Pinpoint Test AA
For DTC U0257:00, GO to Pinpoint Test AC
|
|
| U3 CHECK THE FCDIM (FRONT CONTROL/DISPLAY INTERFACE MODULE)
PARAMETER IDENTIFICATIONS (PIDS) FOR FCIM (FRONT CONTROLS INTERFACE MODULE)
BUTTON INPUTS |
-
Using a diagnostic scan tool, view the FCDIM Parameter Identification (PIDs).
-
NOTE:
The button Parameter Identification (PIDs) begin
with the prefix "BTN_" and end with the indicated button. For example,
PID BTN_EJECT correlates with the eject button on the FCIM .
Monitor the FCDIM Parameter Identification (PIDs) while pressing each
FCIM button.
Do the PID values agree with the button presses?
| No |
If one or more, but not all PID values are incorrect or always read one particular switch position, GO to U10
If all PID values are incorrect or always read one particular switch position, GO to U4
|
|
| U4 CHECK THE FCIM (FRONT CONTROLS INTERFACE MODULE)
VOLTAGE SUPPLY |
-
Measure:
Click to display connectors
|
Positive Lead
|
Measurement / Action
|
Negative Lead
|
|
C2402-8
|
|
Ground
|
Is the voltage greater than 11 volts?
|
| U5 CHECK THE FCIM (FRONT CONTROLS INTERFACE MODULE)
GROUND CIRCUIT |
-
Measure:
Click to display connectors
|
Positive Lead
|
Measurement / Action
|
Negative Lead
|
|
C2402-8
|
|
C2402-5
|
Is the voltage greater than 11 volts?
|
| U6 CHECK THE LIN (LOCAL INTERCONNECT NETWORK)
CIRCUIT FOR A SHORT TO VOLTAGE |
-
Measure:
Click to display connectors
|
Positive Lead
|
Measurement / Action
|
Negative Lead
|
|
C2402-7
|
|
Ground
|
Is any voltage present?
|
| U7 CHECK THE LIN (LOCAL INTERCONNECT NETWORK)
CIRCUIT FOR AN OPEN |
-
Measure:
Click to display connectors
|
Positive Lead
|
Measurement / Action
|
Negative Lead
|
|
C2402-7
|
|
C2123-8
|
Is the resistance less than 3 ohms?
|
| U8 CHECK THE LIN (LOCAL INTERCONNECT NETWORK)
CIRCUIT FOR A SHORT TO GROUND |
-
Measure:
Click to display connectors
|
Positive Lead
|
Measurement / Action
|
Negative Lead
|
|
C2402-7
|
|
Ground
|
Is the resistance greater than 10,000 ohms?
|
| U9 RECHECK FOR DTC (DIAGNOSTIC TROUBLE CODE)
U1A00:00 |
-
Using a diagnostic scan tool, clear all Continuous Memory Diagnostic Trouble Codes (CMDTCs).
-
Wait at least 10 seconds.
-
Using a diagnostic scan tool, carry out the FCDIM self-test.
Is DTC U1A00:00 set in the FCDIM ?
|
| U10 CHECK FOR CORRECT FCIM (FRONT CONTROLS INTERFACE MODULE)
OPERATION |
-
Disconnect and inspect the FCIM connector.
-
Repair:
-
corrosion (clean module pins or install new connectors or terminals)
-
damaged or bent pins (install new terminals or pins)
-
pushed-out pins (install new pins as necessary)
-
Reconnect the FCIM connector. Make sure it seats and latches correctly.
-
Operate the system and determine if the concern is still present.
Is the concern still present?
| Yes |
CHECK OASIS for any applicable Technical Service Bulletins (TSBs). If a
TSB exists for this concern, discontinue this test and follow TSB
instructions. If no Technical Service Bulletins (TSBs) address this
concern, INSTALL a new FCIM .
REFER to: Front Controls Interface
Module (FCIM) (415-00A Information and Entertainment System - General
Information - Vehicles With: AM/FM/CD/SYNC, Removal and Installation).
|
| No |
The system is operating correctly at this time. The
concern may have been caused by module connections. ADDRESS the root
cause of any connector or pin issues.
|
|
| U11 CHECK FOR CORRECT FCDIM (FRONT CONTROL/DISPLAY INTERFACE MODULE)
OPERATION |
-
Disconnect and inspect the FCDIM connector.
-
Repair:
-
corrosion (clean module pins or install new connectors or terminals)
-
damaged or bent pins (install new terminals or pins)
-
pushed-out pins (install new pins as necessary)
-
Reconnect the FCDIM connector. Make sure it seats and latches correctly.
-
Operate the system and determine if the concern is still present.
Is the concern still present?
| Yes |
CHECK OASIS for any applicable Technical Service Bulletins (TSBs). If a
TSB exists for this concern, discontinue this test and follow TSB
instructions. If no Technical Service Bulletins (TSBs) address this
concern, INSTALL a new FCDIM .
REFER to: Front Control/Display
Interface Module (FCDIM) (415-00A Information and Entertainment System -
General Information - Vehicles With: AM/FM/CD/SYNC, Removal and
Installation).
|
| No |
The system is operating correctly at this time. The
concern may have been caused by module connections. ADDRESS the root
cause of any connector or pin issues.
|
|
The FCDIM Is Inoperative Or Does Not Operate Correctly
Normal Operation and Fault Conditions
REFER to: Information and Entertainment System - System Operation
and Component Description (415-00A Information and Entertainment System -
General Information - Vehicles With: AM/FM/CD/SYNC, Description and
Operation).
Possible Source
PINPOINT TEST V: THE FCDIM (FRONT CONTROL/DISPLAY INTERFACE MODULE)
IS INOPERATIVE OR DOES NOT OPERATE CORRECTLY
| V1 VERIFY THE FCDIM (FRONT CONTROL/DISPLAY INTERFACE MODULE)
RESPONSE TO FCIM (FRONT CONTROLS INTERFACE MODULE)
INPUTS |
-
Turn the audio system on.
-
Press each FCIM button and observe the FCDIM display to check for proper operation.
Does the FCDIM display respond correctly to each FCIM input?
| Yes |
VERIFY the specific concern by duplicating the steps
that were taken when the original concern was generated. If the concern
is not duplicated, the system is operating correctly at this time.
INSTRUCT the vehicle owner in the correct operation of the FCDIM .
|
| No |
If the FCDIM
is completely inoperative or blank, GO to V2
If the FCDIM
is not completely inoperative or blank, GO to V3
|
|
| V2 VERIFY THE FCDIM (FRONT CONTROL/DISPLAY INTERFACE MODULE)
PASSES THE NETWORK TEST |
-
Using a diagnostic scan tool, carry out the network test.
Does the FCDIM pass the network test?
| No |
REFER to: Communications Network (418-00 Module Communications Network, Diagnosis and Testing).
|
|
| V3 CHECK FOR LOST COMMUNICATION DIAGNOSTIC TROUBLE CODES (DTCS) SET IN THE FCDIM (FRONT CONTROL/DISPLAY INTERFACE MODULE)
|
-
Using a diagnostic scan tool, retrieve all Continuous Memory Diagnostic Trouble Codes (CMDTCs).
Are any lost communication Diagnostic Trouble Codes (DTCs) (U-codes) present in the FCDIM ?
| Yes |
REFER to the FCDIM
DTC Chart: in this section.
|
|
| V4 CHECK THE FCDIM (FRONT CONTROL/DISPLAY INTERFACE MODULE)
DISPLAY SEGMENTS |
-
Using a diagnostic scan tool, view the FCDIM Parameter Identifications (PIDs).
-
Command all of the LCD segments on using the FCDIM active command LCD_SEG (All LCD Segments).
Do all of the FCDIM segments illuminate?
| Yes |
GO to Pinpoint Test U
|
|
| V5 CHECK FOR CORRECT FCDIM (FRONT CONTROL/DISPLAY INTERFACE MODULE)
OPERATION |
-
Disconnect and inspect the FCDIM connector.
-
Repair:
-
corrosion (clean module pins or install new connectors or terminals)
-
damaged or bent pins (install new terminals or pins)
-
pushed-out pins (install new pins as necessary)
-
Reconnect the FCDIM connector. Make sure it seats and latches correctly.
-
Operate the system and determine if the concern is still present.
Is the concern still present?
| Yes |
CHECK OASIS for any applicable Technical Service Bulletins (TSBs). If a
TSB exists for this concern, discontinue this test and follow TSB
instructions. If no Technical Service Bulletins (TSBs) address this
concern, INSTALL a new FCDIM .
REFER to: Front Control/Display
Interface Module (FCDIM) (415-00A Information and Entertainment System -
General Information - Vehicles With: AM/FM/CD/SYNC, Removal and
Installation).
|
| No |
The system is operating correctly at this time. The
concern may have been caused by module connections. ADDRESS the root
cause of any connector or pin issues.
|
|
The Compass Is Inoperative Or Does Not Operate Correctly
Normal Operation and Fault Conditions
REFER to: Information and Entertainment System - System Operation
and Component Description (415-00A Information and Entertainment System -
General Information - Vehicles With: AM/FM/CD/SYNC, Description and
Operation).
Possible Source
PINPOINT TEST W: THE COMPASS IS INOPERATIVE OR DOES NOT OPERATE CORRECTLY
| W1 VERIFY THE APIM (SYNC MODULE)
AND GPSM (GLOBAL POSITIONING SYSTEM MODULE)
PASS THE NETWORK TEST |
-
Using a diagnostic scan tool, carry out the network test.
Does the APIM and GPSM pass the network test?
| No |
REFER to: Communications Network (418-00 Module Communications Network, Diagnosis and Testing).
|
|
| W2 RETRIEVE THE APIM (SYNC MODULE)
AND GPSM (GLOBAL POSITIONING SYSTEM MODULE)
DIAGNOSTIC TROUBLE CODES (DTCS) |
-
Using a diagnostic scan tool, carry out the self-test for the following modules:
Are any Diagnostic Trouble Codes (DTCs) present in the APIM or GPSM ?
| Yes |
REFER to the appropriate DTC Chart in this section.
|
|
| W3 CHECK FOR CORRECT GPSM (GLOBAL POSITIONING SYSTEM MODULE)
OPERATION |
|
NOTE:
Before operating the system to determine if the
concern is still present, make sure the vehicle is in an open location
that is free from obstacles such as tall buildings or large trees so an
adequate GPS signal can be obtained.
-
Disconnect and inspect the GPSM connector.
-
Repair:
-
corrosion (clean module pins or install new connectors or terminals)
-
damaged or bent pins (install new terminals or pins)
-
pushed-out pins (install new pins as necessary)
-
Reconnect the GPSM connector. Make sure it seats and latches correctly.
-
Operate the system and determine if the concern is still present.
Is the concern still present?
| Yes |
CHECK OASIS for any applicable Technical Service Bulletins (TSBs). If a
TSB exists for this concern, DISCONTINUE this test and FOLLOW TSB
instructions. If no Technical Service Bulletins (TSBs) address this
concern, INSTALL a new GPSM .
REFER to: Global Positioning System
Module (GPSM) (415-00A Information and Entertainment System - General
Information - Vehicles With: AM/FM/CD/SYNC, Removal and Installation).
|
| No |
The system is operating correctly at this time. The
concern may have been caused by module connections. ADDRESS the root
cause of any connector or pin issues.
|
|
U0100:00
Normal Operation and Fault Conditions
REFER to: Information and Entertainment System - System Operation
and Component Description (415-00A Information and Entertainment System -
General Information - Vehicles With: AM/FM/CD/SYNC, Description and
Operation).
DTC Fault Trigger Conditions
|
DTC
|
Description
|
Fault Trigger Conditions
|
|
U0100:00
|
Lost Communication with ECM/PCM "A": No Sub Type Information
|
Set by the GPSM when network messages are missing from the PCM for more than 5 seconds.
|
Possible Source
PINPOINT TEST X: U0100:00
| X1 VERIFY THE CONCERN |
-
Verify if there is an observable symptom present.
Is an observable symptom present?
| No |
The system is operating correctly at this time. The DTC may have been
set due to high network traffic or an intermittent fault condition.
|
|
| X2 RECHECK FOR DTC (DIAGNOSTIC TROUBLE CODE)
U0100:00 |
-
Using a diagnostic scan tool, clear all Continuous Memory Diagnostic Trouble Codes (CMDTCs).
-
Wait at least 10 seconds.
-
Using a diagnostic scan tool, retrieve all Continuous Memory Diagnostic Trouble Codes (CMDTCs).
Is DTC U0100:00 set in the GPSM ?
| No |
The system is operating correctly at this time. The DTC may have been
set due to high network traffic or an intermittent fault condition.
|
|
| X3 CHECK THE PCM (POWERTRAIN CONTROL MODULE)
FOR BATTERY VOLTAGE OUT-OF-RANGE DIAGNOSTIC TROUBLE CODES (DTCS) |
-
Using a diagnostic scan tool, carry out the PCM self-test.
Are any low or high voltage Diagnostic Trouble Codes (DTCs) recorded in the PCM ?
| Yes |
REFER to the appropriate Diagnosis and Testing in section 414-00.
|
|
| X4 CHECK THE GPSM (GLOBAL POSITIONING SYSTEM MODULE)
FOR BATTERY VOLTAGE OUT-OF-RANGE DIAGNOSTIC TROUBLE CODES (DTCS) |
-
Using a diagnostic scan tool, carry out the GPSM self-test.
Are any low or high voltage DTCs recorded in the GPSM ?
| Yes |
For DTC U3003:16, GO to Pinpoint Test AD
For DTC U3003:17, GO to Pinpoint Test AE
|
|
| X5 CHECK FOR CORRECT PCM (POWERTRAIN CONTROL MODULE)
OPERATION |
-
Disconnect and inspect the PCM connectors.
-
Repair:
-
corrosion (clean module pins or install new connectors or terminals)
-
damaged or bent pins (install new terminals or pins)
-
pushed-out pins (install new pins as necessary)
-
Reconnect the PCM connectors. Make sure they seat and latch correctly.
-
Operate the system and determine if the concern is still present.
Is the concern still present?
| Yes |
CHECK OASIS for any applicable Technical Service Bulletins (TSBs). If a
TSB exists for this concern, DISCONTINUE this test and FOLLOW TSB
instructions. If no Technical Service Bulletins (TSBs) address this
concern,
Click here to access Guided Routine (PCM).
|
| No |
The system is operating correctly at this time. The
concern may have been caused by module connections. ADDRESS the root
cause of any connector or pin issues.
|
|
U0140:00
Normal Operation and Fault Conditions
REFER to: Information and Entertainment System - System Operation
and Component Description (415-00A Information and Entertainment System -
General Information - Vehicles With: AM/FM/CD/SYNC, Description and
Operation).
DTC Fault Trigger Conditions
|
DTC
|
Description
|
Fault Trigger Conditions
|
|
U0140:00
|
Lost Communication With Body Control Module: No Sub Type Information
|
Set by the APIM , FCDIM , and GPSM when network messages are missing from the BCM for more than 5 seconds.
|
Possible Source
PINPOINT TEST Y: U0140:00
| Y1 VERIFY THE CONCERN |
-
Verify if there is an observable symptom present.
Is an observable symptom present?
| No |
The system is operating correctly at this time. The DTC may have been
set due to high network traffic or an intermittent fault condition.
|
|
| Y2 RECHECK FOR DTC (DIAGNOSTIC TROUBLE CODE)
U0140:00 |
-
Using a diagnostic scan tool, clear all Continuous Memory Diagnostic Trouble Codes (CMDTCs).
-
Wait at least 10 seconds.
-
Using a diagnostic scan tool, retrieve all Continuous Memory Diagnostic Trouble Codes (CMDTCs).
Is DTC U0140:00 set in the APIM , FCDIM , or GPSM ?
| No |
The system is operating correctly at this time. The DTC may have been
set due to high network traffic or an intermittent fault condition.
|
|
| Y3 CHECK THE BCM (BODY CONTROL MODULE)
FOR BATTERY VOLTAGE OUT-OF-RANGE DIAGNOSTIC TROUBLE CODES (DTCS) |
-
Using a diagnostic scan tool, carry out the BCM self-test.
Are any low or high voltage Diagnostic Trouble Codes (DTCs) recorded in the BCM ?
| Yes |
REFER to: Body Control Module (BCM) (419-10 Multifunction Electronic Modules, Diagnosis and Testing).
|
|
| Y4 CHECK FOR BATTERY VOLTAGE OUT-OF-RANGE DIAGNOSTIC TROUBLE CODES (DTCS) |
-
Using a diagnostic scan tool, carry out the self-test for the following modules:
Are low or high voltage Diagnostic Trouble Codes (DTCs) recorded in the APIM , FCDIM , or GPSM ?
| Yes |
For DTC U3003:16, GO to Pinpoint Test AD
For DTC U3003:17, GO to Pinpoint Test AE
For DTC U3006:16, GO to Pinpoint Test AF
For DTC U3006:17, GO to Pinpoint Test AG
|
|
| Y5 CHECK FOR DTC (DIAGNOSTIC TROUBLE CODE)
U0140:00 SET IN MULTIPLE MODULES |
-
Review the recorded results from the self-test.
Is DTC U0140:00 set in more than one module?
| No |
If there is an observable symptom, REFER to the Symptom Chart in this section.
If there is no observable symptom, the system is operating correctly at
this time. The DTC may have been set due to high network traffic or an
intermittent fault condition.
|
|
| Y6 CHECK FOR CORRECT BCM (BODY CONTROL MODULE)
OPERATION |
-
Disconnect and inspect all the BCM connectors.
-
Repair:
-
corrosion (clean module pins or install new connectors or terminals)
-
damaged or bent pins (install new terminals or pins)
-
pushed-out pins (install new pins as necessary)
-
Reconnect the BCM connectors. Make sure they seat and latch correctly.
-
Operate the system and determine if the concern is still present.
Is the concern still present?
| Yes |
CHECK OASIS for any applicable Technical Service Bulletins (TSBs). If a
TSB exists for this concern, discontinue this test and follow TSB
instructions. If no Technical Service Bulletins (TSBs) address this
concern, INSTALL a new BCM .
REFER to: Body Control Module (BCM) (419-10 Multifunction Electronic Modules, Removal and Installation).
|
| No |
The system is operating correctly at this time. The
concern may have been caused by module connections. ADDRESS the root
cause of any connector or pin issues.
|
|
U0155:00
Normal Operation and Fault Conditions
REFER to: Information and Entertainment System - System Operation
and Component Description (415-00A Information and Entertainment System -
General Information - Vehicles With: AM/FM/CD/SYNC, Description and
Operation).
DTC Fault Trigger Conditions
|
DTC
|
Description
|
Fault Trigger Conditions
|
|
U0155:00
|
Lost Communication With Instrument Panel Cluster (IPC) Control Module: No Sub Type Information
|
Set by the ACM , APIM , FCDIM , and GPSM when network messages are
missing from the IPC for more than 5 seconds with the ignition in RUN.
|
Possible Source
PINPOINT TEST Z: U0155:00
| Z1 VERIFY THE CONCERN |
-
Verify there is an observable symptom present.
Is an observable symptom present?
| No |
The system is operating correctly at this time. The DTC may have been
set due to high network traffic or an intermittent fault condition.
|
|
| Z2 RECHECK FOR DTC (DIAGNOSTIC TROUBLE CODE)
U0155:00 |
-
Using a diagnostic scan tool, clear all Continuous Memory Diagnostic Trouble Codes (CMDTCs).
-
Wait at least 10 seconds.
-
Using a diagnostic scan tool, retrieve all Continuous Memory Diagnostic Trouble Codes (CMDTCs).
Is DTC U0155:00 set in the ACM , APIM , FCDIM , or GPSM ?
| No |
The system is operating correctly at this time. The DTC may have been
set due to high network traffic or an intermittent fault condition.
|
|
| Z3 CHECK THE IPC (INSTRUMENT PANEL CLUSTER)
FOR BATTERY VOLTAGE OUT-OF-RANGE DIAGNOSTIC TROUBLE CODES (DTCS) |
-
Using a diagnostic scan tool, carry out the IPC self-test.
Are any low or high voltage Diagnostic Trouble Codes (DTCs) recorded in the IPC ?
| Yes |
REFER to: Instrumentation, Message Center and Warning Chimes
(413-01 Instrumentation, Message Center and Warning Chimes, Diagnosis
and Testing).
|
|
| Z4 CHECK FOR BATTERY VOLTAGE OUT-OF-RANGE DIAGNOSTIC TROUBLE CODES (DTCS) |
-
Using a diagnostic scan tool, carry out the self-test for the following modules:
Are any low or high voltage Diagnostic Trouble Codes (DTCs) recorded in the ACM , APIM , FCDIM , or GPSM ?
| Yes |
For DTC U3003:16, GO to Pinpoint Test AD
For DTC U3003:17, GO to Pinpoint Test AE
For DTC U3006:16, GO to Pinpoint Test AF
For DTC U3006:17, GO to Pinpoint Test AG
|
|
| Z5 CHECK FOR DTC (DIAGNOSTIC TROUBLE CODE)
U0155:00 SET IN MULTIPLE MODULES |
-
Review the recorded results from the self-test.
Is DTC U0155:00 set in more than one module?
| No |
If there is an observable symptom, REFER to the Symptom Chart: in this section.
If there is no observable symptom, the system is operating correctly at
this time. The DTC may have been set due to high network traffic or an
intermittent fault condition.
|
|
| Z6 CHECK FOR CORRECT IPC (INSTRUMENT PANEL CLUSTER)
OPERATION |
-
Disconnect and inspect the IPC connector.
-
Repair:
-
corrosion (clean module pins or install new connectors or terminals)
-
damaged or bent pins (install new terminals or pins)
-
pushed-out pins (install new pins as necessary)
-
Reconnect the IPC connector. Make sure it seats and latches correctly.
-
Operate the system and determine if the concern is still present.
Is the concern still present?
| Yes |
CHECK OASIS for any applicable Technical Service Bulletins (TSBs). If a
TSB exists for this concern, discontinue this test and follow TSB
instructions. If no Technical Service Bulletins (TSBs) address this
concern,
Click here to access Guided Routine (IPC).
|
| No |
The system is operating correctly at this time. The
concern may have been caused by module connections. ADDRESS the root
cause of any connector or pin issues.
|
|
U0193:00
Normal Operation and Fault Conditions
REFER to: Information and Entertainment System - System Operation
and Component Description (415-00A Information and Entertainment System -
General Information - Vehicles With: AM/FM/CD/SYNC, Description and
Operation).
Several audio system modules receive network messages from the ACM
. These messages consist mainly of audio setting information. Since
more than one module receives each of these messages, all modules
receiving a particular message can exhibit a symptom if the message is
missing.
DTC Fault Trigger Conditions
|
DTC
|
Description
|
Fault Trigger Conditions
|
|
U0193:00
|
Lost Communication With "Digital Audio Control Module A:" No Sub Type Information
|
Set by the FCDIM when network messages are missing from the ACM for more than 5 seconds with the ignition in RUN.
|
Possible Source
PINPOINT TEST AA: U0193:00
| AA1 VERIFY THE CONCERN |
-
Verify there is an observable symptom present.
Is an observable symptom present?
| No |
The system is operating correctly at this time. The DTC may have been
set due to high network traffic or an intermittent fault condition.
|
|
| AA2 RECHECK FOR DTC (DIAGNOSTIC TROUBLE CODE)
U0193:00 |
-
Using a diagnostic scan tool, clear all Continuous Memory Diagnostic Trouble Codes (CMDTCs).
-
Wait at least 10 seconds.
-
Using a diagnostic scan tool, retrieve all Continuous Memory Diagnostic Trouble Codes (CMDTCs).
Is DTC U0193:00 set in the FCDIM ?
| No |
The system is operating correctly at this time. The DTC may have been
set due to high network traffic or an intermittent fault condition.
|
|
| AA3 CHECK FOR BATTERY VOLTAGE OUT-OF-RANGE DIAGNOSTIC TROUBLE CODES (DTCS) |
-
Using a diagnostic scan tool, carry out the self-test for the following modules:
Are any low or high voltage Diagnostic Trouble Codes (DTCs) recorded in the ACM or FCDIM ?
| Yes |
For DTC U3003:16, GO to Pinpoint Test AD
For DTC U3003:17, GO to Pinpoint Test AE
For DTC U3006:16, GO to Pinpoint Test AF
For DTC U3006:17, GO to Pinpoint Test AG
|
|
| AA4 CHECK FOR CORRECT ACM (AUDIO FRONT CONTROL MODULE)
OPERATION |
-
Disconnect and inspect all the ACM connectors.
-
Repair:
-
corrosion (clean module pins or install new connectors or terminals)
-
damaged or bent pins (install new terminals or pins)
-
pushed-out pins (install new pins as necessary)
-
Reconnect the ACM connectors. Make sure they seat and latch correctly.
-
Operate the system and determine if the concern is still present.
Is the concern still present?
| Yes |
CHECK OASIS for any applicable Technical Service Bulletins (TSBs). If a
TSB exists for this concern, discontinue this test and follow TSB
instructions. If no Technical Service Bulletins (TSBs) address this
concern, INSTALL a new ACM .
REFER to: Audio Front Control Module
(ACM) (415-00A Information and Entertainment System - General
Information - Vehicles With: AM/FM/CD/SYNC, Removal and Installation).
|
| No |
The system is operating correctly at this time. The
concern may have been caused by module connections. ADDRESS the root
cause of any connector or pin issues.
|
|
U0253:00
Normal Operation and Fault Conditions
REFER to: Information and Entertainment System - System Operation
and Component Description (415-00A Information and Entertainment System -
General Information - Vehicles With: AM/FM/CD/SYNC, Description and
Operation).
DTC Fault Trigger Conditions
|
DTC
|
Description
|
Fault Trigger Conditions
|
|
U0253:00
|
Lost Communication With Accessory Protocol Interface Module: No Sub Type Information
|
Set by the ACM and FCDIM when network messages are missing from the APIM for more than 5 seconds with the ignition in RUN.
|
Possible Source
PINPOINT TEST AB: U0253:00
| AB1 VERIFY THE CONCERN |
-
Verify there is an observable symptom present.
Is an observable symptom present?
| No |
The system is operating correctly at this time. The DTC may have been
set due to high network traffic or an intermittent fault condition.
|
|
| AB2 RECHECK FOR DTC (DIAGNOSTIC TROUBLE CODE)
U0253:00 |
-
Using a diagnostic scan tool, clear all Continuous Memory Diagnostic Trouble Codes (CMDTCs).
-
Wait at least 10 seconds.
-
Using a diagnostic scan tool, retrieve all Continuous Memory Diagnostic Trouble Codes (CMDTCs).
Is DTC U0253:00 set in the ACM or FCDIM ?
| No |
The system is operating correctly at this time. The DTC may have been
set due to high network traffic or an intermittent fault condition.
|
|
| AB3 CHECK FOR BATTERY VOLTAGE OUT-OF-RANGE DIAGNOSTIC TROUBLE CODES (DTCS) |
-
Using a diagnostic scan tool, carry out the self-test for the following modules:
Are any low or high voltage Diagnostic Trouble Codes (DTCs) recorded in the ACM , APIM , or FCDIM ?
| Yes |
For DTC U3003:16, GO to Pinpoint Test AD
For DTC U3003:17, GO to Pinpoint Test AE
For DTC U3006:16, GO to Pinpoint Test AF
For DTC U3006:17, GO to Pinpoint Test AG
|
|
| AB4 CHECK FOR DTC (DIAGNOSTIC TROUBLE CODE)
U0253:00 SET IN MULTIPLE MODULES |
-
Review the recorded results from the self-test.
Is DTC U0253:00 set in both the ACM and FCDIM ?
| No |
If there is an observable symptom, REFER to the Symptom Chart in this section.
If there is no observable symptom, the system is operating correctly at
this time. The DTC may have been set due to high network traffic or an
intermittent fault condition.
|
|
| AB5 CHECK FOR CORRECT APIM (SYNC MODULE)
OPERATION |
-
Disconnect and inspect the APIM connector.
-
Repair:
-
corrosion (clean module pins or install new connectors or terminals)
-
damaged or bent pins (install new terminals or pins)
-
pushed-out pins (install new pins as necessary)
-
Reconnect the APIM connector. Make sure it seats and latches correctly.
-
Wait at least 2 minutes for the APIM to re-initialize.
-
Operate the system and determine if the concern is still present.
Is the concern still present?
| Yes |
CHECK OASIS for any applicable Technical Service Bulletins (TSBs). If a
TSB exists for this concern, DISCONTINUE this test and FOLLOW TSB
instructions. If no Technical Service Bulletins (TSBs) address this
concern, CARRY OUT the APIM Hardware Test.
| COMPLETE THE FDRS GUIDED ROUTINE |
- NOTE: This procedure must be completed using FDRS. Do not clear DTCs until the FDRS procedure has completed.
To complete the diagnosis, navigate to the FDRS Guided Routine tab and carry out the procedure SYNC.
|
|
| No |
The system is operating correctly at this time. The
concern may have been caused by module connections. ADDRESS the root
cause of any connector or pin issues.
|
|
U0257:00
Normal Operation and Fault Conditions
REFER to: Information and Entertainment System - System Operation
and Component Description (415-00A Information and Entertainment System -
General Information - Vehicles With: AM/FM/CD/SYNC, Description and
Operation).
DTC Fault Trigger Conditions
|
DTC
|
Description
|
Fault Trigger Conditions
|
|
U0257:00
|
Lost Communication With Front Control/Display Interface Module: No Sub Type Information
|
Set by the ACM and APIM when Infotainment Controller Area Network
(I-CAN) network messages are missing from the FCDIM for more than 5
seconds with the ignition in RUN.
|
Possible Source
PINPOINT TEST AC: U0257:00
| AC1 VERIFY THE CONCERN |
-
Verify there is an observable symptom present.
Is an observable symptom present?
| No |
The system is operating correctly at this time. The DTC may have been
set due to high network traffic or an intermittent fault condition.
|
|
| AC2 RECHECK FOR DTC (DIAGNOSTIC TROUBLE CODE)
U0257:00 |
-
Using a diagnostic scan tool, clear all Continuous Memory Diagnostic Trouble Codes (CMDTCs).
-
Wait at least 10 seconds.
-
Using a diagnostic scan tool, retrieve all Continuous Memory Diagnostic Trouble Codes (CMDTCs).
Is DTC U0257:00 set in the ACM or APIM ?
| No |
The system is operating correctly at this time. The DTC may have been
set due to high network traffic or an intermittent fault condition.
|
|
| AC3 CHECK FOR BATTERY VOLTAGE OUT-OF-RANGE DIAGNOSTIC TROUBLE CODES (DTCS) |
-
Using a diagnostic scan tool, carry out the self-test for the following modules:
Are any low or high voltage Diagnostic Trouble Codes (DTCs) recorded in the ACM , APIM , or FCDIM ?
| Yes |
For DTC U3003:16, GO to Pinpoint Test AD
For DTC U3003:17, GO to Pinpoint Test AE
For DTC U3006:16, GO to Pinpoint Test AF
For DTC U3006:17, GO to Pinpoint Test AG
|
|
| AC4 CHECK FOR DTC (DIAGNOSTIC TROUBLE CODE)
U0257:00 SET IN MULTIPLE MODULES |
-
Review the recorded results from the self-test.
Is DTC U0257:00 set in both the ACM and APIM ?
| No |
If there is an observable symptom, REFER to the Symptom Chart in this section.
If there is no observable symptom, the system is operating correctly at
this time. The DTC may have been set due to high network traffic or an
intermittent fault condition.
|
|
| AC5 CHECK FOR CORRECT FCDIM (FRONT CONTROL/DISPLAY INTERFACE MODULE)
OPERATION |
-
Disconnect and inspect the FCDIM connector.
-
Repair:
-
corrosion (clean module pins or install new connectors or terminals)
-
damaged or bent pins (install new terminals or pins)
-
pushed-out pins (install new pins as necessary)
-
Reconnect the FCDIM connector. Make sure it seats and latches correctly.
-
Operate the system and determine if the concern is still present.
Is the concern still present?
| Yes |
CHECK OASIS for any applicable Technical Service Bulletins (TSBs). If a
TSB exists for this concern, discontinue this test and follow TSB
instructions. If no Technical Service Bulletins (TSBs) address this
concern, INSTALL a new FCDIM .
REFER to: Front Control/Display
Interface Module (FCDIM) (415-00A Information and Entertainment System -
General Information - Vehicles With: AM/FM/CD/SYNC, Removal and
Installation).
|
| No |
The system is operating correctly at this time. The
concern may have been caused by module connections. ADDRESS the root
cause of any connector or pin issues.
|
|
U3003:16
Refer to Wiring Diagrams Cell 130 for schematic and connector information.
DTC Fault Trigger Conditions
|
DTC
|
Description
|
Fault Trigger Conditions
|
|
U3003:16
|
Battery Voltage: Circuit Voltage Below Threshold
|
Set by the ACM , APIM , and GPSM
when the supply voltage falls below 10 volts for at least 10 seconds
during normal operation or for more than 250 milliseconds during the
self-test.
|
Possible Sources
-
Previous low battery voltage
-
Wiring, terminals, or connectors
-
ACM
-
APIM
-
GPSM
PINPOINT TEST AD: U3003:16
| AD1 RECHECK FOR DTC (DIAGNOSTIC TROUBLE CODE)
U3003:16 |
-
Using a diagnostic scan tool, clear all Continuous Memory Diagnostic Trouble Codes (CMDTCs).
-
Wait at least 15 seconds.
-
Using a diagnostic scan tool, repeat the self-test for the module in question.
Is DTC U3003:16 still present?
| No |
The system is operating correctly at this time. The DTC may have been set due to a previous low battery voltage condition.
|
|
| AD2 CHECK FOR CHARGING SYSTEM DIAGNOSTIC TROUBLE CODES (DTCS) IN THE PCM (POWERTRAIN CONTROL MODULE)
|
-
Using a diagnostic scan tool, carry out the PCM self-test.
Are any voltage-related Diagnostic Trouble Codes (DTCs) set in the PCM ?
| Yes |
REFER to the appropriate Diagnosis and Testing in section 414-00
|
|
| AD3 CHECK THE BATTERY CONDITION AND STATE OF CHARGE |
-
Check the battery condition and verify the battery is fully charged.
REFER to: Battery (414-01 Battery, Mounting and Cables, Diagnosis and Testing).
Is the battery OK and fully charged?
| No |
REFER to the appropriate Diagnosis and Testing in section 414-00.
|
|
| AD4 CHECK THE SUSPECT MODULE VOLTAGE SUPPLY |
-
Measure and record the voltage at the battery.
-
Disconnect the audio system module setting DTC U3003:16.
-
Measure the voltage between the module setting DTC U3003:16 and ground.
-
For the ACM , measure:
Click to display connectors
|
Positive Lead
|
Measurement / Action
|
Negative Lead
|
|
C240A-1
|
|
Ground
|
-
For the APIM , measure:
Click to display connectors
|
Positive Lead
|
Measurement / Action
|
Negative Lead
|
|
C2383-1
|
|
Ground
|
-
For the GPSM , measure:
Click to display connectors
|
Positive Lead
|
Measurement / Action
|
Negative Lead
|
|
C9050-1
|
|
Ground
|
Is the voltage within 0.2 volts of the recorded battery voltage?
| No |
REPAIR the circuit for high resistance.
|
|
| AD5 CHECK THE SUSPECT MODULE GROUND CIRCUIT |
-
Measure the voltage at the suspect module.
-
For the ACM , measure:
Click to display connectors
|
Positive Lead
|
Measurement / Action
|
Negative Lead
|
|
C240A-1
|
|
C240A-13
|
-
For the APIM , measure:
Click to display connectors
|
Positive Lead
|
Measurement / Action
|
Negative Lead
|
|
C2383-1
|
|
C2383-37
|
|
C2383-1
|
|
C2383-38
|
-
For the GPSM , measure:
Click to display connectors
|
Positive Lead
|
Measurement / Action
|
Negative Lead
|
|
C9050-1
|
|
C9050-6
|
Is the suspect module voltage greater than 11 volts?
| Yes |
For the ACM , GO to AD6
For the APIM , GO to AD7
For the GPSM , GO to AD8
|
| No |
REPAIR the circuit in question.
|
|
| AD6 CHECK FOR CORRECT ACM (AUDIO FRONT CONTROL MODULE)
OPERATION |
-
Disconnect and inspect all the ACM connectors.
-
Repair:
-
corrosion (clean module pins or install new connectors or terminals)
-
damaged or bent pins (install new terminals or pins)
-
pushed-out pins (install new pins as necessary)
-
Reconnect the ACM connectors. Make sure they seat and latch correctly.
-
Operate the system and determine if the concern is still present.
Is the concern still present?
| Yes |
CHECK OASIS for any applicable Technical Service Bulletins (TSBs). If a
TSB exists for this concern, discontinue this test and follow TSB
instructions. If no Technical Service Bulletins (TSBs) address this
concern, INSTALL a new ACM .
REFER to: Audio Front Control Module
(ACM) (415-00A Information and Entertainment System - General
Information - Vehicles With: AM/FM/CD/SYNC, Removal and Installation).
|
| No |
The system is operating correctly at this time. The
concern may have been caused by module connections. ADDRESS the root
cause of any connector or pin issues.
|
|
| AD7 CHECK FOR CORRECT APIM (SYNC MODULE)
OPERATION |
-
Disconnect and inspect the APIM connector.
-
Repair:
-
corrosion (clean module pins or install new connectors or terminals)
-
damaged or bent pins (install new terminals or pins)
-
pushed-out pins (install new pins as necessary)
-
Reconnect the APIM connector. Make sure it seats and latches correctly.
-
Wait at least 2 minutes for the APIM to re-initialize.
-
Operate the system and determine if the concern is still present.
Is the concern still present?
| Yes |
CHECK OASIS for any applicable Technical Service Bulletins (TSBs). If a
TSB exists for this concern, discontinue this test and follow TSB
instructions. If no Technical Service Bulletins (TSBs) address this
concern,
| COMPLETE THE FDRS GUIDED ROUTINE |
- NOTE: This procedure must be completed using FDRS. Do not clear DTCs until the FDRS procedure has completed.
To complete the diagnosis, navigate to the FDRS Guided Routine tab and carry out the procedure SYNC.
|
|
| No |
The system is operating correctly at this time. The
concern may have been caused by module connections. ADDRESS the root
cause of any connector or pin issues.
|
|
| AD8 CHECK FOR CORRECT GPSM (GLOBAL POSITIONING SYSTEM MODULE)
OPERATION |
-
Disconnect and inspect the GPSM connector.
-
Repair:
-
corrosion (clean module pins or install new connectors or terminals)
-
damaged or bent pins (install new terminals or pins)
-
pushed-out pins (install new pins as necessary)
-
Reconnect the GPSM connector. Make sure it seats and latches correctly.
-
Operate the system and determine if the concern is still present.
Is the concern still present?
| Yes |
CHECK OASIS for any applicable Technical Service Bulletins (TSBs). If a
TSB exists for this concern, DISCONTINUE this test and FOLLOW TSB
instructions. If no Technical Service Bulletins (TSBs) address this
concern, INSTALL a new GPSM .
REFER to: Global Positioning System
Module (GPSM) (415-00A Information and Entertainment System - General
Information - Vehicles With: AM/FM/CD/SYNC, Removal and Installation).
|
| No |
The system is operating correctly at this time. The
concern may have been caused by module connections. ADDRESS the root
cause of any connector or pin issues.
|
|
U3003:17
DTC Fault Trigger Conditions
|
DTC
|
Description
|
Fault Trigger Conditions
|
|
U3003:17
|
Battery Voltage: Circuit Voltage Above Threshold
|
Set by the ACM , APIM , and GPSM when the supply voltage is more than
15.8 volts for more than 250 milliseconds during normal operation or the
self-test.
|
Possible Sources
-
Previous high battery voltage
-
ACM
-
APIM
-
GPSM
PINPOINT TEST AE: U3003:17
| AE1 RECHECK FOR DTC (DIAGNOSTIC TROUBLE CODE)
U3003:17 |
-
Using a diagnostic scan tool, clear the Diagnostic Trouble Codes (DTCs) for the module in question.
-
Wait at least 10 seconds.
-
Using a diagnostic scan tool, carry out the self-test for the module in question.
Is DTC U3003:17 present?
| No |
The system is operating correctly at this time. The DTC may have been
set previously during battery charging or while jump starting the
vehicle.
|
|
| AE2 CHECK FOR HIGH VOLTAGE DIAGNOSTIC TROUBLE CODES (DTCS) SET IN MULTIPLE MODULES |
-
Using a diagnostic scan tool, retrieve all Continuous Memory Diagnostic Trouble Codes (CMDTCs).
Are high voltage Diagnostic Trouble Codes (DTCs)
such as B1676, P0563, or U3003:17 set in more than one module?
| Yes |
REFER to the appropriate Diagnosis and Testing in section 414-00
|
|
| AE3 CHECK THE BATTERY VOLTAGE |
-
Turn off all interior lights, exterior lights, and accessories.
-
Start and run the engine at approximately 2,000 RPM for 3 minutes while monitoring the battery voltage.
Does the battery voltage rise to 15.5 volts or higher?
| Yes |
REFER to the appropriate Diagnosis and Testing in section 414-00
|
| No |
For the ACM , GO to AE4
For the APIM , GO to AE5
For the GPSM , GO to AE6
|
|
| AE4 CHECK FOR CORRECT ACM (AUDIO FRONT CONTROL MODULE)
OPERATION |
-
Disconnect and inspect all the ACM connectors.
-
Repair:
-
corrosion (clean module pins or install new connectors or terminals)
-
damaged or bent pins (install new terminals or pins)
-
pushed-out pins (install new pins as necessary)
-
Reconnect the ACM connectors. Make sure they seat and latch correctly.
-
Operate the system and determine if the concern is still present.
Is the concern still present?
| Yes |
CHECK OASIS for any applicable Technical Service Bulletins (TSBs). If a
TSB exists for this concern, discontinue this test and follow TSB
instructions. If no Technical Service Bulletins (TSBs) address this
concern, INSTALL a new ACM .
REFER to: Audio Front Control Module
(ACM) (415-00A Information and Entertainment System - General
Information - Vehicles With: AM/FM/CD/SYNC, Removal and Installation).
|
| No |
The system is operating correctly at this time. The
concern may have been caused by module connections. ADDRESS the root
cause of any connector or pin issues.
|
|
| AE5 CHECK FOR CORRECT APIM (SYNC MODULE)
OPERATION |
-
Disconnect and inspect the APIM connector.
-
Repair:
-
corrosion (clean module pins or install new connectors or terminals)
-
damaged or bent pins (install new terminals or pins)
-
pushed-out pins (install new pins as necessary)
-
Reconnect the APIM connector. Make sure it seats and latches correctly.
-
Wait at least 2 minutes for the APIM to re-initialize.
-
Operate the system and determine if the concern is still present.
Is the concern still present?
| Yes |
CHECK OASIS for any applicable Technical Service Bulletins (TSBs). If a
TSB exists for this concern, discontinue this test and follow TSB
instructions. If no Technical Service Bulletins (TSBs) address this
concern,
| COMPLETE THE FDRS GUIDED ROUTINE |
- NOTE: This procedure must be completed using FDRS. Do not clear DTCs until the FDRS procedure has completed.
To complete the diagnosis, navigate to the FDRS Guided Routine tab and carry out the procedure SYNC.
|
|
| No |
The system is operating correctly at this time. The
concern may have been caused by module connections. ADDRESS the root
cause of any connector or pin issues.
|
|
| AE6 CHECK FOR CORRECT GPSM (GLOBAL POSITIONING SYSTEM MODULE)
OPERATION |
-
Disconnect and inspect the GPSM connector.
-
Repair:
-
corrosion (clean module pins or install new connectors or terminals)
-
damaged or bent pins (install new terminals or pins)
-
pushed-out pins (install new pins as necessary)
-
Reconnect the GPSM connector. Make sure it seats and latches correctly.
-
Operate the system and determine if the concern is still present.
Is the concern still present?
| Yes |
CHECK OASIS for any applicable Technical Service Bulletins (TSBs). If a
TSB exists for this concern, DISCONTINUE this test and FOLLOW TSB
instructions. If no Technical Service Bulletins (TSBs) address this
concern, INSTALL a new GPSM .
REFER to: Global Positioning System
Module (GPSM) (415-00A Information and Entertainment System - General
Information - Vehicles With: AM/FM/CD/SYNC, Removal and Installation).
|
| No |
The system is operating correctly at this time. The
concern may have been caused by module connections. ADDRESS the root
cause of any connector or pin issues.
|
|
U3006:16
Refer to Wiring Diagrams Cell 130 for schematic and connector information.
DTC Fault Trigger Conditions
|
DTC
|
Description
|
Fault Trigger Conditions
|
|
U3006:16
|
Control Module Input Power “A”: Circuit Voltage Below Threshold
|
Set by the FCDIM when the supply voltage falls below 8.5 volts for at least 1 second during normal operation.
|
Possible Sources
-
Previous low battery voltage
-
Wiring, terminals, or connectors
-
FCDIM
PINPOINT TEST AF: U3006:16
| AF1 RECHECK FOR DTC (DIAGNOSTIC TROUBLE CODE)
U3006:16 |
-
Using a diagnostic scan tool, clear all Continuous Memory Diagnostic Trouble Codes (CMDTCs).
-
Wait at least 15 seconds.
-
Using a diagnostic scan tool, carry out the FCDIM self-test.
Is DTC U3006:16 set in the FCDIM ?
| No |
The system is operating correctly at this time. The DTC may have been set due to a previous low battery voltage condition.
|
|
| AF2 CHECK FOR CHARGING SYSTEM DTC (DIAGNOSTIC TROUBLE CODE)
IN THE PCM (POWERTRAIN CONTROL MODULE)
|
-
Using a diagnostic scan tool, carry out the PCM self-test.
Are any voltage-related Diagnostic Trouble Codes (DTCs) set in the PCM ?
| Yes |
REFER to the appropriate Diagnosis and Testing in section 414-00
|
|
| AF3 CHECK THE BATTERY CONDITION AND STATE OF CHARGE |
-
Check the battery condition and verify the battery is fully charged.
REFER to: Battery (414-01 Battery, Mounting and Cables, Diagnosis and Testing).
See Battery Condition Test.
Is the battery OK and fully charged?
| No |
REFER to the appropriate Diagnosis and Testing in section 414-00
|
|
| AF4 CHECK THE FCDIM (FRONT CONTROL/DISPLAY INTERFACE MODULE)
VOLTAGE SUPPLY |
-
Measure and record the voltage at the battery.
-
Measure:
Click to display connectors
|
Positive Lead
|
Measurement / Action
|
Negative Lead
|
|
C2123-1
|
|
Ground
|
Is the voltage within 0.2 volts of the recorded battery voltage?
| No |
REPAIR the circuit for high resistance.
|
|
| AF5 CHECK THE FCDIM (FRONT CONTROL/DISPLAY INTERFACE MODULE)
GROUND CIRCUIT |
-
Measure:
Click to display connectors
|
Positive Lead
|
Measurement / Action
|
Negative Lead
|
|
C2123-1
|
|
C2123-9
|
Is the voltage greater than 11 volts?
| No |
REPAIR the circuit for high resistance.
|
|
| AF6 CHECK FOR CORRECT FCDIM (FRONT CONTROL/DISPLAY INTERFACE MODULE)
OPERATION |
-
Disconnect and inspect the FCDIM connector.
-
Repair:
-
corrosion (clean module pins or install new connectors or terminals)
-
damaged or bent pins (install new terminals or pins)
-
pushed-out pins (install new pins as necessary)
-
Reconnect the FCDIM connector. Make sure it seats and latches correctly.
-
Operate the system and determine if the concern is still present.
Is the concern still present?
| Yes |
CHECK OASIS for any applicable Technical Service Bulletins (TSBs). If a
TSB exists for this concern, discontinue this test and follow TSB
instructions. If no Technical Service Bulletins (TSBs) address this
concern, INSTALL a new FCDIM .
REFER to: Front Control/Display
Interface Module (FCDIM) (415-00A Information and Entertainment System -
General Information - Vehicles With: AM/FM/CD/SYNC, Removal and
Installation).
|
| No |
The system is operating correctly at this time. The
concern may have been caused by module connections. ADDRESS the root
cause of any connector or pin issues.
|
|
U3006:17
DTC Fault Trigger Conditions
|
DTC
|
Description
|
Fault Trigger Conditions
|
|
U3006:17
|
Control Module Input Power “A”: Circuit Voltage Above Threshold
|
Set by the FCDIM when the supply voltage is more than 16.5 volts for at least 1 second during normal operation.
|
Possible Source
-
Previous high battery voltage
-
FCDIM
PINPOINT TEST AG: U3006:17
| AG1 RECHECK FOR DTC (DIAGNOSTIC TROUBLE CODE)
U3006:17 |
-
Using a diagnostic scan tool, clear all Continuous Memory Diagnostic Trouble Codes (CMDTCs).
-
Wait at least 10 seconds.
-
Using a diagnostic scan tool, carry out the FCDIM self-test.
Is DTC U3006:17 set in the FCDIM ?
| No |
The system is operating correctly at this time. The DTC may have been
set previously during battery charging or while jump starting the
vehicle.
|
|
| AG2 CHECK FOR HIGH VOLTAGE DIAGNOSTIC TROUBLE CODES (DTCS) SET IN OTHER MODULES |
-
Using a diagnostic scan tool, retrieve all Continuous Memory Diagnostic Trouble Codes (CMDTCs).
Are high voltage Diagnostic Trouble Codes (DTCs)
such as B1676, P0563, or U3003:17 set in more than one module?
| Yes |
REFER to the appropriate Diagnosis and Testing in section 414-00
|
|
| AG3 CHECK THE BATTERY VOLTAGE |
-
Turn off all interior lights, exterior lights, and accessories.
-
Start and run the engine at approximately 2,000 RPM for 3 minutes while monitoring the battery voltage.
Does the battery voltage rise to 15.5 volts or higher?
| Yes |
REFER to the appropriate Diagnosis and Testing in section 414-00
|
|
| AG4 CHECK FOR CORRECT FCDIM (FRONT CONTROL/DISPLAY INTERFACE MODULE)
OPERATION |
-
Disconnect and inspect the FCDIM connector.
-
Repair:
-
corrosion (clean module pins or install new connectors or terminals)
-
damaged or bent pins (install new terminals or pins)
-
pushed-out pins (install new pins as necessary)
-
Reconnect the FCDIM connector. Make sure it seats and latches correctly.
-
Operate the system and determine if the concern is still present.
Is the concern still present?
| Yes |
CHECK OASIS for any applicable Technical Service Bulletins (TSBs). If a
TSB exists for this concern, discontinue this test and follow TSB
instructions. If no TSBs (Technical Service Bulletins) address this
concern, INSTALL a new FCDIM .
REFER to: Front Control/Display
Interface Module (FCDIM) (415-00A Information and Entertainment System -
General Information - Vehicles With: AM/FM/CD/SYNC, Removal and
Installation).
|
| No |
The system is operating correctly at this time. The
concern may have been caused by module connections. ADDRESS the root
cause of any connector or pin issues.
|
|
System Operation
System Diagram
Network Message Chart
ACM Module Network Input Messages
Broadcast Message
Originating Module
Message Purpose
Audio button state
FCDIM
Used to indicate when a button is pressed on the FCIM ...
Programming
NOTE:
An APIM Reset consists of a battery disconnect and a SYNC® system Master Reset. It may not be necessary to perform a Master Reset after disconnecting the battery if the concern is resolved...
Other information:
Removal
NOTE:
Removal steps in this procedure may contain installation details.
Remove the floor console.
Refer to: Floor Console (501-12 Instrument Panel and Console, Removal and Installation).
Remove the parking brake cable adjustment lock nut...
Special Tool(s) /
General Equipment
300-OTC1585AEPowertrain Lift
Tie Rod End Remover
Wooden Block
Removal
WARNING:
Before beginning any service procedure in this section,
refer to Safety Warnings in section 100-00 General Information...
 Information and Entertainment System - System Operation and Component Description. Description and Operation
 Reset the SYNC Module [APIM]. General Procedures
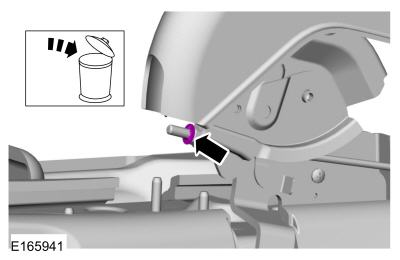 Loosen the parking brake cable adjustment nut.