Ford Fiesta: Parking Brake and Actuation / Parking Brake Cable - 1.6L EcoBoost (132kW/180PS) – Sigma. Removal and Installation
Removal
NOTE:
Removal steps in this procedure may contain installation details.
-
Remove the floor console.
Refer to: Floor Console (501-12 Instrument Panel and Console, Removal and Installation).
-
Remove the parking brake cable adjustment lock nut.
-
Loosen the parking brake cable adjustment nut.
Loosen:
:
5 turn(s)
-
Remove the rear wheels and tires.
Refer to: Wheel and Tire (204-04A Wheels and Tires, Removal and Installation).
-
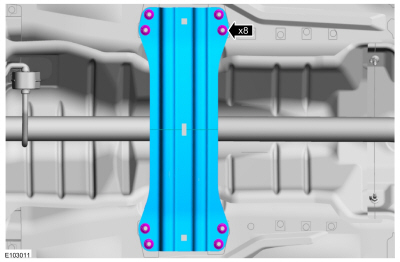
Remove the nuts and the crossbrace.
-
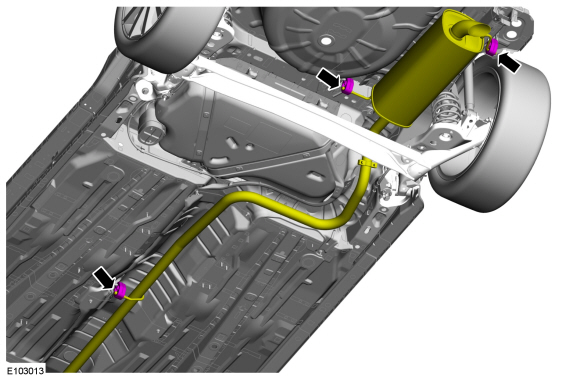
Detach the exhaust isolators and lower the exhaust.
-
Remove the nuts and exhaust heat shield.
-
Remove the nuts and position the exhaust heat shield forward.
-
-
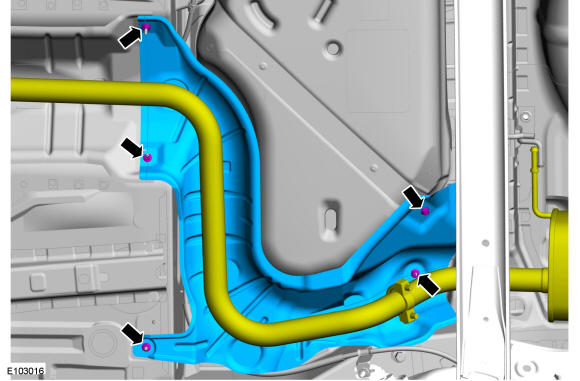
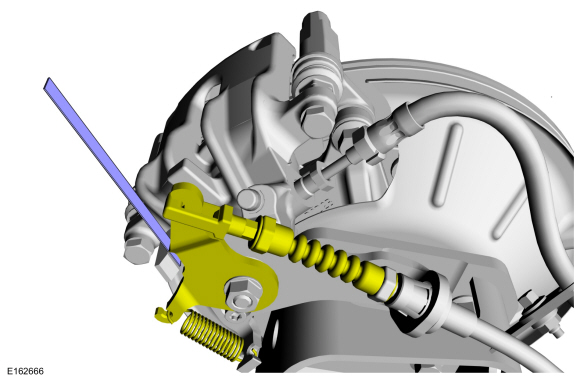
Detach the rear parking brake cables from the brake caliper levers.
-
Press inward on the tabs and detach the rear parking
brake cables from the brake caliper brackets and pull the cables
through the brackets.
-
Detach the rear parking brake cable retainers.
-
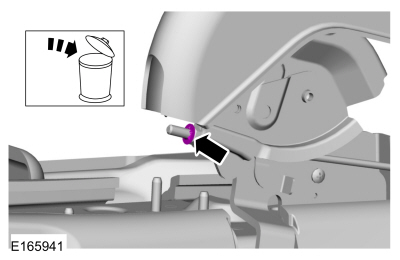
Remove the plug from the equalizer, push inward on the
tabs and detach the LH and RH rear cables from the bracket.
-
-
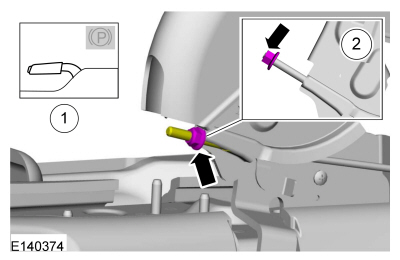
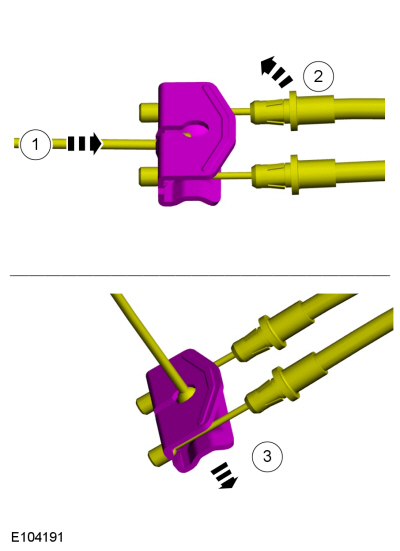
Align the end of the front cable with the hole in the equalizer.
-
Rotate both cables upward.
-
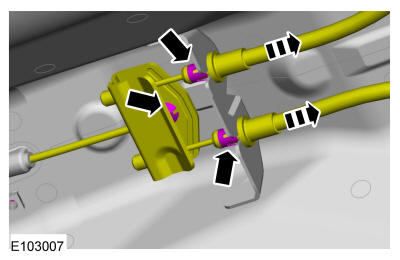
Disconnect the front cable from the equalizer.
-
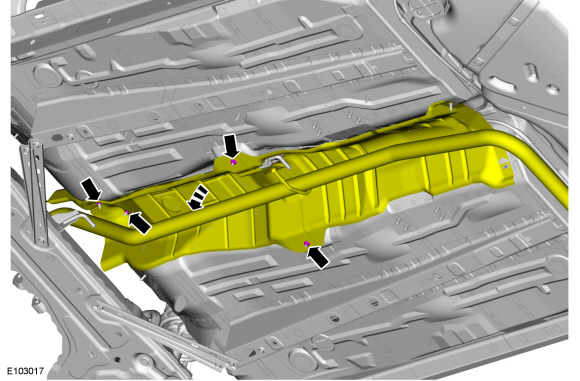
Detach the parking brake cable retainers. Remove the bracket nuts and the parking brake cable.
Installation
-
Attach the parking brake cable retainers and install the nuts.
Torque:
18 lb.ft (25 Nm)
-
Attach the front parking brake cable to the equalizer.
-
Attach the rear parking brake cables to the bracket and install the equalizer plug.
-
-
Attach the rear parking brake cable retainers.
-
Route the cables through the brackets and secure the tabs.
-
Attach the rear parking brake cables from the brake caliper levers.
-
Position the exhaust heat shield and install the nuts.
-
Install the exhaust heat shield and the nuts.
-
Raise the exhaust and attach the exhaust isolators.
-
Install the crossbrace and tighten the nuts.
Torque:
30 lb.ft (40 Nm)
-
NOTE:
This step requires the aid of another technician.
-
Make sure the parking brake is released.
-
Tighten the parking brake cable adjustment nut until
movement is observed on one of the parking brake levers.
-
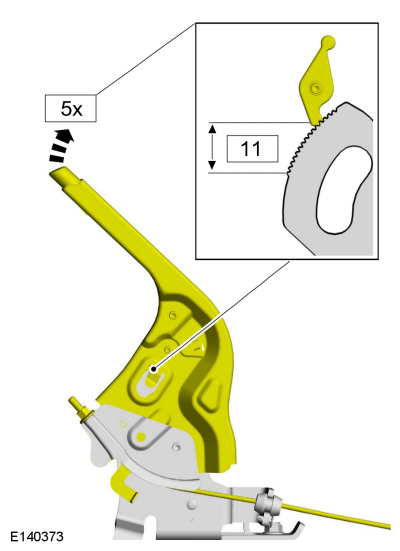
Apply the parking brake, counting the positions until
the 11th position has been reached. Release the parking brake and repeat
4 times.
-
NOTE:
This step requires the aid of another technician.
-
Insert a 1 mm feeler gauge between the parking brake lever and the brake caliper abutment, on both sides.
-
Tighten the parking brake cable adjustment nut until
movement is observed on one of the parking brake levers.
-
Remove the feeler gauges.
-
Install the wheels and tires.
Refer to: Wheel and Tire (204-04A Wheels and Tires, Removal and Installation).
-
Install the parking brake adjustment lock nut.
-
Install the floor console.
Refer to: Floor Console (501-12 Instrument Panel and Console, Removal and Installation).
-
Release the parking brake.
Special Tool(s) /
General Equipment
206-D002
(D81L-1103-A)
Gauge, Brake Adjustment
Flat Headed Screw Driver
Removal
NOTE:
Removal steps in this procedure may contain installation details...
Other information:
B1413:11 and B1413:93
Refer to Wiring Diagrams Cell 46 for schematic and connector information.
Normal Operation and Fault Conditions
The RCM monitors the LH front impact severity sensor circuits for the following faults:
Open circuit
Short to voltage
Short to ground
Faulted LH front impact severity sensor
If a fault is detecte..
Removal
NOTE:
Removal steps in this procedure may contain installation details.
Release the fuel system pressure.
Refer to: Fuel System Pressure Release (310-00B Fuel System - General
Information - 1.6L EcoBoost (132kW/180PS) – Sigma, General Procedures).
Disconnect the battery ground cable.
Refer to: Battery Disconnect and Connect (414-01 Battery, Mou..


 Parking Brake Cable. Removal and Installation