Ford Fiesta: Instrument Panel and Console / Instrument Panel Upper Section. Removal and Installation
Special Tool(s) / General Equipment
| Interior Trim Remover |
Removal
All vehicles
NOTE: Removal steps in this procedure may contain installation details.
-
Remove the driver knee airbag.
Refer to: Driver Knee Airbag (501-20B Supplemental Restraint System, Removal and Installation).
-
Remove the steering wheel.
Refer to: Steering Wheel (211-04 Steering Column, Removal and Installation).
-
Remove the screws and the steering column shroud.
 |
-
NOTICE: Make sure the clockspring does not rotate.
Use tape to prevent the clockspring from rotating.
 |
-
Disconnect the electrical connectors, remove the bolt, release the retaining clip and remove the SCCM .
 |
-
Remove the IPC .
Refer to: Instrument Panel Cluster (IPC) (413-01 Instrumentation, Message Center and Warning Chimes, Removal and Installation).
-
Remove the headlamp switch.
Refer to: Headlamp Switch (417-01 Exterior Lighting, Removal and Installation).
-
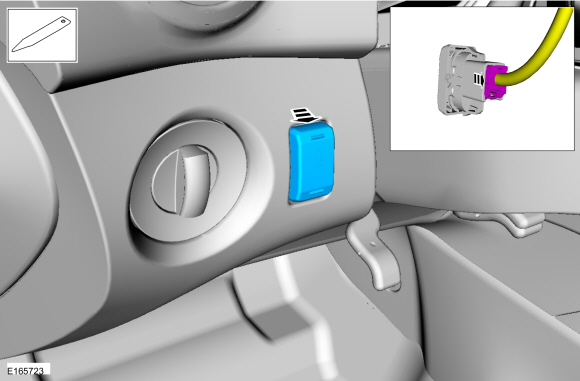
Remove the instrument panel dimmer switch and disconnect the electrical connector.
Use the General Equipment: Interior Trim Remover
 |
-
Remove the ACM .
Refer to: Audio Front Control Module (ACM) (415-00A Information and Entertainment System - General Information - Vehicles With: AM/FM/CD/SYNC, Removal and Installation).
Refer to: Audio Front Control Module (ACM) (415-00A Information and Entertainment System - General Information - Vehicles With: AM/FM/CD/SYNC, Removal and Installation).
Refer to: Audio Front Control Module (ACM) (415-00B Information and Entertainment System - General Information - Vehicles With: AM/FM/CD/SYNC/Touchscreen Display, Removal and Installation).
-
If equipped.
Disconnect the electrical connector, remove the screws and the FCDIM .
Torque: 11 lb.in (1.2 Nm)
 |
-
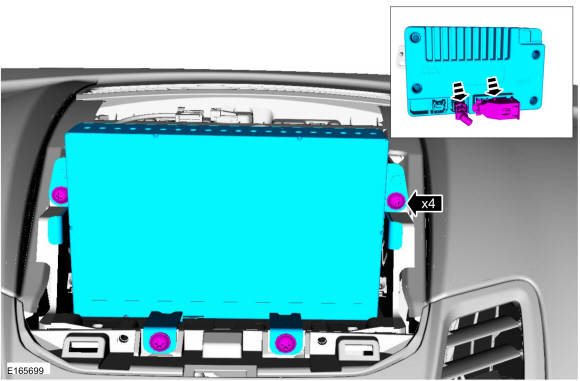
If equipped.
Remove the screws and the FDIM . Disconnect the electrical connectors.
Torque: 14 lb.in (1.6 Nm)
 |
-
Remove the floor console.
Refer to: Floor Console (501-12 Instrument Panel and Console, Removal and Installation).
-
Remove the screws and the HVAC control module. Disconnect the electrical connectors.
 |
-
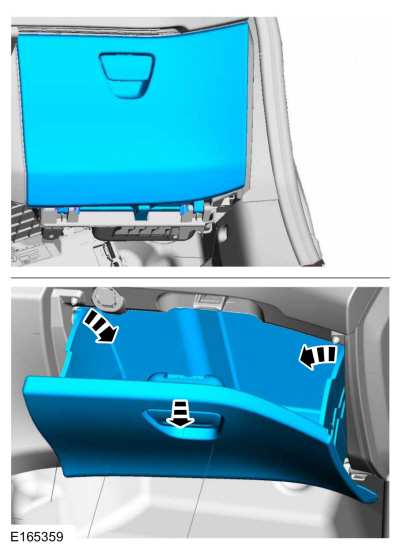
Release the retaining tabs and remove the glove compartment.
 |
-
Release the retaining tabs and remove the instrument
panel passenger side finish panel. Disconnect the electrical connector.
 |
-
If equipped, remove the APIM .
Refer to: SYNC Module [APIM] (415-00A Information and Entertainment System - General Information - Vehicles With: AM/FM/CD/SYNC, Removal and Installation).
-
-
Remove the nuts.
Torque: 53 lb.in (6 Nm)
-
Detach the wiring harness retainers, position
the wiring harness aside and remove the passenger airbag mounting
bracket.
-
Remove the nuts.
 |
-
On both sides, remove the A-pillar trim panel.
Refer to: A-Pillar Trim Panel (501-05 Interior Trim and Ornamentation, Removal and Installation).
-
On both sides.
Position the front door weatherstrip aside, release the clips and remove the instrument panel finish panel.
 |
-
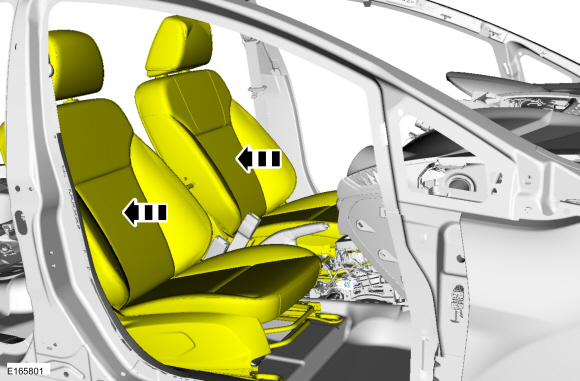
Move both the front seats to the full rearward position.
 |
-
Remove the bolts.
Torque: 18 lb.in (2 Nm)
 |
If equipped
-
Remove the bolts.
Torque: 18 lb.in (2 Nm)
 |
All vehicles
-
NOTE: The RH and LH defroster ducts stay in the vehicle when the upper instrument panel is removed.
With the upper instrument panel loose release the RH and LH defroster duct clips.
 |
-
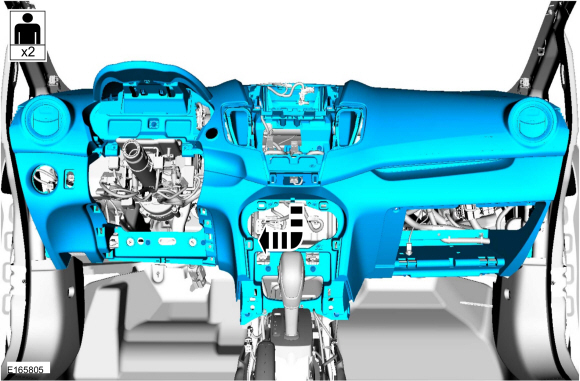
NOTE: To avoid damage to the instrument panel, an assistant is required when carrying out this step.
NOTE: Note the harness routing and make sure that all electrical connectors and wiring are not hindered before removing the instrument panel or damage to the components may occur.
Remove the instrument panel upper section.
 |
Installation
-
To install, reverse the removal procedure.
 Instrument Panel. Removal and Installation
Special Tool(s) /
General Equipment
Hose Clamp(s)
Removal
NOTE:
Removal steps in this procedure may contain installation details...
 Instrument Panel Center Upper Trim Panel. Removal and Installation
Special Tool(s) /
General Equipment
Interior Trim Remover
Removal
NOTE:
Instrument panel center upper trim panel with 6...
Other information:
Ford Fiesta 2014 - 2019 Service Manual: Front Fog Lamp. Removal and Installation
Removal With the vehicle in NEUTRAL, position it on a hoist. Refer to: Jacking and Lifting - Overview (100-02 Jacking and Lifting, Description and Operation). Remove the appropriate wheel and tire. Refer to: Wheel and Tire (204-04A Wheels and Tires, Removal and Installation)...
Ford Fiesta 2014 - 2019 Service Manual: Parking Aid - System Operation and Component Description. Description and Operation
System Operation System Diagram Item Description 1 Video camera 2 IPC 3 TCM 4 LIN 5 Video signal 6 Infotainment Controller Area Network (I-CAN) 7 HS-CAN 8 MS-CAN 9 PCM 10 Reversing lamp switch 11 Manual transm..
Categories
- Manuals Home
- Ford Fiesta Service Manual (2014 - 2019)
- Front Subframe. Removal and Installation
- Timing Belt. Removal and Installation
- Manual Transmission, Clutch, Transfer Case and Power Transfer Unit
- Manual Transmission - 6-Speed Manual Transmission – B6
- Fuel Rail. Removal and Installation
Component Bleeding. General Procedures
Special Tool(s) / General Equipment
Master Cylinder Bleeding SetBleeding
NOTICE: If the fluid is spilled on the paintwork, the affected area must be immediately washed down with cold water.
Master Cylinder
NOTE: When a new brake master cylinder has been installed, it should be primed to prevent air from entering the system.
NOTE: Make sure the area around the master cylinder cap is clean and free of foreign material.
Remove the brake fluid reservoir cap.