Ford Fiesta: Glass, Frames and Mechanisms / Rear Window Glass Reseal - 5-Door. General Procedures
Ford Fiesta 2014 - 2019 Service Manual / Body and Paint / Glass, Frames and Mechanisms / Rear Window Glass Reseal - 5-Door. General Procedures
Materials
| Name | Specification |
|---|---|
| Sika® SikaTack® MACH 60 / Sika® SikaTack® MACH 30 / Dow® BETASEAL™ Express | - |
| Sika Tack ASAP Urethane Adhesive | - |
| Motorcraft® Ultra-Clear Spray Glass Cleaner ZC-23 |
ESR-M14P5-A |
Repair
-
Remove the liftgate trim panel.
Refer to: Liftgate Trim Panel (501-05) .
-
On both sides.
 |
-
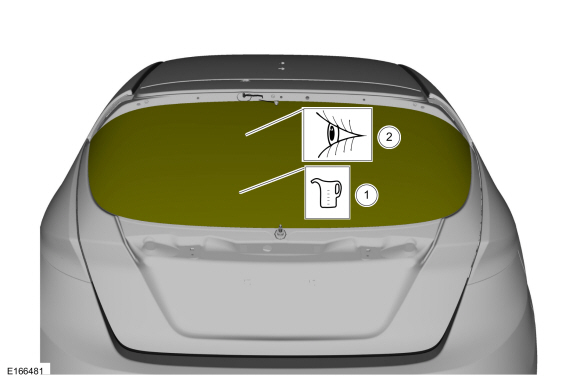
Check the liftgate window glass seal for air or water leaks through the urethane adhesive bead.
 |
-
Clean the interior and exterior of the liftgate window glass surface with glass cleaner.
Material: Motorcraft® Ultra-Clear Spray Glass Cleaner / ZC-23 (ESR-M14P5-A)
 |
-
Cut the urethane adhesive applicator tip to specification.
-
NOTE: Use an air caulking gun or a high-ratio, electric or battery-operated caulk gun to apply the urethane adhesive with less effort and a continuous bead.
NOTE: Make sure there are no gaps in the urethane adhesive bead.
Apply the urethane adhesive over the top of the existing urethane adhesive.
Material: Sika Tack ASAP Urethane Adhesive
Material: Sika® SikaTack® MACH 60 / Sika® SikaTack® MACH 30 / Dow® BETASEAL™ Express
-
-
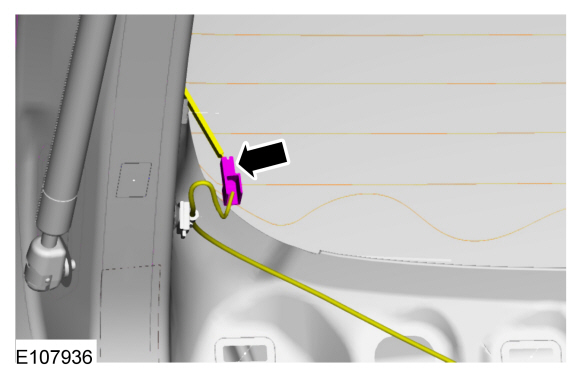
From inside the vehicle, apply the urethane adhesive to the top and sides of the liftgate window glass .
Material: Sika Tack ASAP Urethane Adhesive
Material: Sika® SikaTack® MACH 60 / Sika® SikaTack® MACH 30 / Dow® BETASEAL™ Express
-
From inside the vehicle, apply the urethane adhesive to the bottom of the liftgate window glass.
Material: Sika Tack ASAP Urethane Adhesive
Material: Sika® SikaTack® MACH 60 / Sika® SikaTack® MACH 30 / Dow® BETASEAL™ Express
-
From inside the vehicle, apply the urethane adhesive to the top and sides of the liftgate window glass .
 |
-
NOTE: Allow the urethane adhesive to cure for a minimum of one hour before testing for air or water leaks.
After the urethane adhesive has cured, check the liftgate window glass seal for air or water leaks through the urethane adhesive bead and add urethane adhesive as necessary.
Material: Sika Tack ASAP Urethane Adhesive
Material: Sika® SikaTack® MACH 60 / Sika® SikaTack® MACH 30 / Dow® BETASEAL™ Express
 |
-
On both sides.
 |
-
Install the liftgate trim panel.
Refer to: Liftgate Trim Panel (501-05) .
-
If necessary, remove excess urethane adhesive from the
interior and exterior surface of the liftgate window glass.
Material: Motorcraft® Ultra-Clear Spray Glass Cleaner / ZC-23 (ESR-M14P5-A)
 |
 Rear Window Glass Reseal - 4-Door. General Procedures
Materials
Name
Specification
Sika® SikaTack® MACH 60 / Sika® SikaTack® MACH 30 / Dow® BETASEAL™ Express
-
Sika Tack ASAP Urethane Adhesive
-
Motorcraft® Ultra-Clear Spray Glass CleanerZC-23
ESR-M14P5-A
Repair
Remove the headliner...
 Lead Terminal Repair. General Procedures
Materials
Name
Specification
Motorcraft® Ultra-Clear Spray Glass CleanerZC-23
ESR-M14P5-A
Repair
Bring the vehicle up to at least the specified room temperature or above...
Other information:
Ford Fiesta 2014 - 2019 Service Manual: Pinpoint Test - DTC: D. Diagnosis and Testing
B0010:11, B0010:12, B0010:13 and B0010:1A Refer to Wiring Diagrams Cell 46 for schematic and connector information. Normal Operation and Fault Conditions The RCM continuously monitors the passenger airbag stage 1 circuits for the following faults: Resistance out of range Unexpected voltage Short to ground Faulted passenger airbag ..
Ford Fiesta 2014 - 2019 Service Manual: Front Controls Interface Module (FCIM). Removal and Installation
Removal NOTE: Removal steps in this procedure may contain installation details. NOTE: This step is only necessary when installing a new component. NOTE: The PMI process must begin with the current FCIM installed. If the current FCIM does not respond to the diagnostic scan tool, the tool may prompt for As-Built Data as part of the repair. Using a diagnostic sc..
Categories
- Manuals Home
- Ford Fiesta Service Manual (2014 - 2019)
- Camshafts. Removal and Installation
- Engine - 1.6L EcoBoost (132kW/180PS) – Sigma
- Clutch - 6-Speed Manual Transmission – B6
- Manual Transmission, Clutch, Transfer Case and Power Transfer Unit
- Fuel Rail. Removal and Installation
Brake Backing Plate. Removal and Installation
Removal
NOTE: Removal steps in this procedure may contain installation details.
Remove the brake shoes.Refer to: Brake Shoes (206-02 Drum Brake, Removal and Installation).
Disconnect the brake tube fitting.
Torque: 159 lb.in (18 Nm) Remove the bolt and wheel cylinder.
Torque: 106 lb.in (12 Nm)
 Disconnect the brake shoe lever fitting and re
Copyright © 2025 www.fofiesta7.com
