Ford Fiesta: Handles, Locks, Latches and Entry Systems / Rear Door Latch. Removal and Installation
Ford Fiesta 2014 - 2019 Service Manual / Body and Paint / Handles, Locks, Latches and Entry Systems / Rear Door Latch. Removal and Installation
Removal
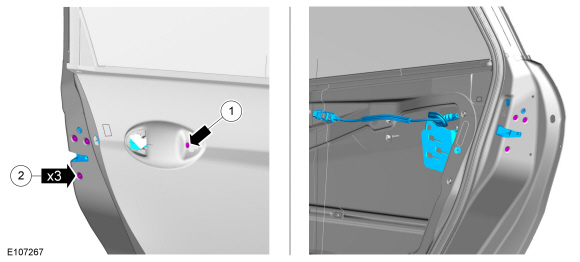
NOTE: RH shown, LH similar.
NOTE: Removal steps in this procedure may contain installation details.
All vehicles
-
Remove the rear door trim panel.
Refer to: Rear Door Trim Panel (501-05 Interior Trim and Ornamentation, Removal and Installation).
-
Remove the adhesive tape covers.
 |
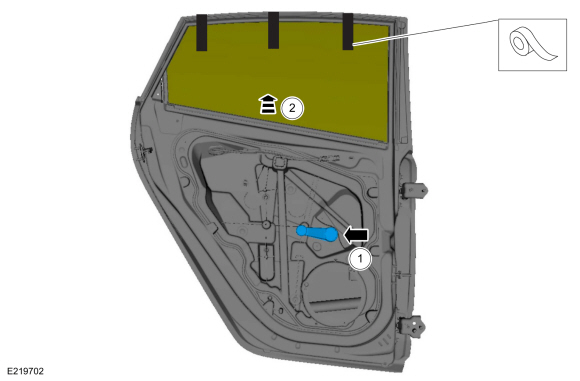
Vehicles with manual windows
-
Lower the rear door window glass.
-
Partially install the window crank handle.
-
Lower the rear door window glass.
-
Partially install the window crank handle.
 |
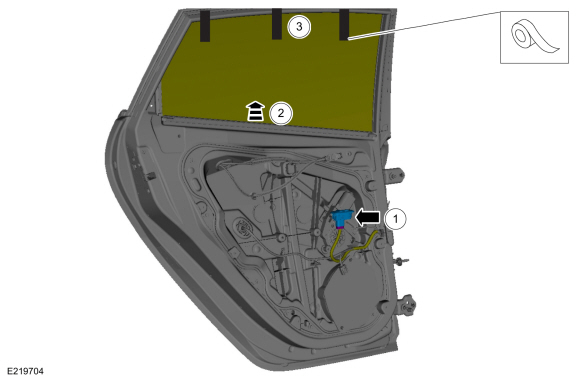
Vehicles with power windows
-
Lower the rear door window glass.
-
Partially install the rear door window control switch.
-
Lower the rear door window glass.
-
Partially install the rear door window control switch.
 |
All vehicles
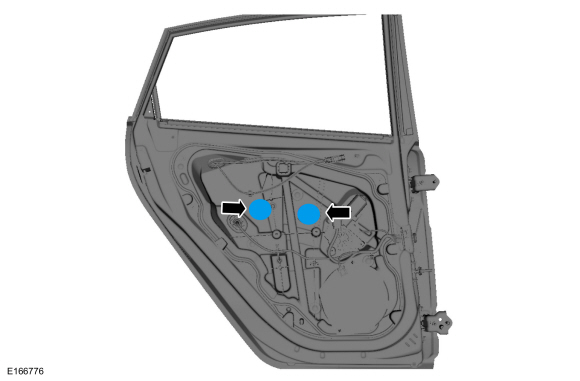
-
Remove the bolts from the rear door window glass.
Torque: 62 lb.in (7 Nm)
 |
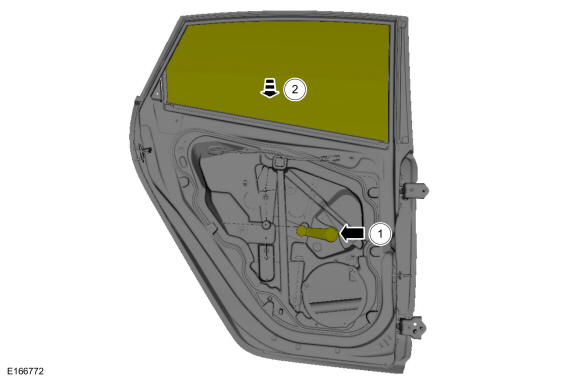
Vehicles with manual windows
-
Raise the rear door window glass and tape the rear door window glass in place.
-
Remove the front door window crank handle.
-
Raise the front door window glass and tape the front door window glass in place.
-
Remove the front door window crank handle.
 |
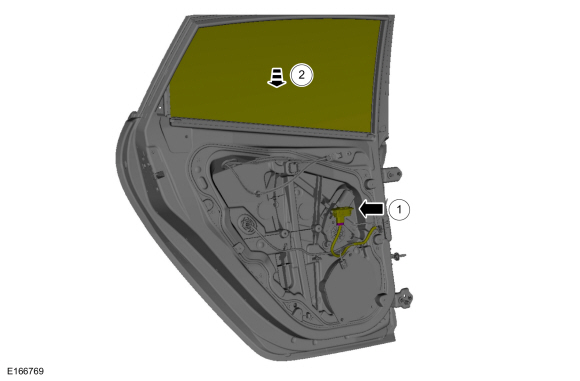
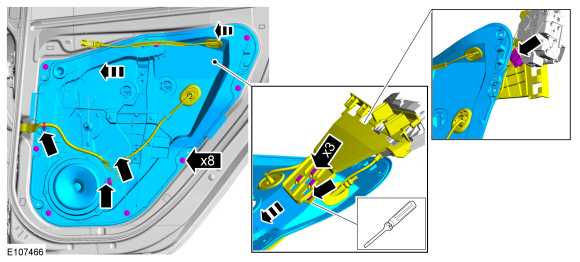
-
Remove the rear door carrier.
Torque: 71 lb.in (8 Nm)
 |
Vehicles with power windows
-
Raise the rear door window glass and tape the rear door window glass in place.
-
Remove the rear door window control switch.
-
Raise the rear door window glass.
-
Tape the rear door window glass in place.
-
Remove the rear door window control switch.
 |
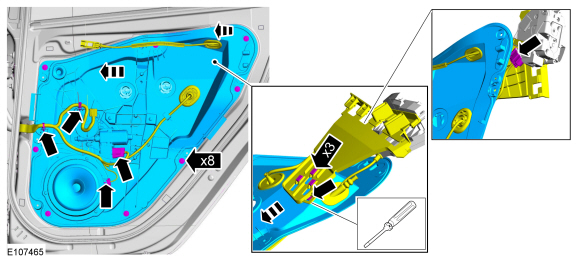
-
Remove the rear door carrier.
Torque: 71 lb.in (8 Nm)
 |
All vehicles
-
Refer to: Exterior Rear Door Handle (501-14 Handles, Locks, Latches and Entry Systems, Removal and Installation).
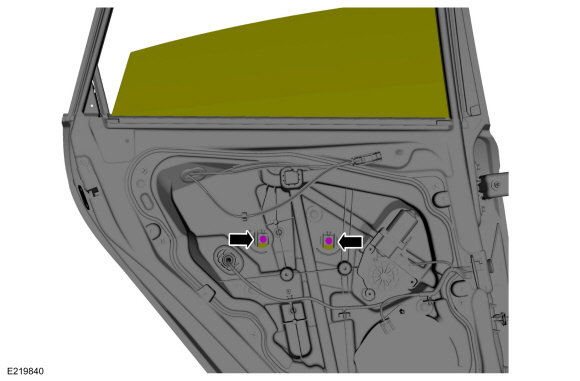
-
Remove the rear door latch.
-
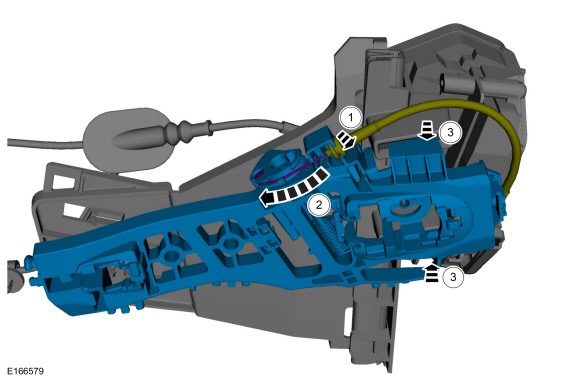
Remove the screw from the exterior rear door handle reinforcement.
-
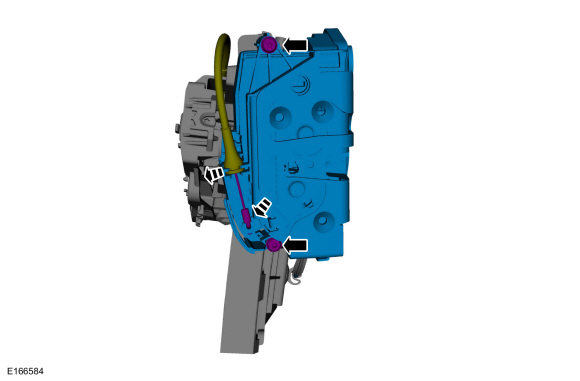
Remove the retainers from the rear door latch and remove the rear door latch.
Torque: 71 lb.in (8 Nm)
-
Remove the screw from the exterior rear door handle reinforcement.
 |
-
NOTE: This step is only necessary when installing a new component.
Remove the exterior rear door handle reinforcement.
-
Detach the cable from the exterior rear door handle reinforcement.
-
Remove the cable eyelet from the exterior rear door handle reinforcement.
-
Remove the exterior rear door handle reinforcement.
-
Detach the cable from the exterior rear door handle reinforcement.
 |
-
NOTE: This step is only necessary when installing a new component.
Remove the latch screws, disconnect the cables and remove the front door latch.
 |
-
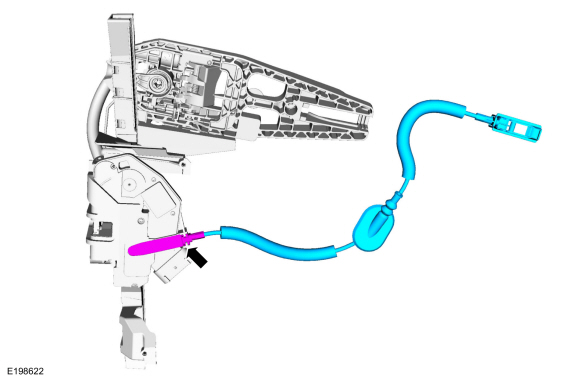
NOTE: This step is only necessary when installing a new component.
Remove interior rear door handle cable from the rear door latch.
 |
Installation
-
To install, reverse the removal procedure.
-
If the door is equipped with one-touch up, the power window motor must be initialized.
Refer to: Power Door Window Initialization (501-11 Glass, Frames and Mechanisms, General Procedures).
 Front Door Latch. Removal and Installation
Removal
NOTE:
Removal steps may contain installation details.
NOTE:
Driver side shown, passenger side similar.
All vehicles
Remove the front door trim panel...
 Luggage Compartment Lid Latch. Removal and Installation
Removal
NOTE:
Removal steps in this procedure may contain installation details.
Remove the luggage compartment lid trim panel...
Other information:
Ford Fiesta 2014 - 2019 Service Manual: Child Safety Seat Tether Anchor. Removal and Installation
Removal NOTE: If a child safety seat was in use during a collision, inspect the child safety seat mounting areas and restore the vehicle to the original production configuration. NOTE: Removal steps in this procedure may contain installation details...
Ford Fiesta 2014 - 2019 Service Manual: Air Conditioning (A/C) Compressor Inlet Line - 1.6L EcoBoost (132kW/180PS) – Sigma. Removal and Installation
Removal NOTE: Removal steps in this procedure may contain installation details. Recover the refrigerant. Refer to: Air Conditioning (A/C) System Recovery, Evacuation and Charging (412-00 Climate Control System - General Information) ...
Categories
- Manuals Home
- Ford Fiesta Service Manual (2014 - 2019)
- Maintenance Schedules
- Front Suspension
- Engine System - General Information
- Engine. Assembly
- Timing Belt. Removal and Installation
Ride Height Measurement. General Procedures
Special Tool(s) / General Equipment
Surface GaugeCheck
Ride Height Measurement - Front
NOTE: Make sure that the vehicle is positioned on a flat, level surface and the tires are inflated to the correct pressure. Vehicle should have a full tank of fuel.
Ride height = 2-3Measurement 2
Measurement 3
Use the General Equipment: Surface Gauge
Copyright © 2025 www.fofiesta7.com