Ford Fiesta: Handles, Locks, Latches and Entry Systems / Front Door Latch. Removal and Installation
Removal
NOTE: Removal steps may contain installation details.
NOTE: Driver side shown, passenger side similar.
All vehicles
-
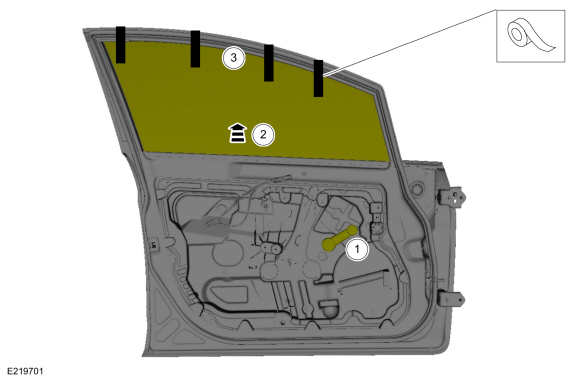
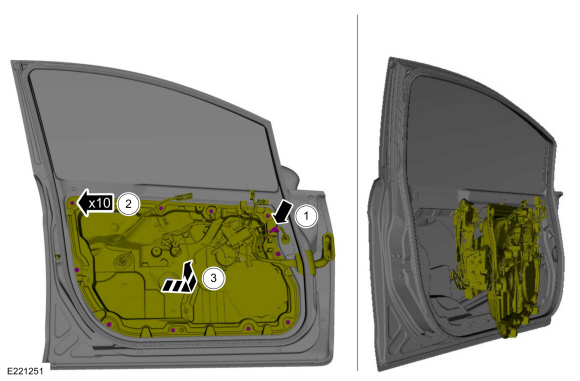
Remove the front door trim panel.
Refer to: Front Door Trim Panel (501-05 Interior Trim and Ornamentation, Removal and Installation).
-
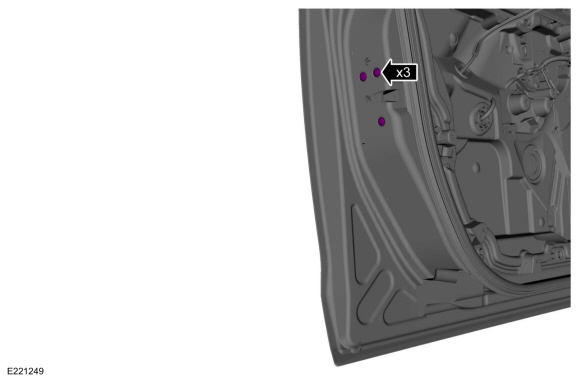
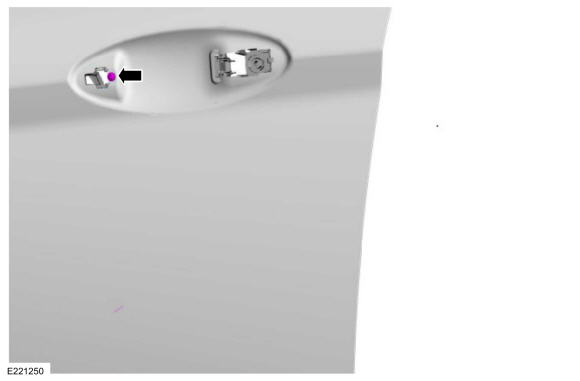
Remove the adhesive tape covers.
 |
Vehicles with manual windows
-
Lower the front door window glass.
-
Partially install the window crank handle.
-
Lower the front door window glass.
-
Partially install the window crank handle.
 |
Vehicles with power windows
-
Lower the front door window glass.
-
Partially install the front door window control switch.
-
Lower the front door window glass.
-
Partially install the front door window control switch.
 |
All vehicles
-
Remove the bolts from the front door window glass.
 |
Vehicles with manual windows
-
Raise the front door window glass and tape the front door window glass in place.
-
Remove the front door window crank handle.
-
Raise the front door window glass.
-
Tape the front door window glass in place.
-
Remove the front door window crank handle.
 |
Vehicles with power windows
-
Raise the front door window glass and tape the front door window glass in place.
-
Remove the front door window control switch.
-
Raise the front door window glass.
-
Tape the front door window glass in place.
-
Remove the front door window control switch.
 |
All vehicles
-
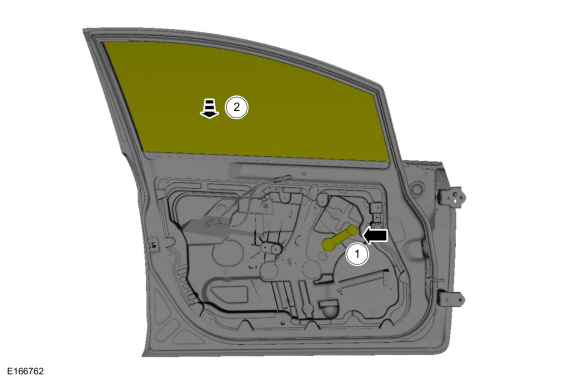
Remove the exterior front door handle.
Refer to: Exterior Front Door Handle (501-14 Handles, Locks, Latches and Entry Systems, Removal and Installation).
-
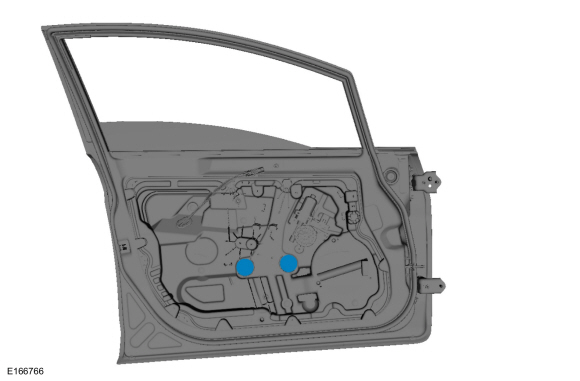
Remove the front door latch bolts.
Torque: 71 lb.in (8 Nm)
 |
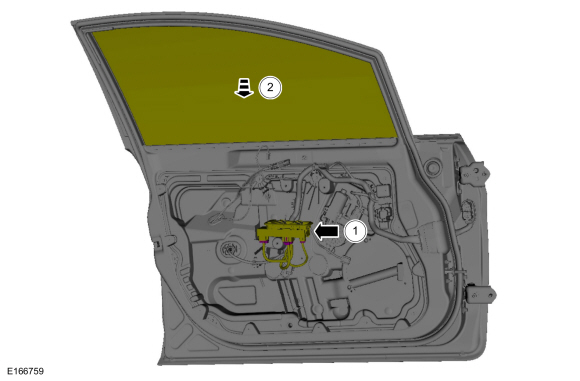
-
Remove the exterior front door handle reinforcement screw.
 |
-
NOTE: Do not remove the front door carrier from the door.
NOTE: During installation, make sure the front door carrier tabs are correctly positioned inside the run channel retainers before sliding the front door carrier in place. Otherwise, the front door carrier will prevent the installation of the window glass.
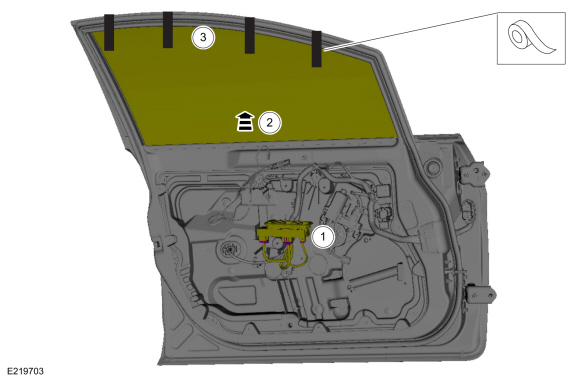
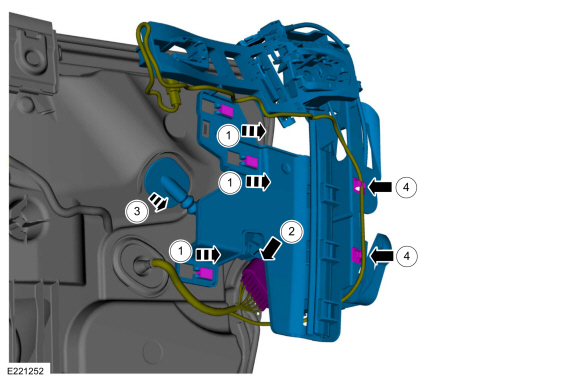
Position aside the front door carrier and latch assembly.
-
Disconnect the front door exterior mirror electrical connector.
-
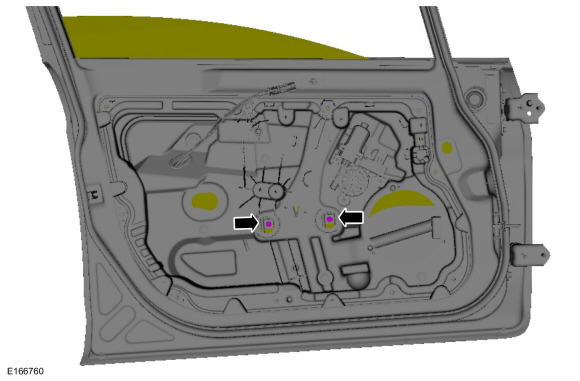
Remove the bolts from the front door carrier.
Torque: 80 lb.in (9 Nm)
-
NOTE: During removal make sure the exterior front door handle reinforcement is released from the door before positioning aside the front door carrier and latch assembly. Otherwise, the exterior front door handle reinforcement could be damaged.
Position aside the front door carrier and latch assembly.
-
Disconnect the front door exterior mirror electrical connector.
 |
-
NOTE: Back side of front door carrier shown for clarity.
NOTE: Do not remove the carrier from the door.
NOTE: During installation, make sure the front door carrier tabs are correctly positioned inside the run channel retainers before sliding the front door carrier in place. Otherwise, the front door carrier will prevent the installation of the window glass.
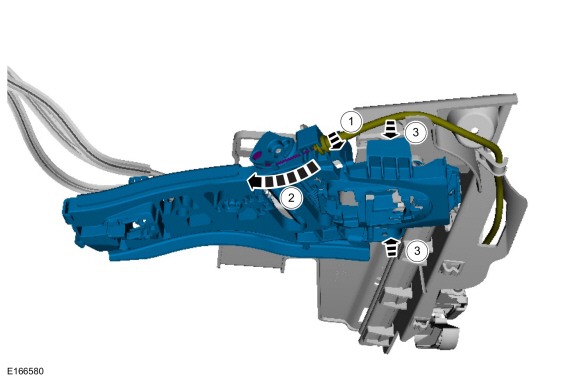
Remove the front door latch assembly.
-
Slide the latch assembly off the retaining tabs securing it to the front door carrier.
-
Disconnect the front door latch electrical connector from the front door latch.
-
Remove the interior door handle cable and grommet from the front door carrier.
-
Release the routing clips for the exterior door
handle electrical harness and remove the front door latch assembly.
-
Slide the latch assembly off the retaining tabs securing it to the front door carrier.
 |
-
NOTE: This step is only necessary when installing a new component.
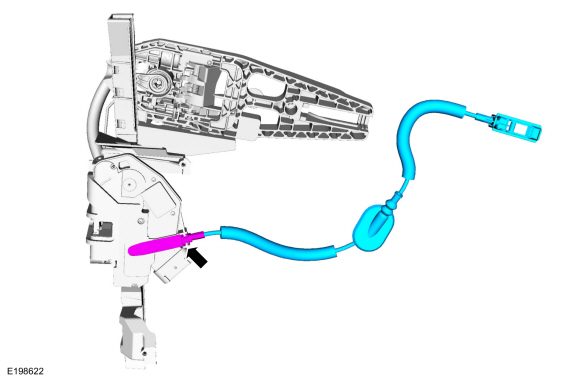
Remove the exterior front door handle reinforcement.
-
Detach the cable from the exterior front door handle reinforcement.
-
Remove the cable eyelet from the exterior front door handle reinforcement.
-
Remove the exterior front door handle reinforcement.
-
Detach the cable from the exterior front door handle reinforcement.
 |
-
NOTE: This step is only necessary when installing a new component.
Remove the latch screws, disconnect the cables and remove the front door latch.
 |
-
NOTE: This step is only necessary when installing a new component.
Remove interior front door handle cable from the front door latch.
 |
Installation
-
To install, reverse the removal procedure.
-
If the door is equipped with one-touch up, the power window motor must be initialized.
Refer to: Power Door Window Initialization (501-11 Glass, Frames and Mechanisms, General Procedures).
 Ignition Lock Cylinder. Removal and Installation
Removal
Non-functional lock cylinder
NOTE:
For non-functional ignition lock cylinders, replace the ingition lock cylinder housing.
Replace the ingition lock cylinder housing...
 Rear Door Latch. Removal and Installation
Removal
NOTE:
RH shown, LH similar.
NOTE:
Removal steps in this procedure may contain installation details.
All vehicles
Remove the rear door trim panel...
Other information:
Ford Fiesta 2014 - 2019 Service Manual: Specifications
General Specifications Item Specification Plastic front fascia paint maximum thickness 12 mils (300 microns) Plastic rear fascia paint maximum thickness 12 mils (300 microns) General Specifications Item..
Ford Fiesta 2014 - 2019 Service Manual: Engine Component View. Description and Operation
Upper Engine Item Part Number Description 1 67506750 Oil indicator 2 12A36612A366 Ignition coil on plug (4 required) 3 1225712257 Ignition coil mounting bracket 4 9U5509U550 Ignition coil mounting bracket insulator 5 9H4879H487 Fuel rail 6 9F5939F593 Fuel injector (4 requi..
Categories
- Manuals Home
- Ford Fiesta Service Manual (2014 - 2019)
- Engine
- Clutch - 6-Speed Manual Transmission – B6
- Jacking and Lifting - Overview. Description and Operation
- Engine Component View. Description and Operation
- Front Subframe. Removal and Installation
Wheels and Tires. Diagnosis and Testing
Preliminary Inspection
Verify the customer concern by carrying out a road test on a smooth road. If any vibrations are apparent, Refer to the Symptom Chart: NVH.To maximize tire performance, inspect for signs of incorrect inflation and uneven wear, which may indicate a need for balancing, rotation or front suspension alignment.
Correct tire pressure and driving techniques have an important influence on tire life. Heavy cornering, excessively rapid acceleration and unnecessary sharp braking increase tire wear.
Correct tire pressure and driving techniques have an important influence on tire life. Heavy cornering, exce