Ford Fiesta: Rear Disc Brake / Rear Brake Flexible Hose. Removal and Installation
Ford Fiesta 2014 - 2019 Service Manual / Brake System / Rear Disc Brake / Rear Brake Flexible Hose. Removal and Installation
Removal
NOTICE: If the fluid is spilled on the paintwork, the affected area must be immediately washed down with cold water.
NOTE: Removal steps in this procedure may contain installation details.
-
Refer to: Health and Safety Precautions (100-00 General Information, Description and Operation). WARNING:
Before beginning any service procedure in this
manual, refer to health and safety warnings in section 100-00 General
Information. Failure to follow this instruction may result in serious
personal injury.
-
Remove the wheel and tire.
Refer to: Wheel and Tire (204-04A Wheels and Tires, Removal and Installation).
-
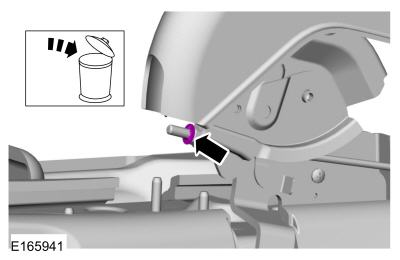
NOTICE: Make sure that all openings are sealed.
NOTICE: Make sure that the brake hose is not twisted and is correctly located.
-
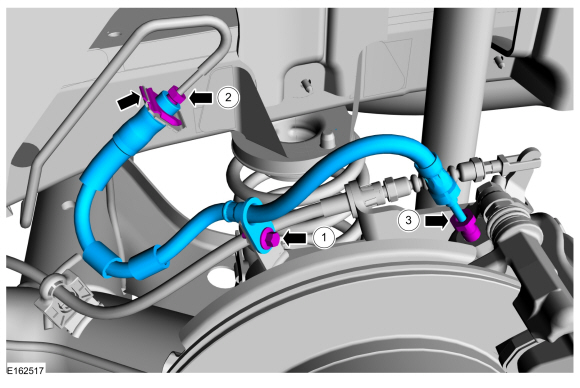
Remove the brake hose bracket bolt.
Torque: 97 lb.in (11 Nm)
-
Disconnect the brake tube fitting and remove the clip.
Torque: 159 lb.in (18 Nm)
-
Disconnect the fitting and remove the brake hose.
Torque: 159 lb.in (18 Nm)
-
Remove the brake hose bracket bolt.
 |
Installation
-
To install, reverse the removal procedure.
-
Refer to: Component Bleeding (206-00 Brake System - General Information, General Procedures).
 Brake Pads. Removal and Installation
Special Tool(s) /
General Equipment
Brake Caliper Piston Retractor
Materials
Name
Specification
Motorcraft® DOT 4 LV High Performance Motor Vehicle Brake FluidPM-20
WSS-M6C65-A2
Removal
NOTE:
Removal steps in this procedure may contain installation details...
 Brake Caliper Anchor Plate. Removal and Installation
Removal
NOTE:
Removal steps in this procedure may contain installation details.
Remove the brake pads.
Refer to: Brake Pads (206-04 Rear Disc Brake, Removal and Installation)...
Other information:
Ford Fiesta 2014 - 2019 Service Manual: Halfshaft Seal LH. Removal and Installation
Special Tool(s) / General Equipment 308-880Installer, Driveshaft Seal Removal Remove the wheel and tire. Refer to: Wheel and Tire (204-04A Wheels and Tires, Removal and Installation). Remove the bolt and position aside the LH brake hose...
Ford Fiesta 2014 - 2019 Service Manual: Transmission Control Module (TCM) Wiring Harness. Removal and Installation
Special Tool(s) / General Equipment Locking Pliers Removal NOTE: Removal steps in this procedure may contain installation details. Remove the battery tray. Refer to: Battery Tray - 1.6L EcoBoost (132kW/180PS) – Sigma (414-01 Battery, Mounting and Cables, Removal and Installation)...
Categories
- Manuals Home
- Ford Fiesta Service Manual (2014 - 2019)
- Timing Belt. Removal and Installation
- Climate Control System - General Information
- Engine
- Body Control Module (BCM). Removal and Installation
- General Information
Parking Brake Control. Removal and Installation
Removal
NOTE: Removal steps in this procedure may contain installation details.
Remove the floor console.Refer to: Floor Console (501-12 Instrument Panel and Console, Removal and Installation).
Remove the driver seat.
Refer to: Front Seat (501-10 Seating, Removal and Installation).
Remove the parking brake cable adjustment lock nut.
 Loosen the parking brake cable adjustment nut.
Copyright © 2025 www.fofiesta7.com
