Ford Fiesta: Seating / Front Seat Backrest. Removal and Installation
Special Tool(s) /
General Equipment
| Feeler Gauge |
| Flat Headed Screw Driver |
| Locking Pliers |
Removal
 WARNING:
The following procedure describes critical repair steps
required for correct seat component installation. Follow all notes and
steps carefully. Do not place any objects between the seat components
and the body of the vehicle, nor any objects within a joint internal to
the seat structure. Failure to follow step instructions may result in
incorrect operation of the seat components and increases the risk of
serious personal injury.
WARNING:
The following procedure describes critical repair steps
required for correct seat component installation. Follow all notes and
steps carefully. Do not place any objects between the seat components
and the body of the vehicle, nor any objects within a joint internal to
the seat structure. Failure to follow step instructions may result in
incorrect operation of the seat components and increases the risk of
serious personal injury.
NOTE:
Driver seat shown, passenger seat similar.
-
Remove the front seat.
Refer to: Front Seat (501-10 Seating, Removal and Installation).
-
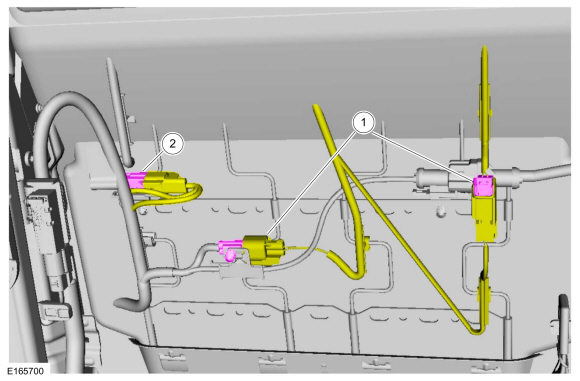
-
If equipped.
Disconnect the heated seat electrical connectors and position the wiring harness aside.
-
Disconnect the electrical connector and position the wiring harness aside.
-
NOTE:
Base seat shown, Recaro seat similar.
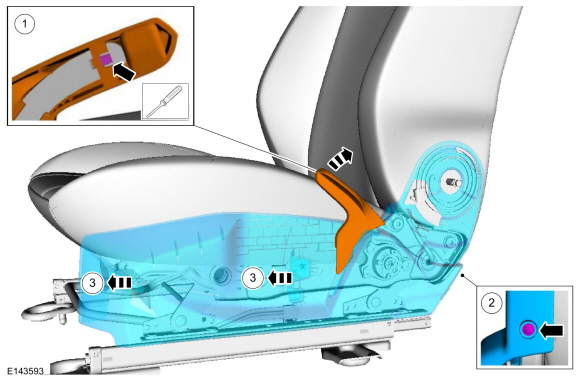
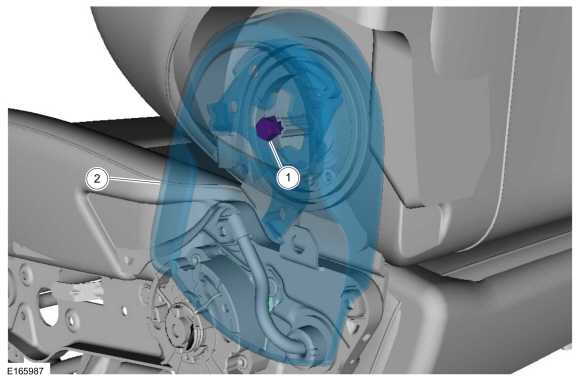
Detach the backrest cover straps and position the backrest cover aside.
-
-
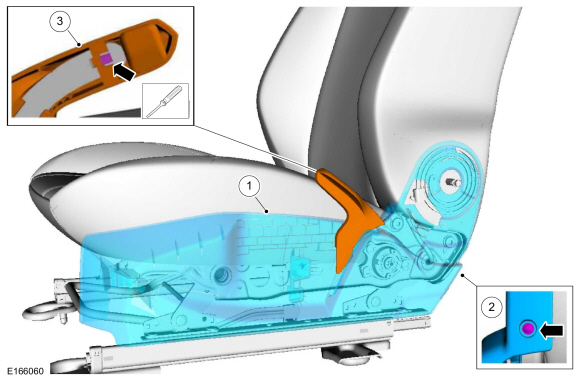
Remove the bolt cover.
-
Remove the bolt.
-
Remove the recline handle.
-
-
If equipped.
Release the tab and remove the height adjustment handle.
Use the General Equipment: Flat Headed Screw Driver
-
Remove the screw.
-
Slide forward and remove the side shield.
-
-
Remove the screw.
-
Pull the recliner cover up then out.
-
Release the clip and remove the recliner cover.
-
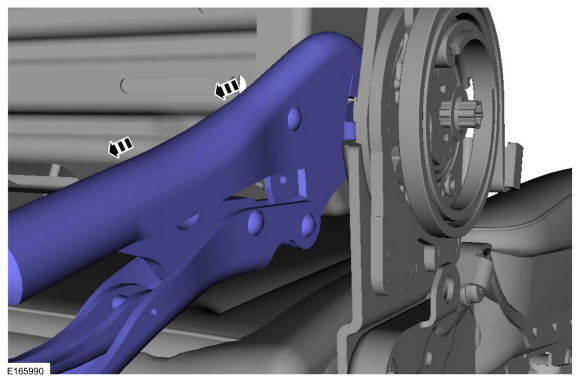
Remove the bolts and the front seat backrest.
Installation
-
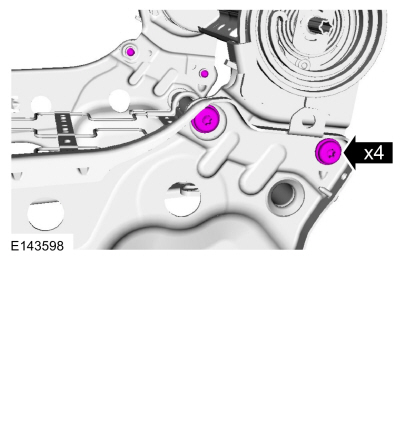
Install the front seat backrest and tighten the bolts.
Torque:
35 lb.ft (48 Nm)
-
-
Install the recline handle.
-
Tighten the bolt.
-
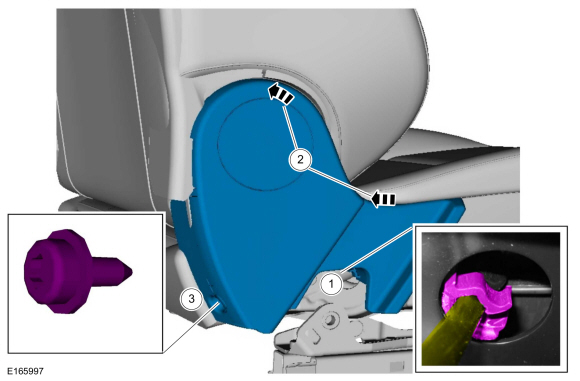
Push the recline handle fully toward the inboard
side of the seat, then release the pressure on the recline handle.
-
On both sides, immobilize the recline shaft using the
locking pliers clamped to the shaft and flush up against the side of the
recliner.
Use the General Equipment: Locking Pliers
-
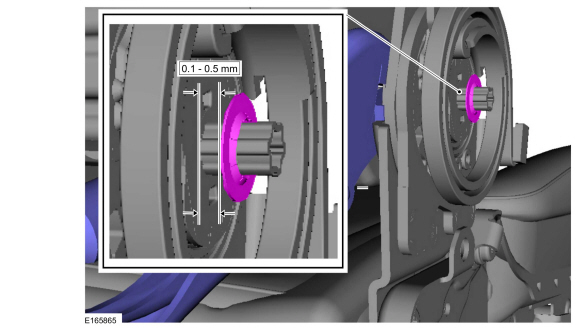
If the clearance between the inboard push nut and the
bushing exceeds 0.5 mm (0.019 in), install a 0.5 mm (0.019 in) feeler
gauge or shim between the inboard push nut and the bushing and slide the
inboard push nut tight against the feeler gauge or shim.
Use the General Equipment: Feeler Gauge
-
-
Remove the bolt.
-
Remove the recline handle.
-
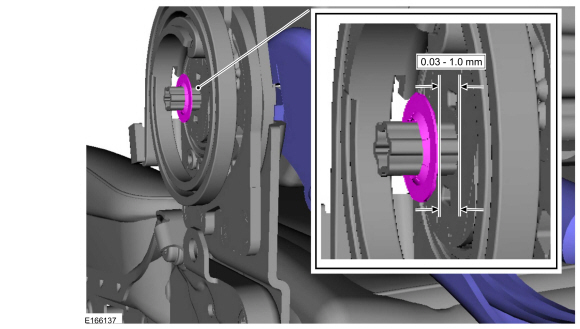
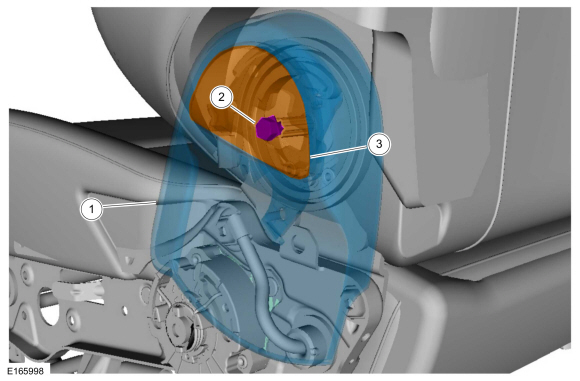
Push the outboard push nut (located behind recline handle) flush to the outboard bushing.
-
On both sides. Remove the locking pliers.
-
Verify the clearance between the outboard push nut and
bushing is between 0.3 mm and 1.0 mm (0.011 in and 0.039 in).
Use the General Equipment: Feeler Gauge
-
-
Install the side shield.
-
Install the screw.
Torque:
27 lb.in (3.0 Nm)
-
If equipped.
Install the height adjustment handle.
-
-
Install the recline handle.
-
Tighten the bolt.
Torque:
35 lb.in (4.0 Nm)
-
Install the bolt cover.
-
-
Attach the electrical harness to the recliner cover clip.
-
Install the recliner cover.
-
Tighten the screw.
Torque:
27 lb.in (3.0 Nm)
-
Install the front seat.
Refer to: Front Seat (501-10 Seating, Removal and Installation).
Special Tool(s) /
General Equipment
Flat Headed Screw Driver
Hog Ring Plier
Removal
NOTE:
Removal steps in this procedure may contain installation details...
Removal
NOTE:
Removal steps in this procedure may contain installation details.
Remove the front seat backrest cover.
Refer to: Front Seat Backrest Cover (501-10 Seating, Removal and Installation)...
Other information:
WARNING:
Before working on or disconnecting any of the fuel tubes or fuel
system components, relieve the fuel system pressure to prevent
accidental spraying of fuel. Fuel in the fuel system remains under high
pressure, even when the engine is not running...
Removal
NOTE:
Removal steps in this procedure may contain installation details.
NOTE:
To prevent setting Diagnostic Trouble Codes (DTCs), make
sure the ignition switch is in the OFF position prior to disconnecting
the accelerator pedal electrical connector...
Categories
Removal
NOTE:
Removal steps in this procedure may contain installation details.
 WARNING:
Before beginning any service procedure in this
manual, refer to health and safety warnings in section 100-00 General
Information. Failure to follow this instruction may result in serious
personal injury.
WARNING:
Before beginning any service procedure in this
manual, refer to health and safety warnings in section 100-00 General
Information. Failure to follow this instruction may result in serious
personal injury.
Refer to: Health and Safety Precautions (100-00 General Information, Description and Operation).
Remove the wheel and tire.
Refer to: Wheel and Tire (204-04A Wheels and Tires, Removal and Installation).
read more


 Front Seat Cushion Cover. Removal and Installation
 Lumbar Assembly. Removal and Installation