Ford Fiesta: Glass, Frames and Mechanisms / Windshield Reseal. General Procedures
Special Tool(s) / General Equipment
| Wooden Block |
Materials
| Name | Specification |
|---|---|
| Sika® SikaTack® MACH 60 / Sika® SikaTack® MACH 30 / Dow® BETASEAL™ Express | - |
| Sika Tack ASAP Urethane Adhesive | - |
| Motorcraft® Ultra-Clear Spray Glass Cleaner ZC-23 |
ESR-M14P5-A |
Repair
-
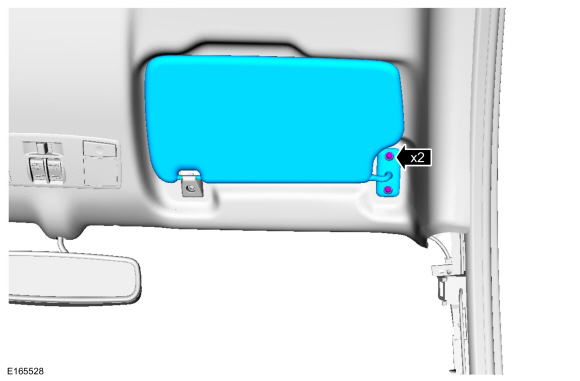
Remove the interior rear view mirror.
Refer to: Interior Rear View Mirror (501-09 Rear View Mirrors, Removal and Installation).
-
Remove the cowl panel grille.
Refer to: Cowl Panel Grille (501-02 Front End Body Panels, Removal and Installation).
-
NOTE: On both sides.
Remove the A-pillar trim panels.
Refer to: A-Pillar Trim Panel (501-05) .
-
NOTE: On both sides.
Remove the B-pillar trim panels.
Refer to: B-Pillar Trim Panel (501-05 Interior Trim and Ornamentation, Removal and Installation).
-
On both sides.
 |
-
On both sides.
 |
-
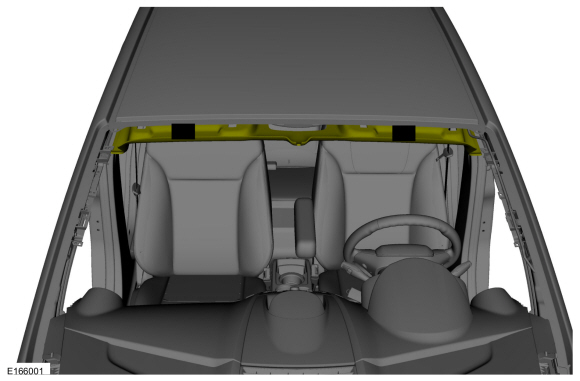
NOTE: Windshield removed for clarity.
Place two blocks of wood spacing the headliner away from the windshield.
Use the General Equipment: Wooden Block
 |
-
Clean the interior and exterior of the windshield glass surface with glass cleaner.
Material: Motorcraft® Ultra-Clear Spray Glass Cleaner / ZC-23 (ESR-M14P5-A)
-
Cut the urethane adhesive applicator tip to specification.
 |
-
NOTE: Use a high-ratio, air, electric or battery-operated caulk gun to apply the urethane adhesive with less effort and a continuous bead.
NOTE: Make sure all gaps in the urethane adhesive are smoothed into one continuous bead.
-
Apply urethane adhesive over the existing urethane adhesive.
Material: Sika® SikaTack® MACH 60 / Sika® SikaTack® MACH 30 / Dow® BETASEAL™ Express
Material: Sika Tack ASAP Urethane Adhesive
-
-
From inside the vehicle, apply the urethane adhesive to the top and sides of the windshield.
Material: Sika® SikaTack® MACH 60 / Sika® SikaTack® MACH 30 / Dow® BETASEAL™ Express
Material: Sika Tack ASAP Urethane Adhesive
-
From outside the vehicle, apply the urethane adhesive to the bottom of the windshield.
Material: Sika® SikaTack® MACH 60 / Sika® SikaTack® MACH 30 / Dow® BETASEAL™ Express
Material: Sika Tack ASAP Urethane Adhesive
-
From inside the vehicle, apply the urethane adhesive to the top and sides of the windshield.
 |
-
NOTE: Allow the urethane adhesive to cure for a minimum of one hour before testing for air or water leaks.
After the urethane adhesive has cured, check the windshield seal for air or water leaks. Add urethane adhesive as necessary.
Material: Sika Tack ASAP Urethane Adhesive
Material: Sika® SikaTack® MACH 60 / Sika® SikaTack® MACH 30 / Dow® BETASEAL™ Express
 |
-
NOTICE: Make sure not to crease the headliner when removing the wood blocks.
NOTE: Windshield removed for clarity.
Remove the blocks and position the front portion of the headliner.
 |
-
On both sides.
 |
-
On both sides.
 |
-
NOTE: On both sides.
Install the B-pillar trim panels.
Refer to: B-Pillar Trim Panel (501-05 Interior Trim and Ornamentation, Removal and Installation).
-
NOTE: On both sides.
Install the A-pillar trim panels.
Refer to: A-Pillar Trim Panel (501-05) .
-
Install the interior rear view mirror.
Refer to: Interior Rear View Mirror (501-09 Rear View Mirrors, Removal and Installation).
-
Install the cowl panel grille.
Refer to: Cowl Panel Grille (501-02 Front End Body Panels, Removal and Installation).
-
If necessary, remove excess urethane adhesive from the interior and exterior surface of the windshield glass.
Material: Motorcraft® Ultra-Clear Spray Glass Cleaner / ZC-23 (ESR-M14P5-A)
 |
 Lead Terminal Repair. General Procedures
Materials
Name
Specification
Motorcraft® Ultra-Clear Spray Glass CleanerZC-23
ESR-M14P5-A
Repair
Bring the vehicle up to at least the specified room temperature or above...
 Power Door Window Initialization. General Procedures
Initialization
WARNING:
Before beginning any service procedure in this
section, refer to Safety Warnings in section 100-00 General Information...
Other information:
Ford Fiesta 2014 - 2019 Service Manual: Variable Camshaft Timing (VCT) Unit. Removal and Installation
Special Tool(s) / General Equipment 303-1097Locking Tool, Variable Camshaft Timing Oil Control UnitTKIT-2010B-FLMTKIT-2010B-ROW 303-1552Alignment Tool, CamshaftTKIT-2012A-FLTKIT-2012A-ROW Removal NOTICE: Do not loosen or remove the crankshaft pulley bolt without first installing the special tools...
Ford Fiesta 2014 - 2019 Service Manual: Safety Precautions - Overview. Description and Operation
Overview WARNING: Before beginning any service procedure in this section, refer to Safety Warnings in section 100-00 General Information. Failure to follow this instruction may result in serious personal injury. Refer to: Health and Safety Precautions (100-00 General Information, Description and Operation)...
Categories
- Manuals Home
- Ford Fiesta Service Manual (2014 - 2019)
- Maintenance Schedules - Gasoline Engines. Description and Operation
- Clutch - 6-Speed Manual Transmission – B6
- Engine. Assembly
- Manual Transmission, Clutch, Transfer Case and Power Transfer Unit
- Front Subframe. Removal and Installation
Ride Height Measurement. General Procedures
Special Tool(s) / General Equipment
Surface GaugeCheck
Ride Height Measurement - Front
NOTE: Make sure that the vehicle is positioned on a flat, level surface and the tires are inflated to the correct pressure. Vehicle should have a full tank of fuel.
Ride height = 2-3Measurement 2
Measurement 3
Use the General Equipment: Surface Gauge
