Ford Fiesta: Seating / Front Seat Backrest Cover. Removal and Installation
Special Tool(s) / General Equipment
| Flat Headed Screw Driver | |
| Hog Ring Plier |
Removal
 WARNING:
Front seat backrest trim covers installed on seats equipped
with seat side airbags cannot be repaired. A new trim cover must be
installed. Cleaning is permissible. Failure to follow these instructions
may result in the seat side airbag deploying incorrectly and increase
the risk of serious personal injury or death in a crash.
NOTE: Driver seat shown, passenger seat similar.
All seats
-
Remove the front seat.
Refer to: Front Seat (501-10 Seating, Removal and Installation).
-
NOTE: This step is only necessary when installing a new component.
NOTE: Follow the unique instructions and graphic for this step in installation.
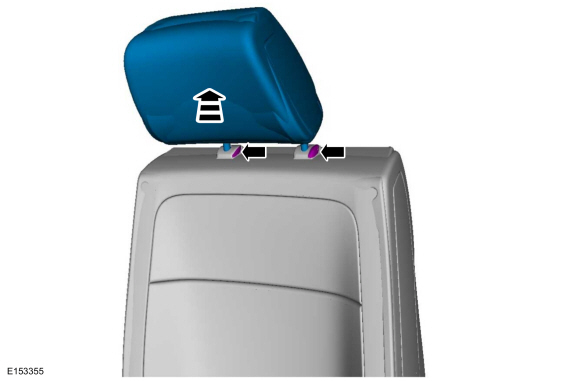
Depress the locking tabs and remove the head restraint.
 |
-
NOTE: This step is only necessary when installing a new component.
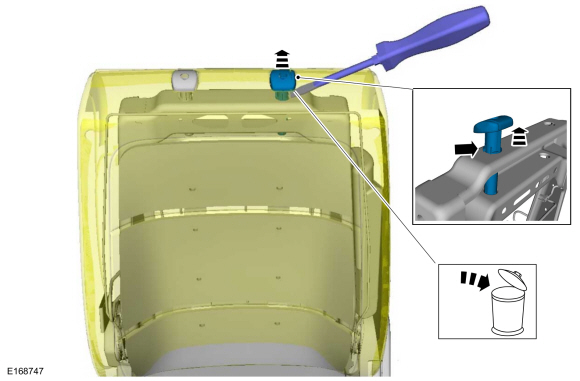
On both sides.
Remove and discard the headrest restraint guide sleeves.
Use the General Equipment: Flat Headed Screw Driver
 |
All seats except Recaro™
-
If equipped.
-
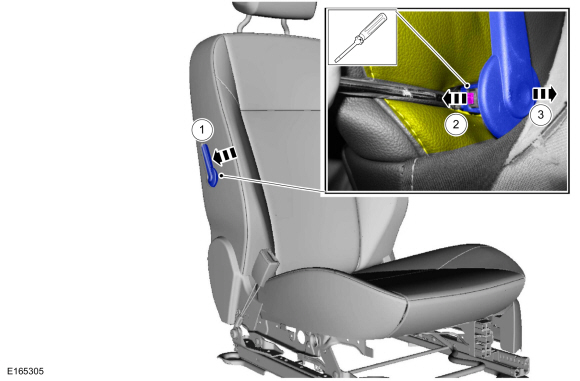
Position the adjustable lumbar handle.
-
Release the locking clip.
Use the General Equipment: Flat Headed Screw Driver
-
Remove the adjustable lumbar handle.
-
Position the adjustable lumbar handle.
 |
-
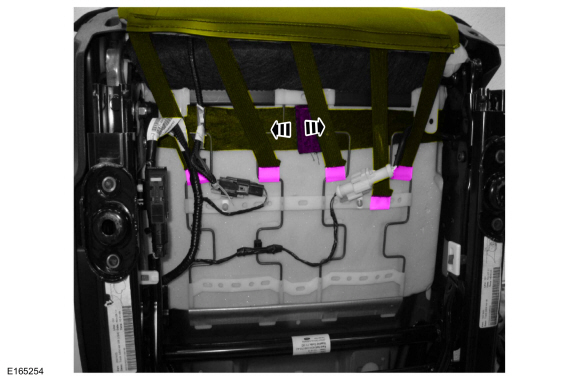
Detach the backrest cover straps and position the backrest cover aside.
 |
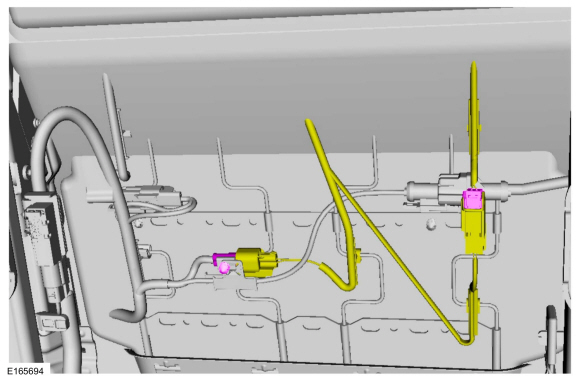
Heated seats
-
Disconnect the heated seat electrical connectors and position the wiring harness aside.
 |
All seats
-
-
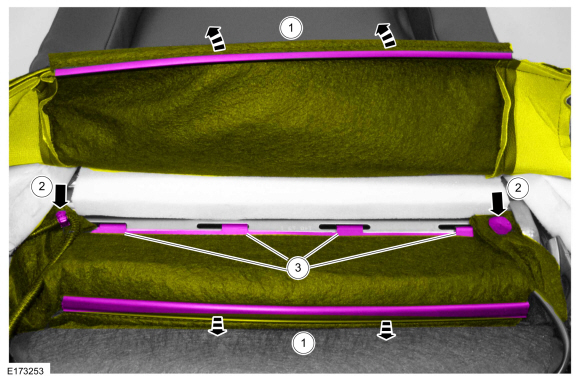
Release the J-clip and open the backrest cover.
-
Detach the pin-type retainer and wire harness retainer.
-
Release the backrest cover J-clips.
-
Release the J-clip and open the backrest cover.
 |
All seats except Recaro™
-
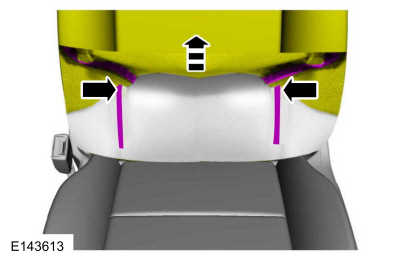
NOTICE: Use care when separating the seat backrest cover from the hook-and-loop strips, or the hook-and-loop strips may be torn from the seat backrest foam pad.
Release the hook-and-loop strips and partially invert the backrest cover.
 |
-
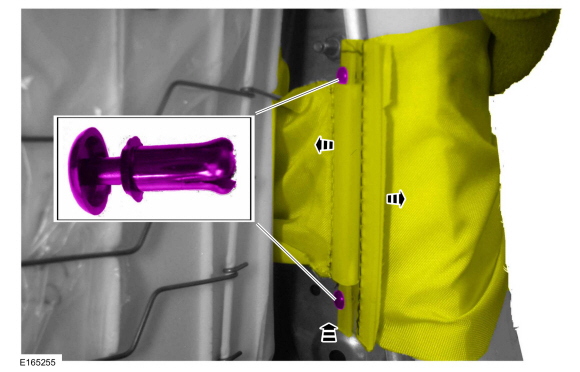
Remove the retainers, release the J-hook and position the side airbag deployment chute aside.
 |
All seats
-
-
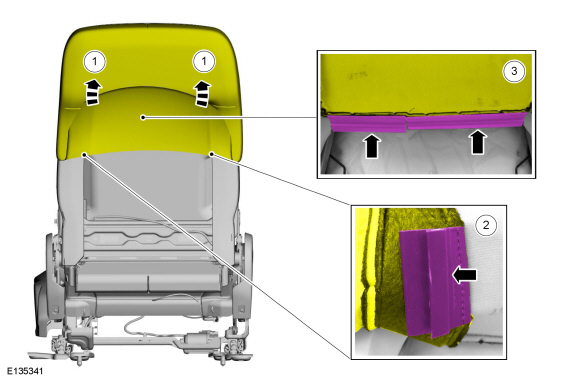
Invert the backrest cover.
-
Detach the J-clips.
-
Detach the J-clips.
-
Invert the backrest cover.
 |
All seats except Recaro™
-
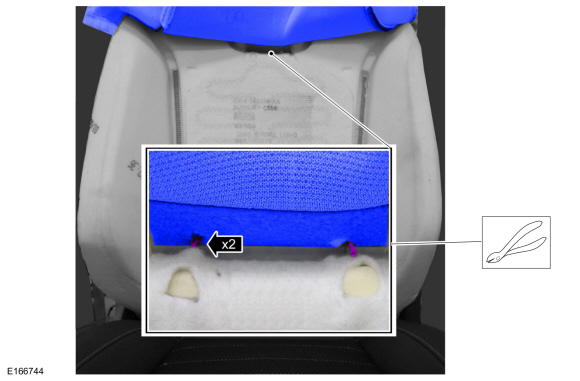
NOTE: This step is only necessary when installing a new component.
Remove the hog rings and remove the front seat backrest cover.
 |
Recaro™ seats
-
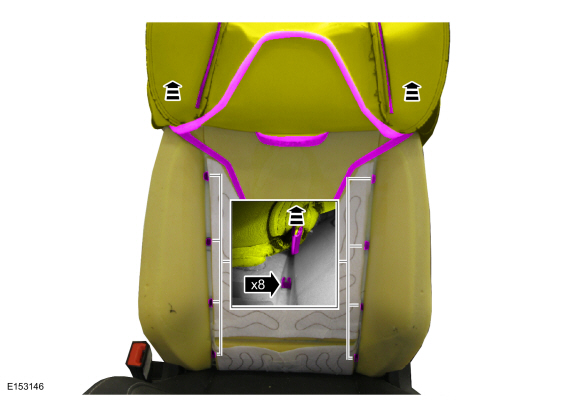
NOTICE: Use care when separating the seat backrest cover from the hook-and-loop strip, or the hook-and-loop strip may be torn from the seat backrest foam pad
NOTICE: Use care when separating the seat backrest cover from the hook-and-arrow strips, or the arrows may be torn from the seat backrest foam pad.
NOTE: This step is only necessary when installing a new component.
Release the hook-and-arrows, release the hook-and-loop strips and remove the backrest cover.
 |
Installation
 WARNING:
Carefully inspect the passenger airbag trim cover, canister
and soft pack before assembly. If any foreign objects are found, remove
them before attaching the passenger airbag trim cover to the canister.
If the canister or soft pack is damaged, install a new passenger airbag
assembly. Failure to follow this instruction may result in the passenger
airbag deploying incorrectly, which increases the risk of serious
personal injury or death in a crash.
-
To install, reverse the removal procedure.
Use the General Equipment: Hog Ring Plier
-
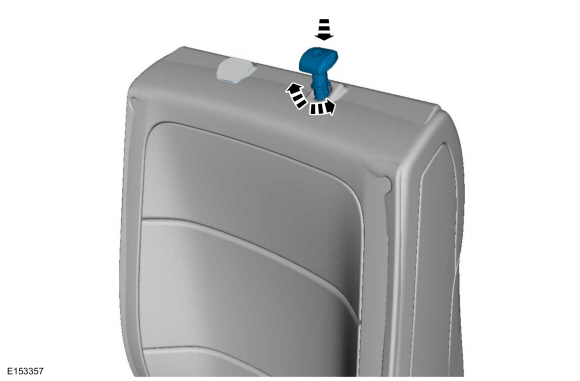
NOTICE: Always install new head restraint guide sleeves. Difficult adjustment of the head restraint may occur. Failure to follow these instructions may result in component failure.
NOTICE: The head restraint guide sleeves are not interchangeable. Failure to install the correct head restraint guide sleeves at the correct position may result in component failure.
On both sides. Allow the head restraint guide sleeve to slide freely through the backrest foam and backrest cover. Twist the head restraint guide sleeve while pushing it into the backrest frame hole as far as it will go, using hand pressure.
 |
 Front Seat. Removal and Installation
Removal
WARNING:
The following procedure describes critical repair steps
required for correct seat component installation. Follow all notes and
steps carefully...
 Front Seat Cushion Cover. Removal and Installation
Special Tool(s) /
General Equipment
Flat Headed Screw Driver
Hog Ring Plier
Removal
NOTE:
Removal steps in this procedure may contain installation details...
Other information:
Ford Fiesta 2014 - 2019 Service Manual: Inner Quarter Panel and Wheelhouse - 5-Door. Removal and Installation
Special Tool(s) / General Equipment Resistance Spotwelding Equipment Air Body Saw MIG/MAG Welding Equipment Spot Weld Drill Bit Locking Pliers Materials Name Specification Seam SealerTA-2-B, 3M™ 08308, LORD Fusor® 803DTM - Removal WARNING: Before beginning any service procedure in this ..
Ford Fiesta 2014 - 2019 Service Manual: Accessory Drive - Component Location. Description and Operation
Item Description 1 Accessory drive belt tensioner 2 Water pump pulley 3 Crankshaft belt pulley 4 Pulley - A/C compressor 5 Drive belt idler pulley assembly 6 Generator pulley 7 Accessory drive belt ..
Categories
- Manuals Home
- Ford Fiesta Service Manual (2014 - 2019)
- Timing Belt. Removal and Installation
- Engine System - General Information
- Fuel Rail. Removal and Installation
- Engine Component View. Description and Operation
- Clutch - 6-Speed Manual Transmission – B6
Component Bleeding. General Procedures
Special Tool(s) / General Equipment
Master Cylinder Bleeding SetBleeding
NOTICE: If the fluid is spilled on the paintwork, the affected area must be immediately washed down with cold water.
Master Cylinder
NOTE: When a new brake master cylinder has been installed, it should be primed to prevent air from entering the system.
NOTE: Make sure the area around the master cylinder cap is clean and free of foreign material.
Remove the brake fluid reservoir cap.