Ford Fiesta: Body Closures / Front Door Alignment. General Procedures
Ford Fiesta 2014 - 2019 Service Manual / Body and Paint / Body Closures / Front Door Alignment. General Procedures
Inspection
-
Check the body to the front door dimensions.
Refer to: Body and Frame (501-26 Body Repairs - Vehicle Specific Information and Tolerance Checks, Description and Operation).
Adjustment
NOTE: Removal steps in this procedure may contain installation details.
NOTE: LH side shown, RH side similar.
All alignments
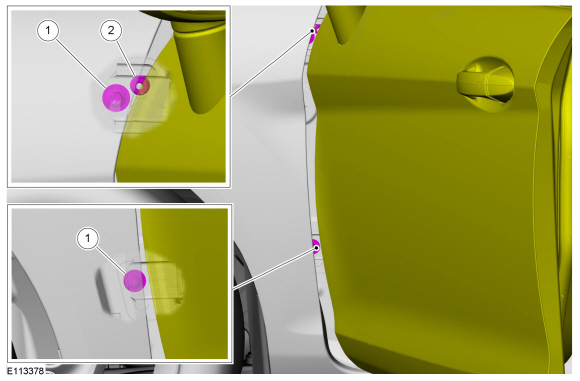
-
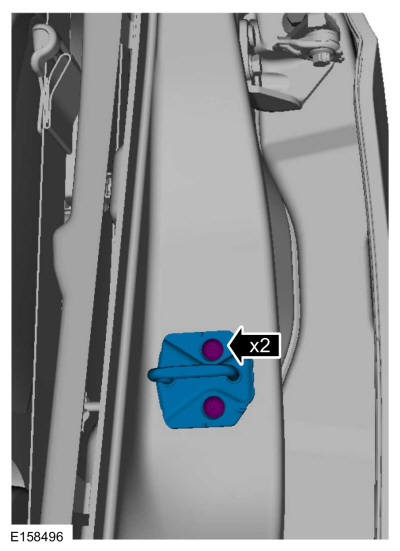
Remove the bolts and the striker assembly.
 |
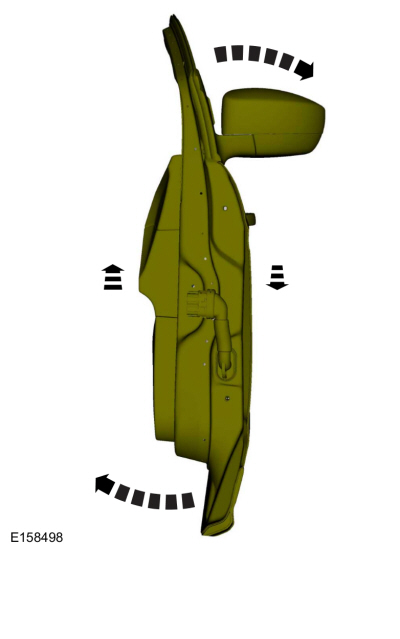
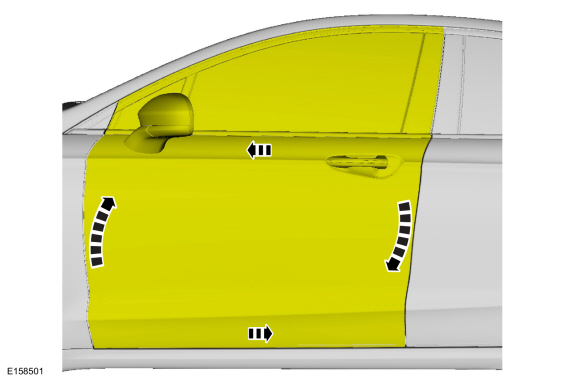
Front door in and out, up and down alignment
-
Loosen the bolts to permit movement of the door.
Loosen: 2 turn(s)
 |
-
Adjust the door to specification.
Refer to: Body and Frame (501-26 Body Repairs - Vehicle Specific Information and Tolerance Checks, Description and Operation).
 |
-
Tighten the bolts.
Torque: 18 lb.ft (24 Nm)
|
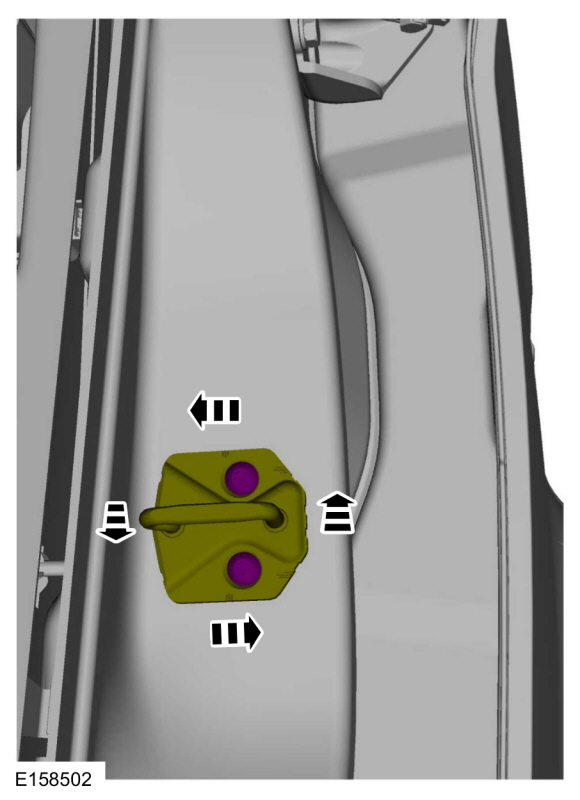
Front door fore, aft and tilt alignment
-
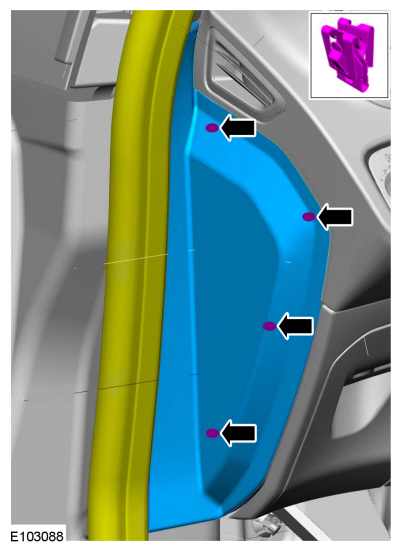
Position the front door weatherstrip aside, release the clips and remove the instrument finish panel.
 |
-
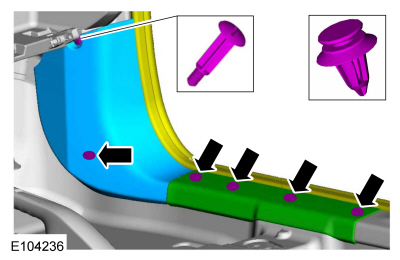
On passenger side:
Position the front door weatherstrip aside, remove the push-pins, the scuff plate and the lower cowl trim panel.
 |
-
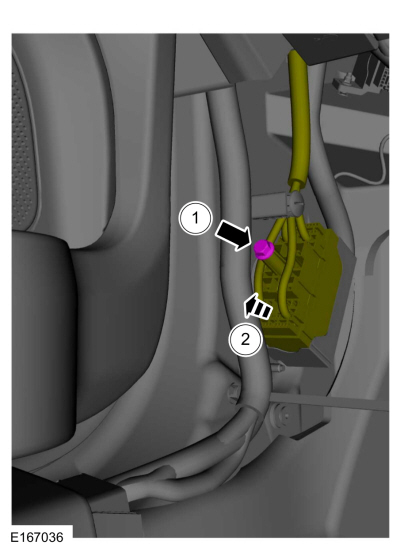
On driver side:
-
Remove the bolt.
-
Disconnect and position the electrical connector aside.
-
Remove the bolt.
 |
-
Remove the driver knee airbag.
Refer to: Driver Knee Airbag (501-20B Supplemental Restraint System, Removal and Installation).
-
On driver side:
Loosen the nuts.
Loosen: 2 turn(s)
 |
-
On passenger side:
Release the retaining tabs and remove the glove compartment.
 |
-
On passenger side:
Loosen the nuts.
Loosen: 2 turn(s)
 |
-
-
Loosen the bolts.
Loosen: 2 turn(s)
-
If equipped.
Loosen the nut.
Loosen: 2 turn(s)
-
Loosen the bolts.
 |
-
Adjust the door to specification.
Refer to: Body and Frame (501-26 Body Repairs - Vehicle Specific Information and Tolerance Checks, Description and Operation).
 |
-
-
Tighten the bolts.
Torque: 18 lb.ft (25 Nm)
-
If equipped.
Tighten the nut.
Torque: 106 lb.in (12 Nm)
-
Tighten the bolts.
|
-
On driver side:
Tighten the nuts.
Torque: 18 lb.ft (25 Nm)
|
-
On passenger side:
Tighten the nuts.
Torque: 18 lb.ft (25 Nm)
|
All alignments
-
Loosen the bolts to permit movement of the striker assembly.
Loosen:
: 2 turn(s)
 |
-
Tighten the bolts.
Torque: 18 lb.ft (25 Nm)
|
-
Check the body to the front door dimensions.
Refer to: Body and Frame (501-26 Body Repairs - Vehicle Specific Information and Tolerance Checks, Description and Operation).
-
Install the removed components.

 Rear Door Alignment. General Procedures
Inspection
Check the body to the rear door dimensions.
Refer to: Body and Frame (501-26 Body Repairs - Vehicle Specific Information and Tolerance Checks, Description and Operation)...
Other information:
Ford Fiesta 2014 - 2019 Service Manual: Rear Seat Backrest. Removal and Installation
Removal NOTE: The 40 percent backrest must be removed before the 60 percent backrest can be removed. NOTE: Removal steps in this procedure may contain installation details. All seats Lower the backrest. Rotate the backrest hinge locking arm rearward and release the backrest...
Ford Fiesta 2014 - 2019 Service Manual: Brake Fluid Reservoir. Removal and Installation
Materials Name Specification Motorcraft® DOT 4 LV High Performance Motor Vehicle Brake FluidPM-20 WSS-M6C65-A2 Removal NOTICE: If the fluid is spilled on the paintwork, the affected area must be immediately washed down with cold water...
Categories
- Manuals Home
- Ford Fiesta Service Manual (2014 - 2019)
- Maintenance Schedules - Gasoline Engines. Description and Operation
- Engine Cooling - 1.6L EcoBoost (132kW/180PS) – Sigma
- Front Suspension
- Engine. Assembly
- Service Information
Brake Master Cylinder. Removal and Installation
Removal
NOTICE: If the fluid is spilled on the paintwork, the affected area must be immediately washed down with cold water.
NOTE: Removal steps in this procedure may contain installation details.
All vehicles
Remove the battery tray.Refer to: Battery Tray - 1.6L Duratec-16V Ti-VCT (88kW/120PS) – Sigma (414-01 Battery, Mounting and Cables, Removal and Installation).
Refer to: Battery Tray - 1.6L EcoBoost (132kW/180PS) – Sigma (414-01 Battery, Mounting and Cables, Removal and Installation).
Disconnect the vacuum tube from the brake booster and detach the routing clip.
Copyright © 2025 www.fofiesta7.com